

Deploy in Azure
Learn how to deploy your first TrapEye instance in Microsoft Azure. This guide focuses on the manual deployment through the Azure portal, but the same workflow applies when using IaC tools such as Terraform or the Azure CLI.
Create a New Custom Image
Section titled “Create a New Custom Image”Navigate to Network foundation -> Virtual networks and select the private network where your TrapEye agent will be deployed.
Write down the
NameandLocationof the private network, you will need this information during the vm creation process.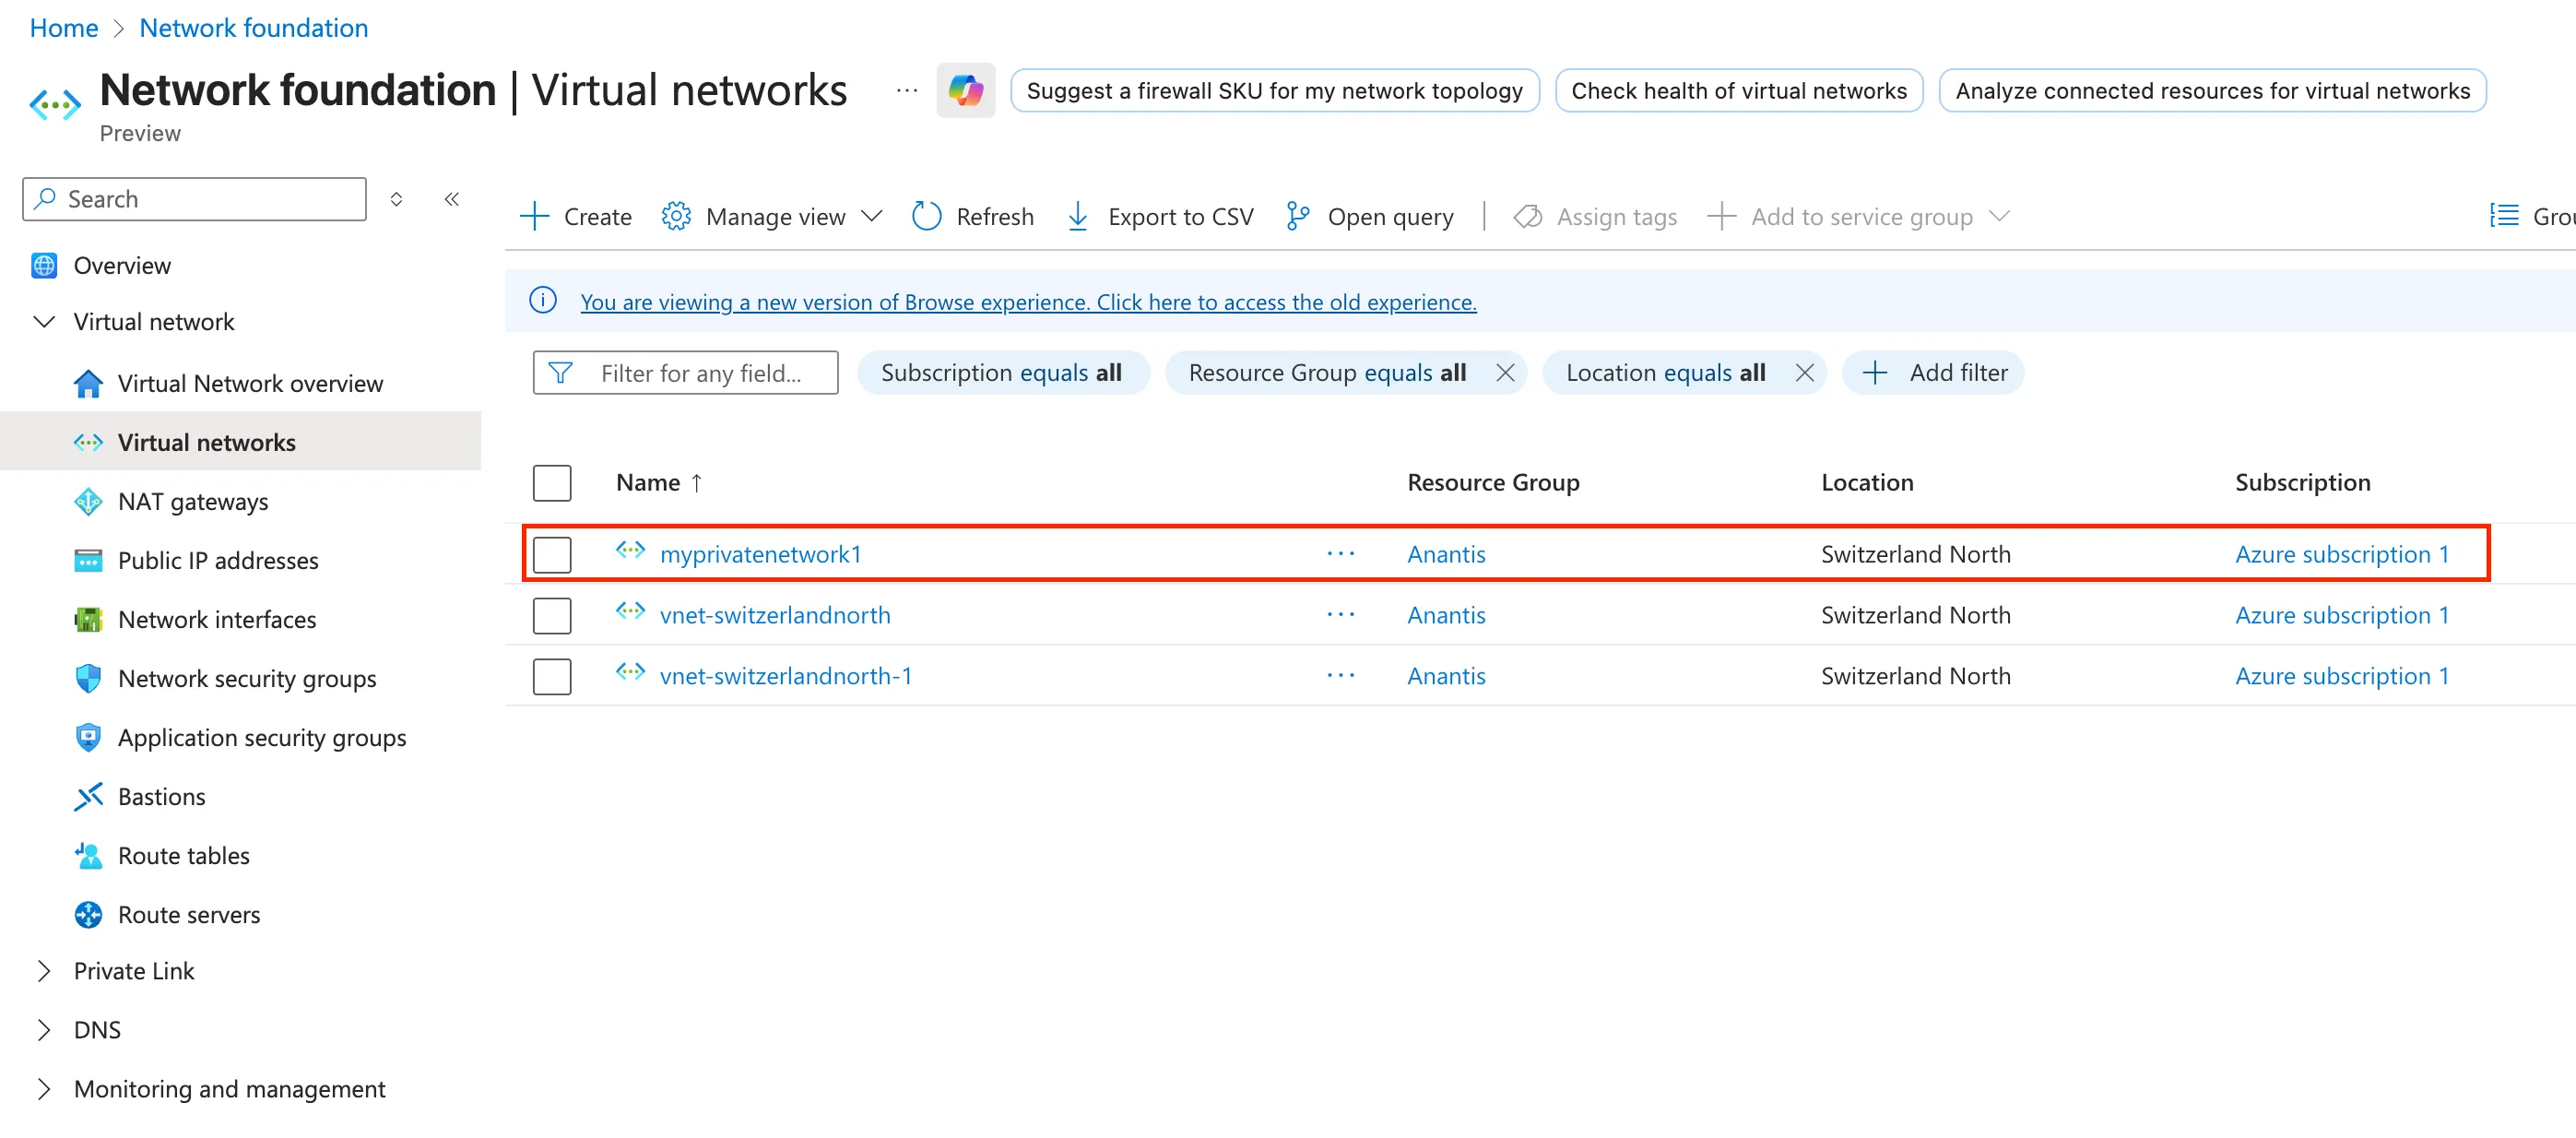
Log in to the TrapEye Portal, go to Management → Installation and download the latest TrapEye Azure image (
.vhdformat).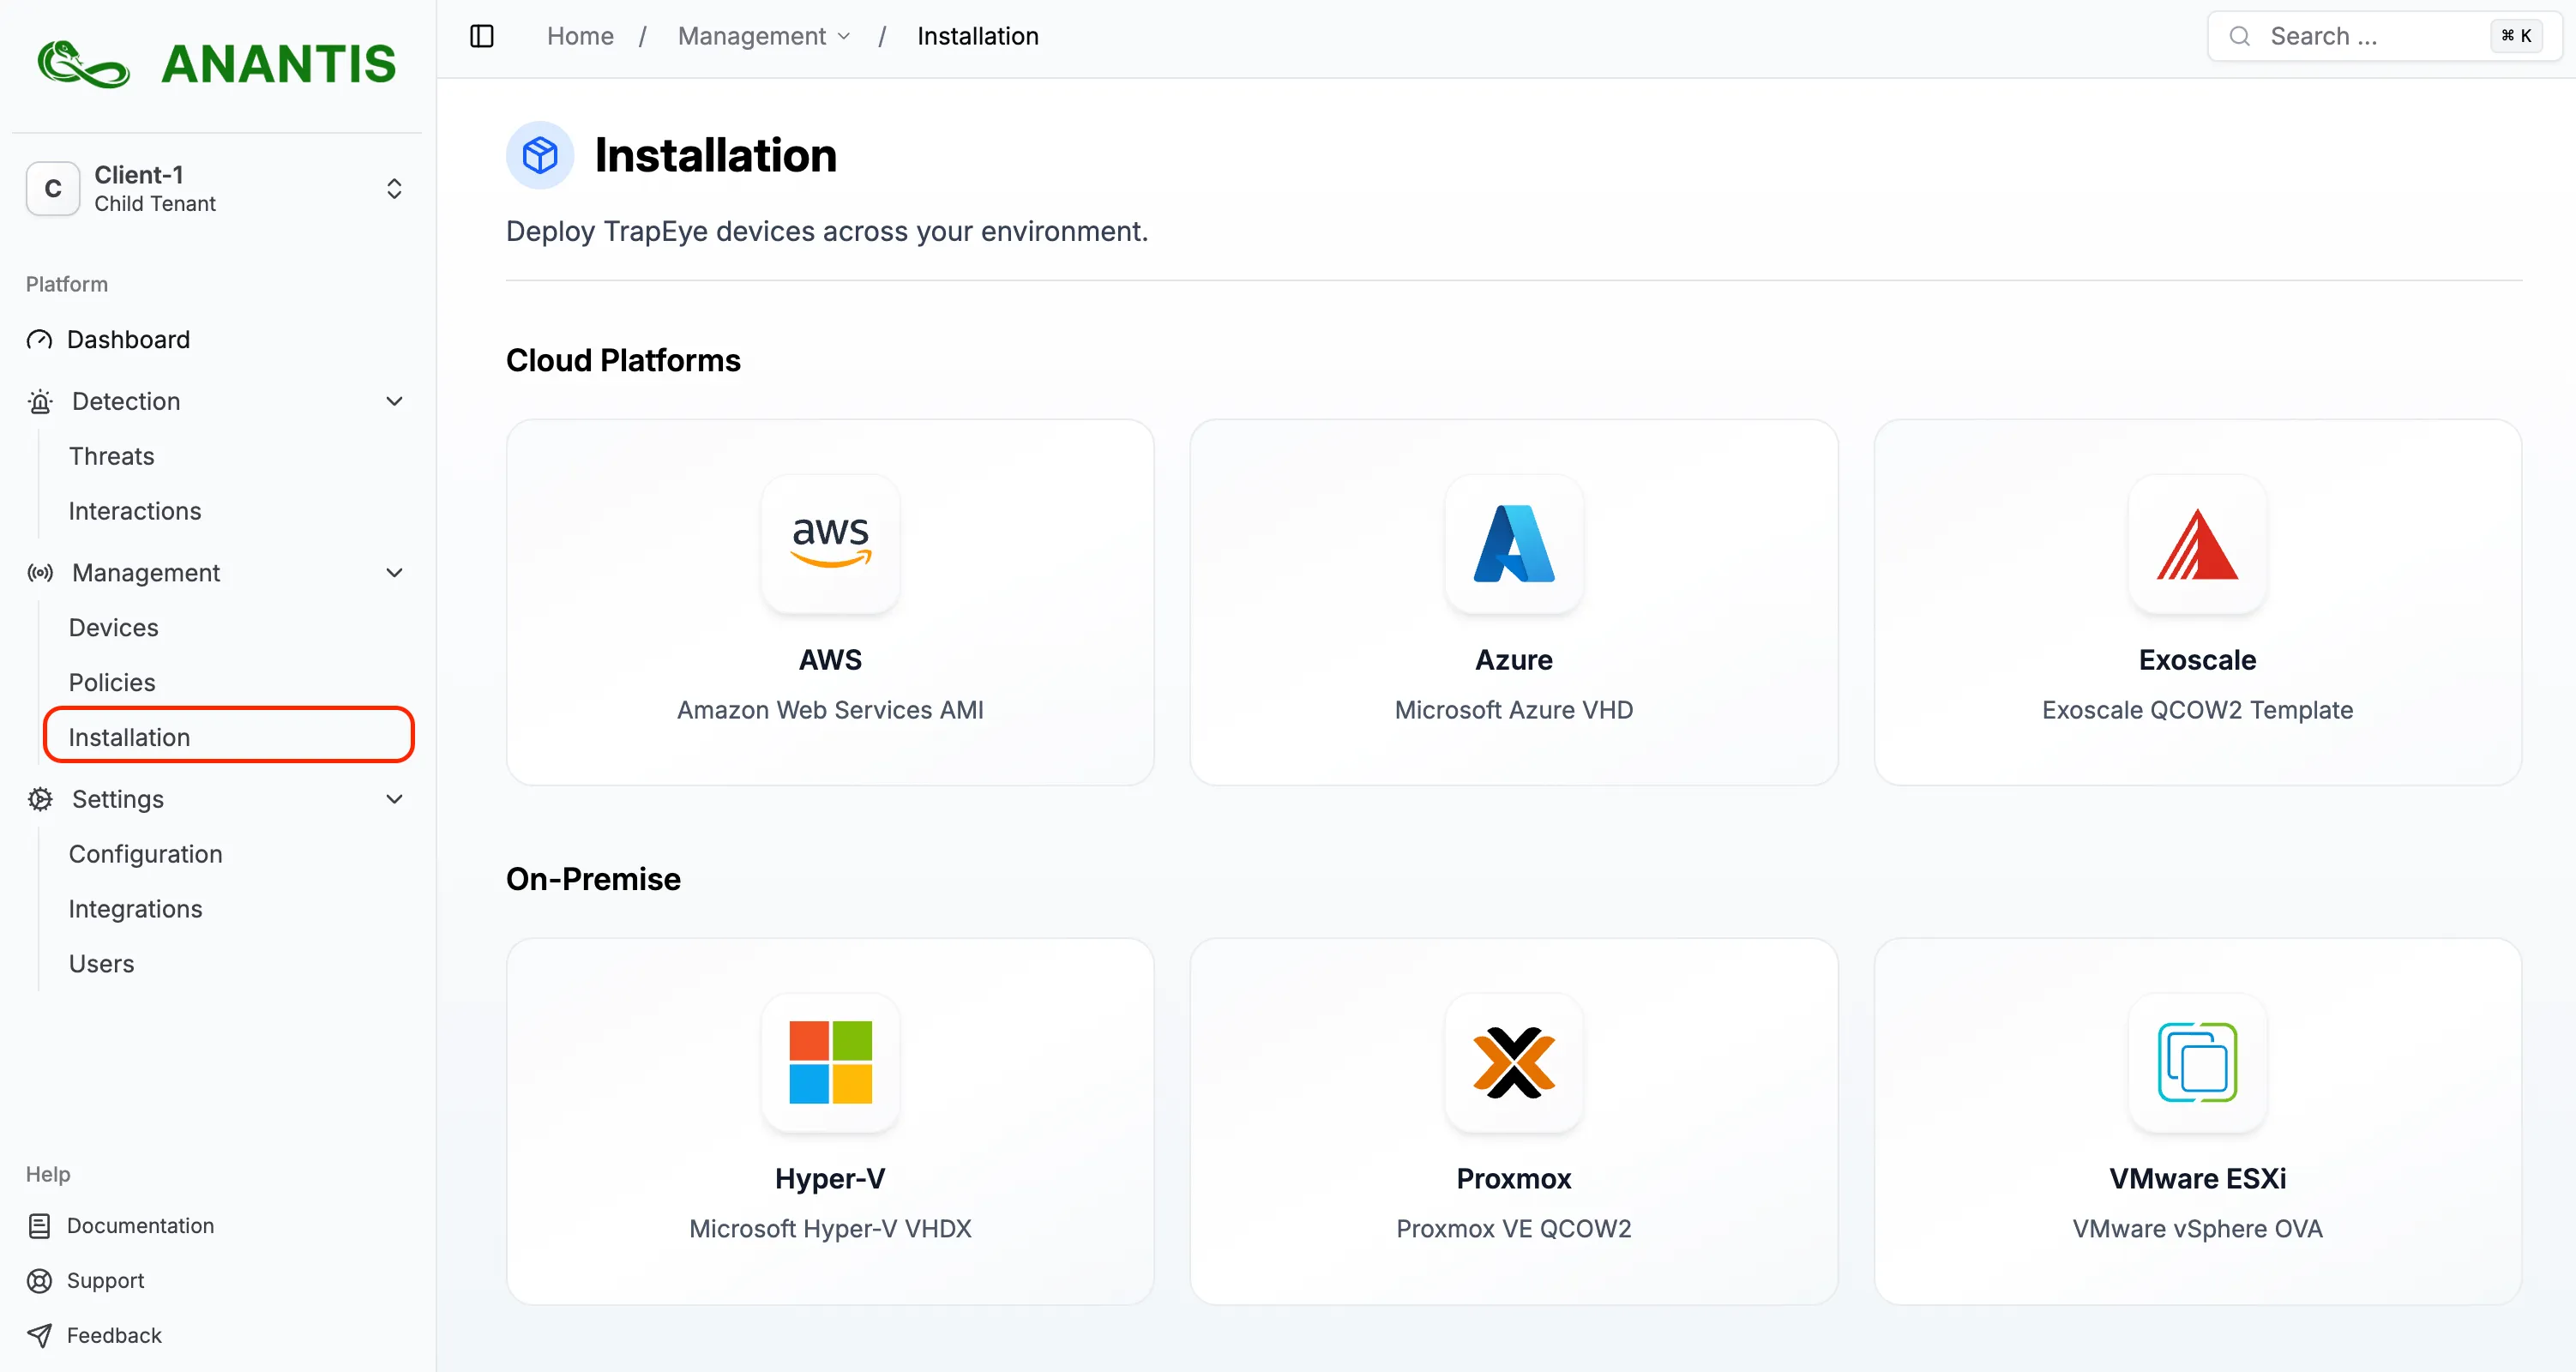
Go to Storage center -> Blob storage in the Azure Portal and create a new storage account if you do not already have one available in the same region as your target virtual network.
Create a
Containerinside the storage account to host the TrapEye image.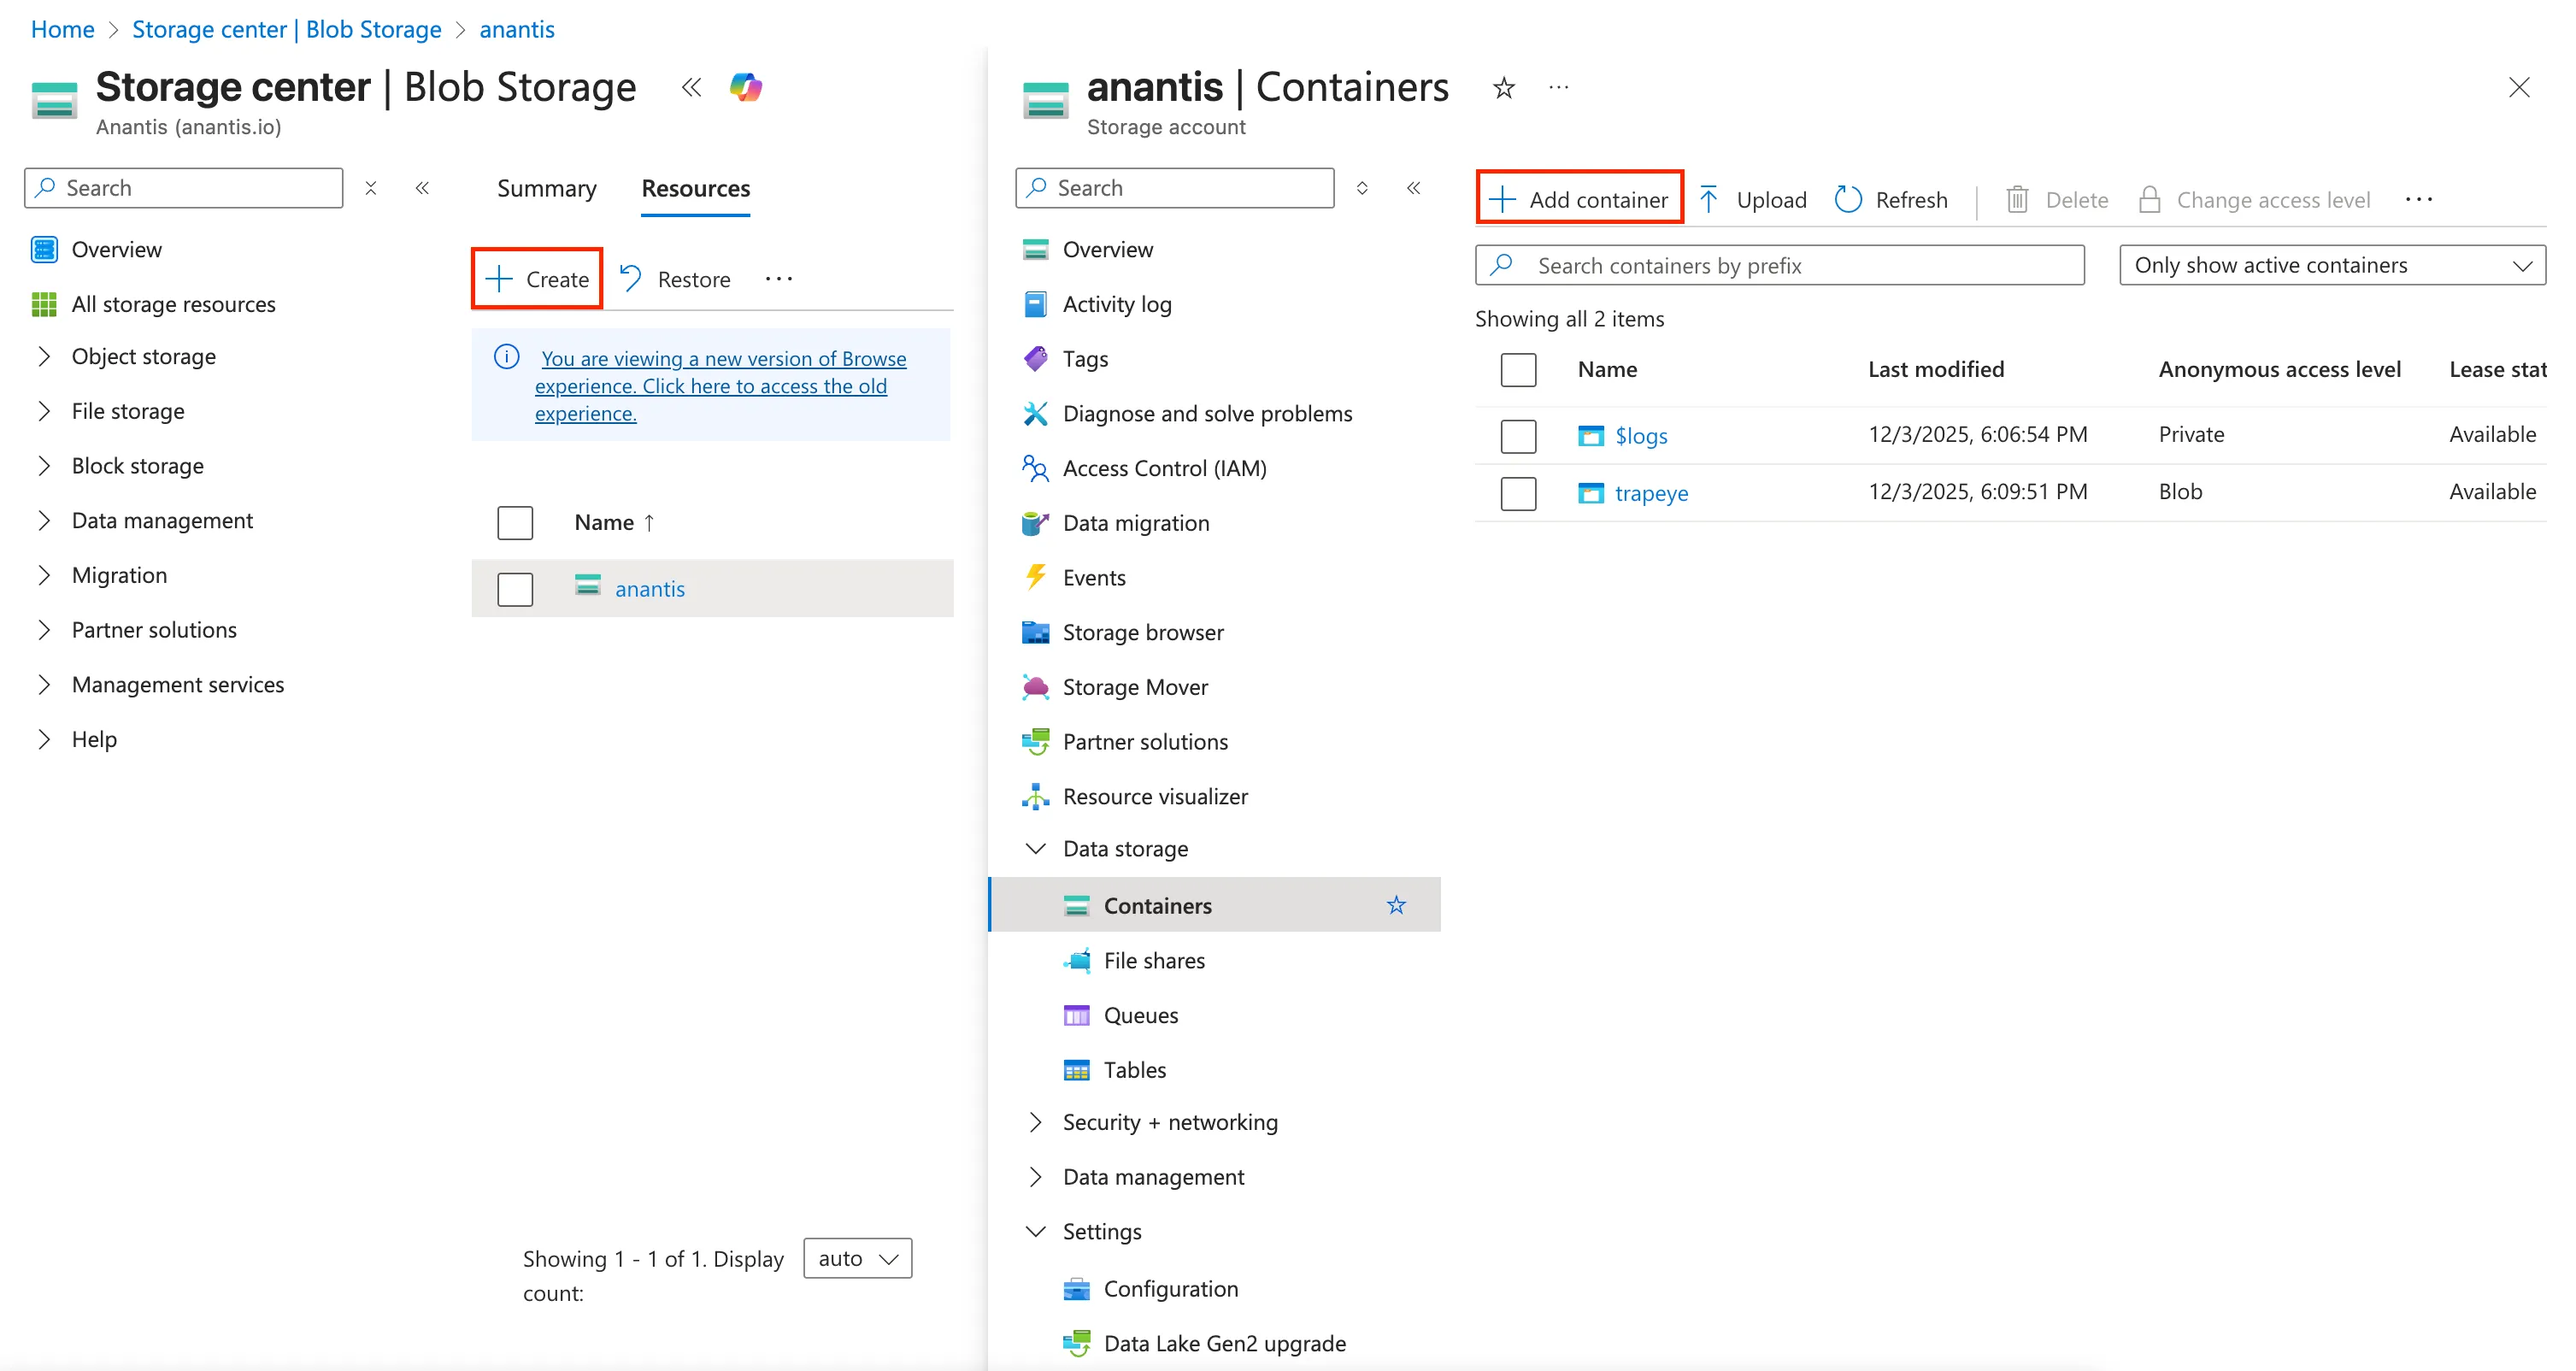
Upload the downloaded
.vhdfile to your container, make sure to select thePage blobstorage type.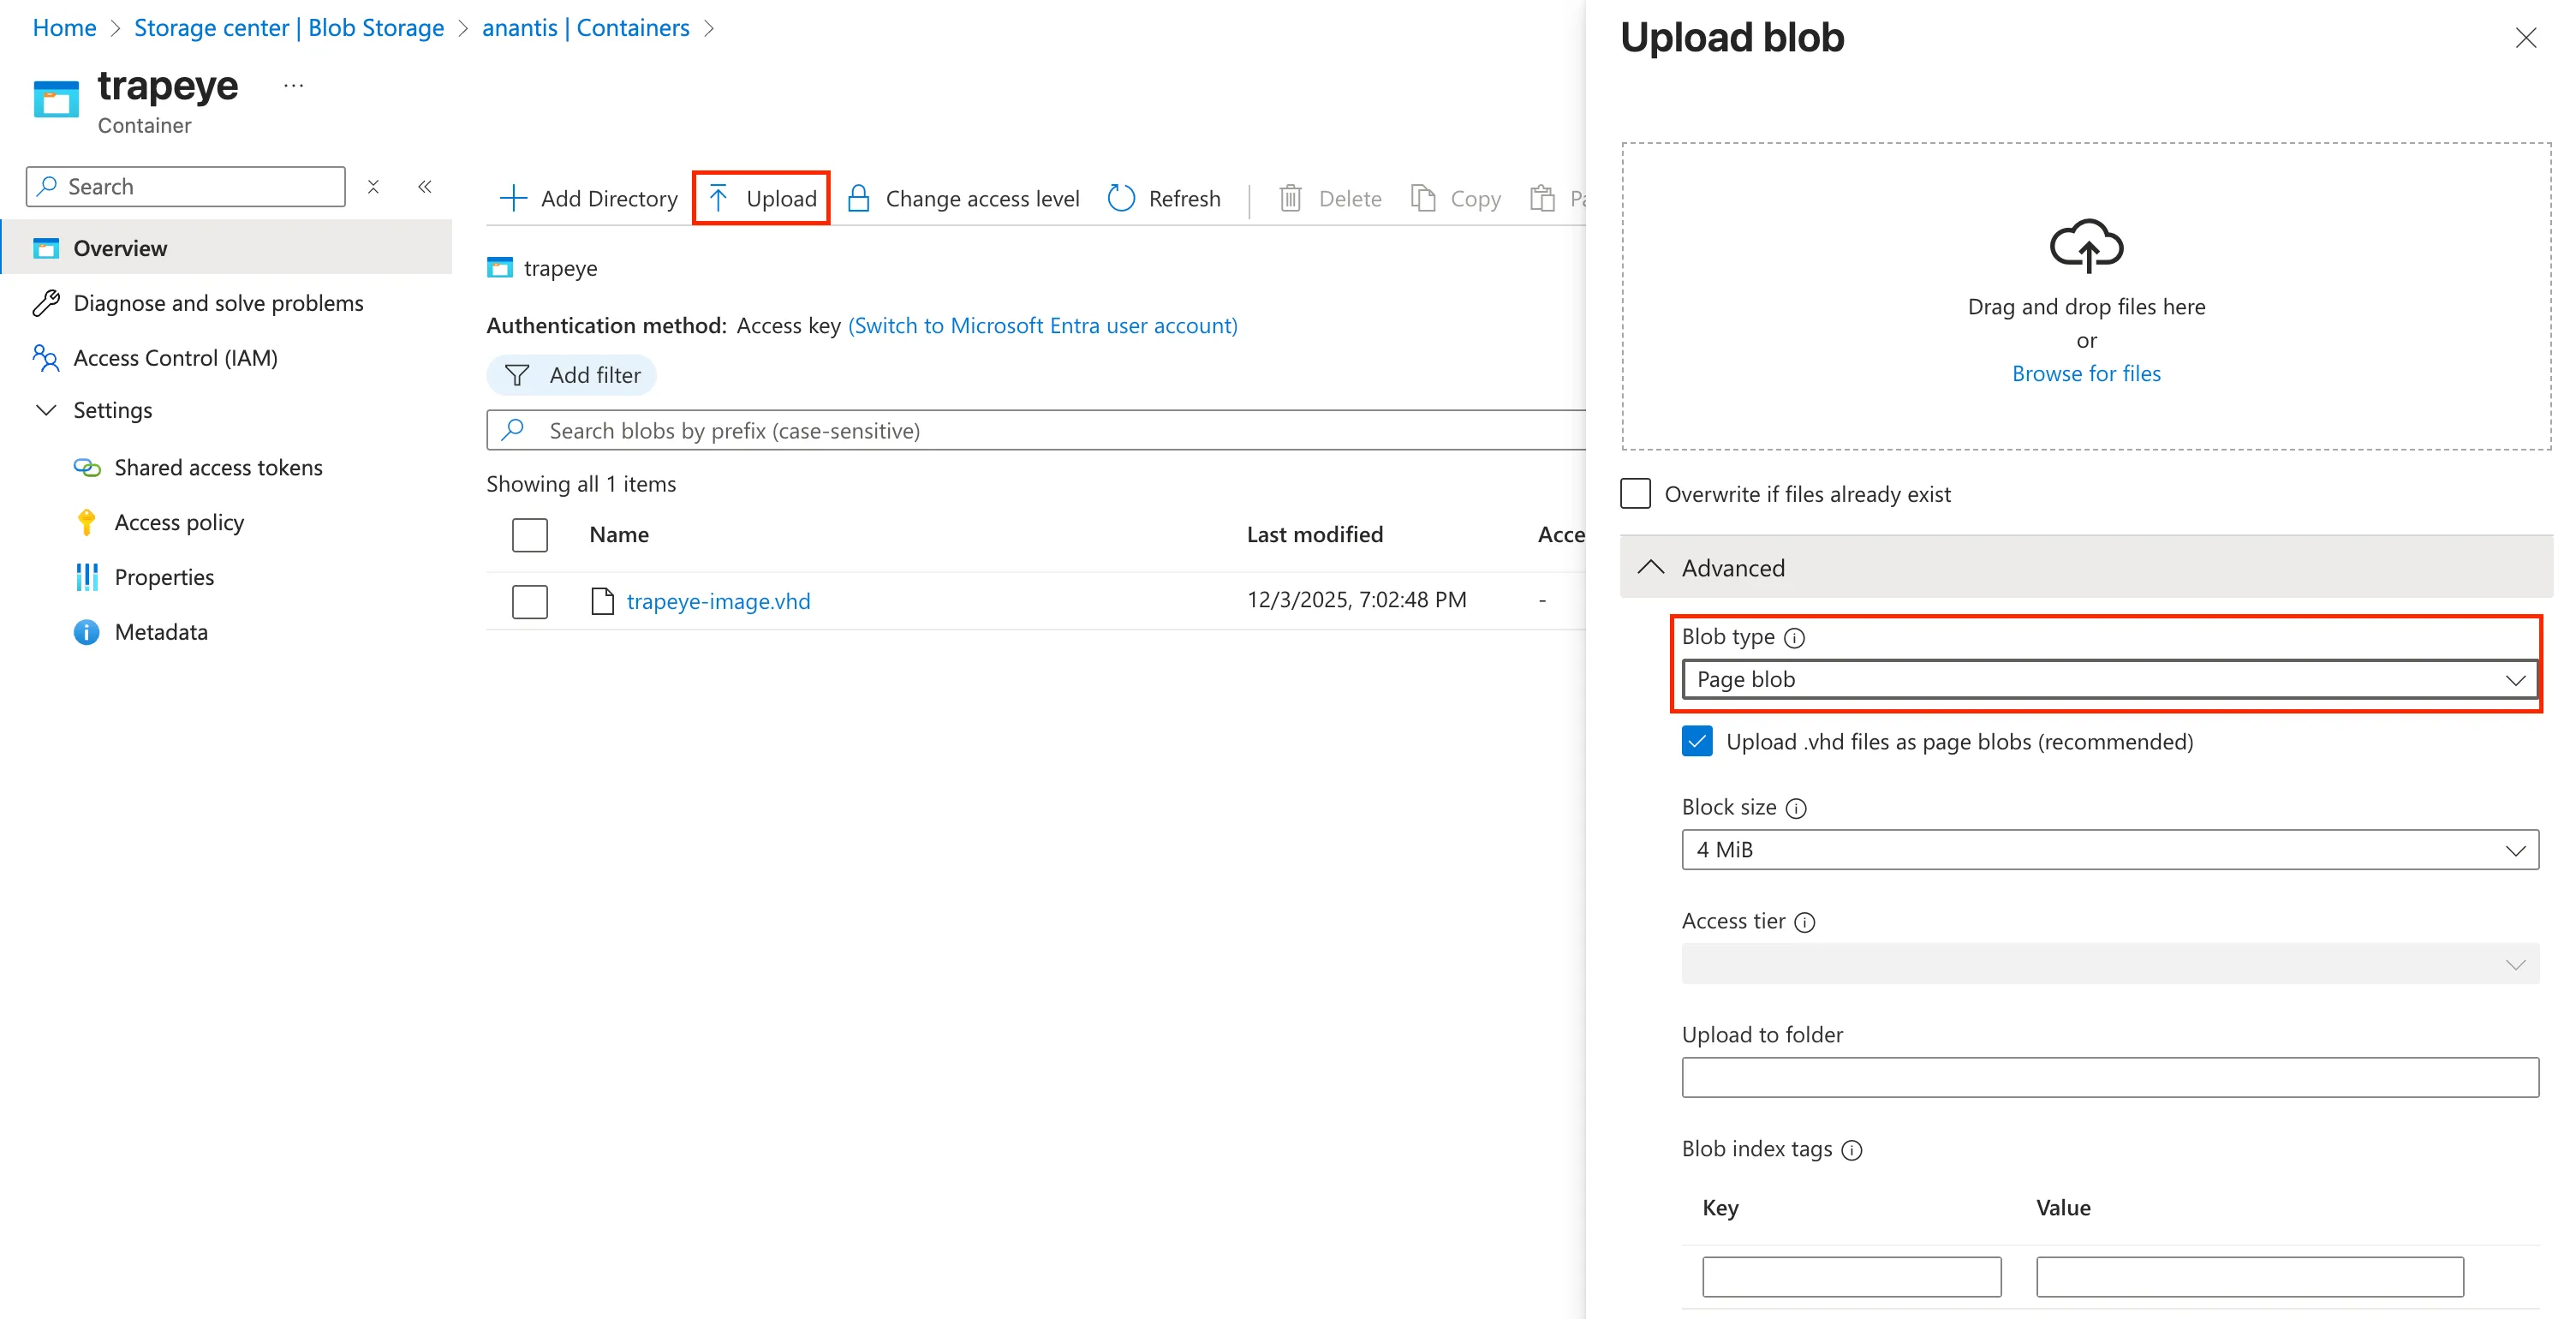
Navigate to Compute infrastructure -> Custom images in the Azure Portal and click on
Createto create a new custom image.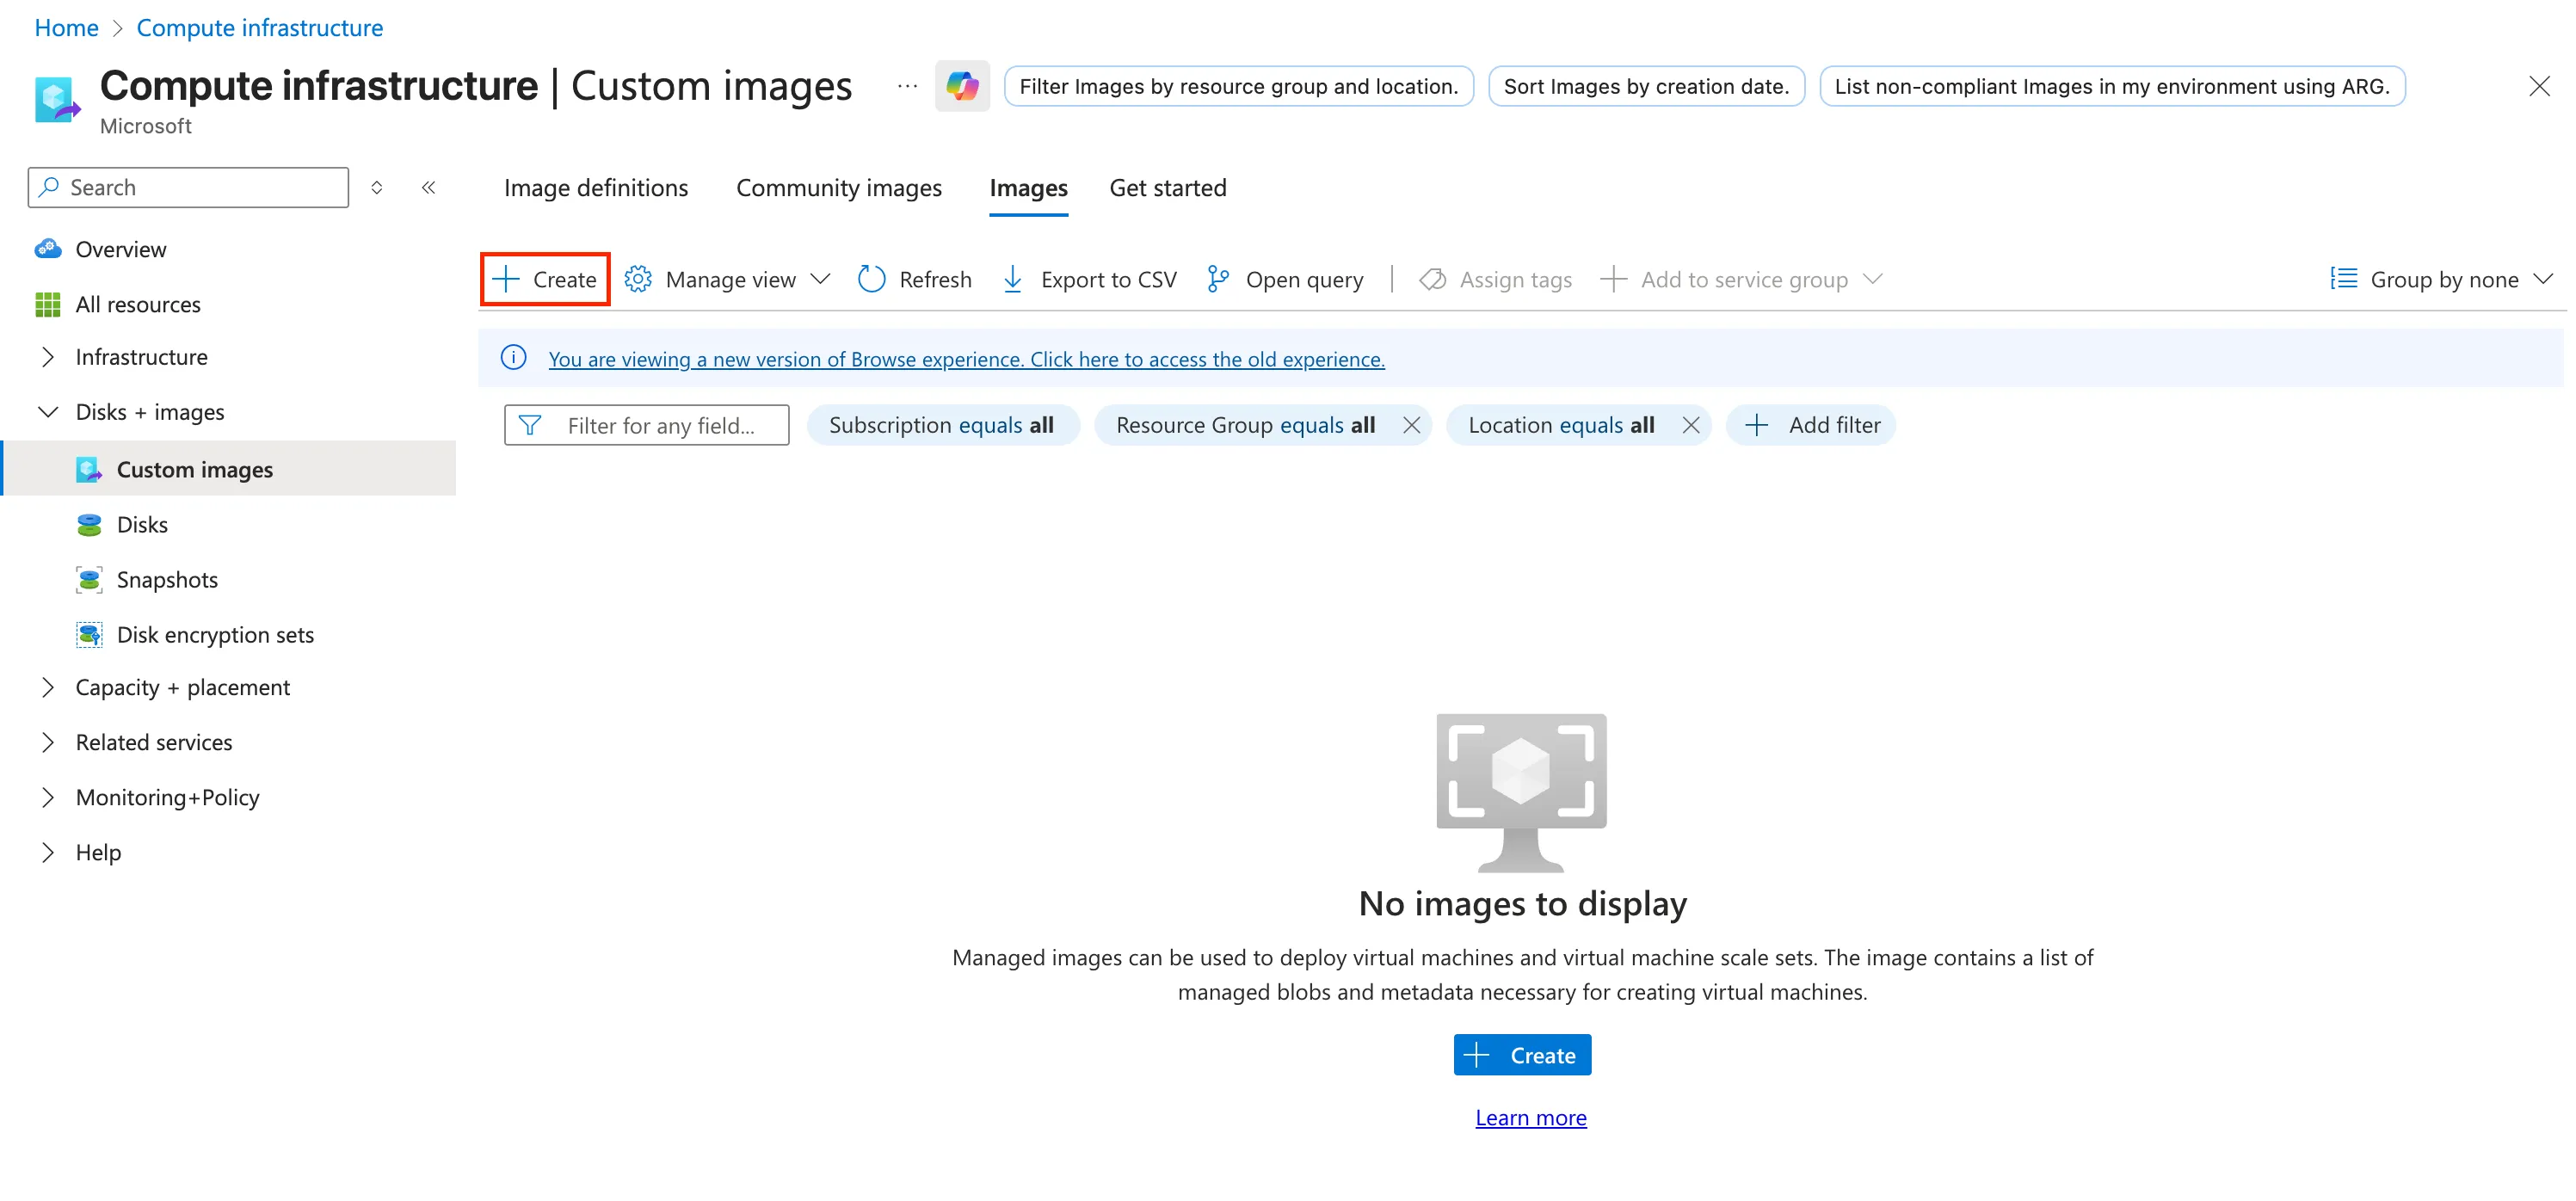
Configure the following fields:
Field Recommended Value Name trapeye-image Region Must match the region of your virtual network OS type linux VM generation Gen 1 Storage blob Click Browseand select the uploaded.vhdfile from your storage account.Account type Standard SSD 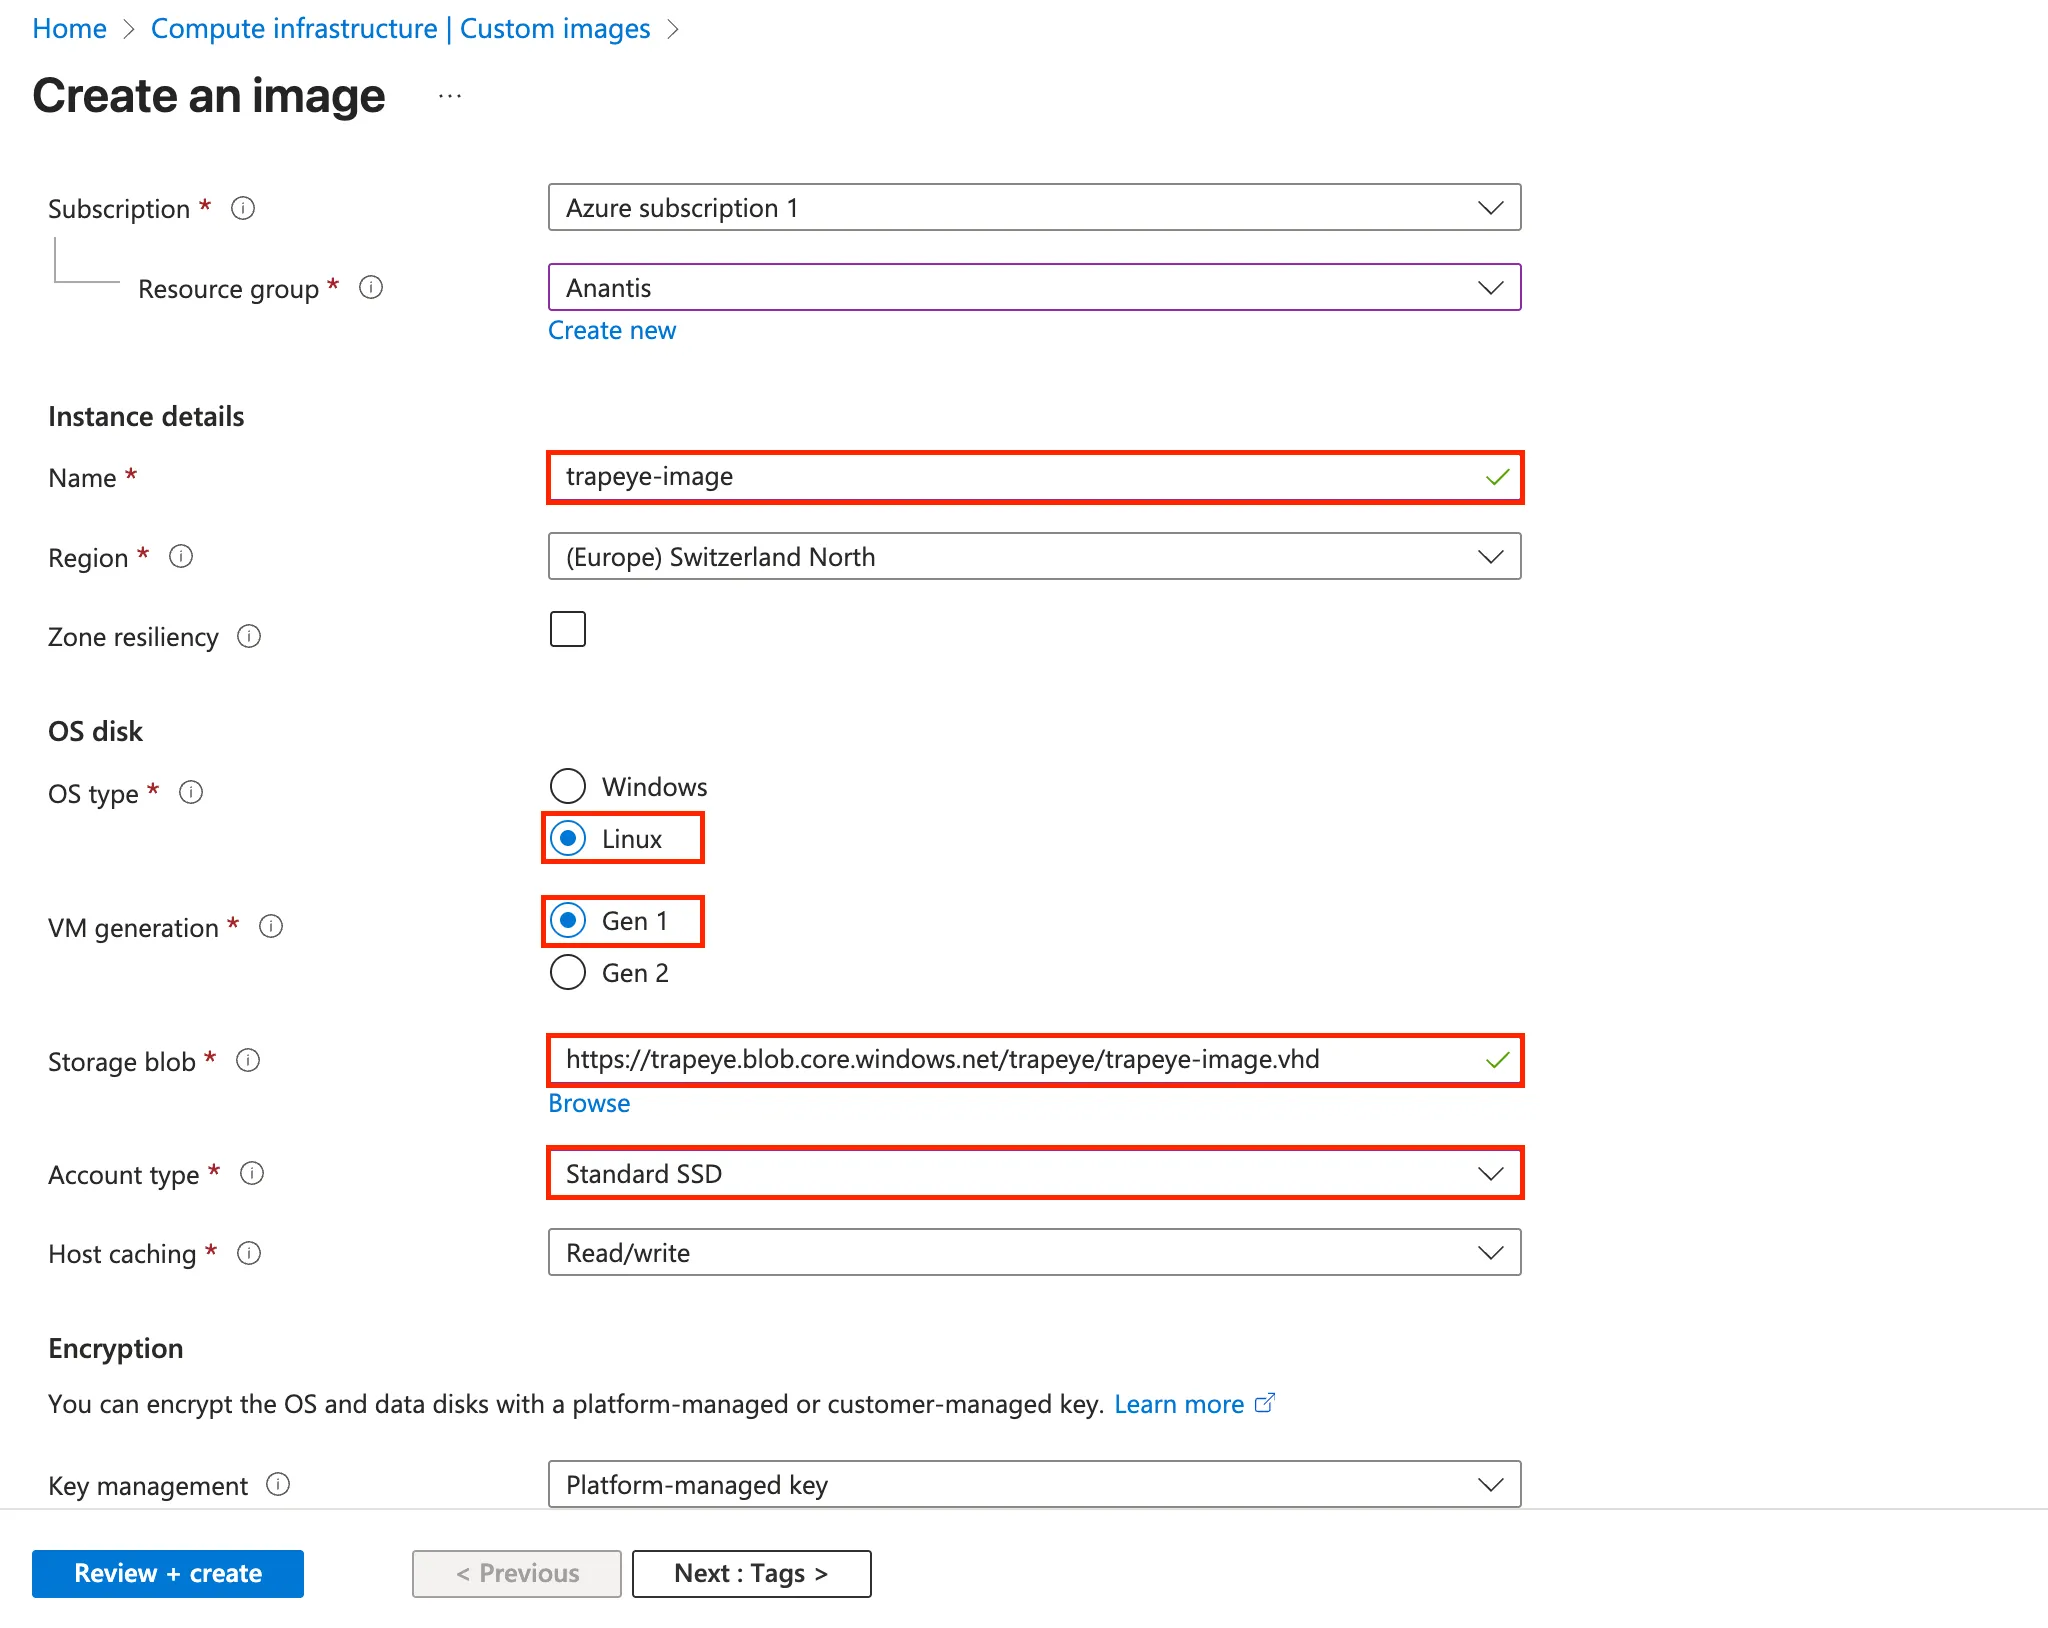
Create a New Virtual Machine
Section titled “Create a New Virtual Machine”From the created custom image, click on
Create VMto start the virtual machine creation process.
Choose a
Ressource Group,NameandSizefor your virtual machine using the recommended values below:Resource Minimum Value Recommended Value CPU 1 vCPUs 2 vCPUs Memory 1024 MiB (1 GB) 4096 MiB (4 GB) Disk 10GB 10GB 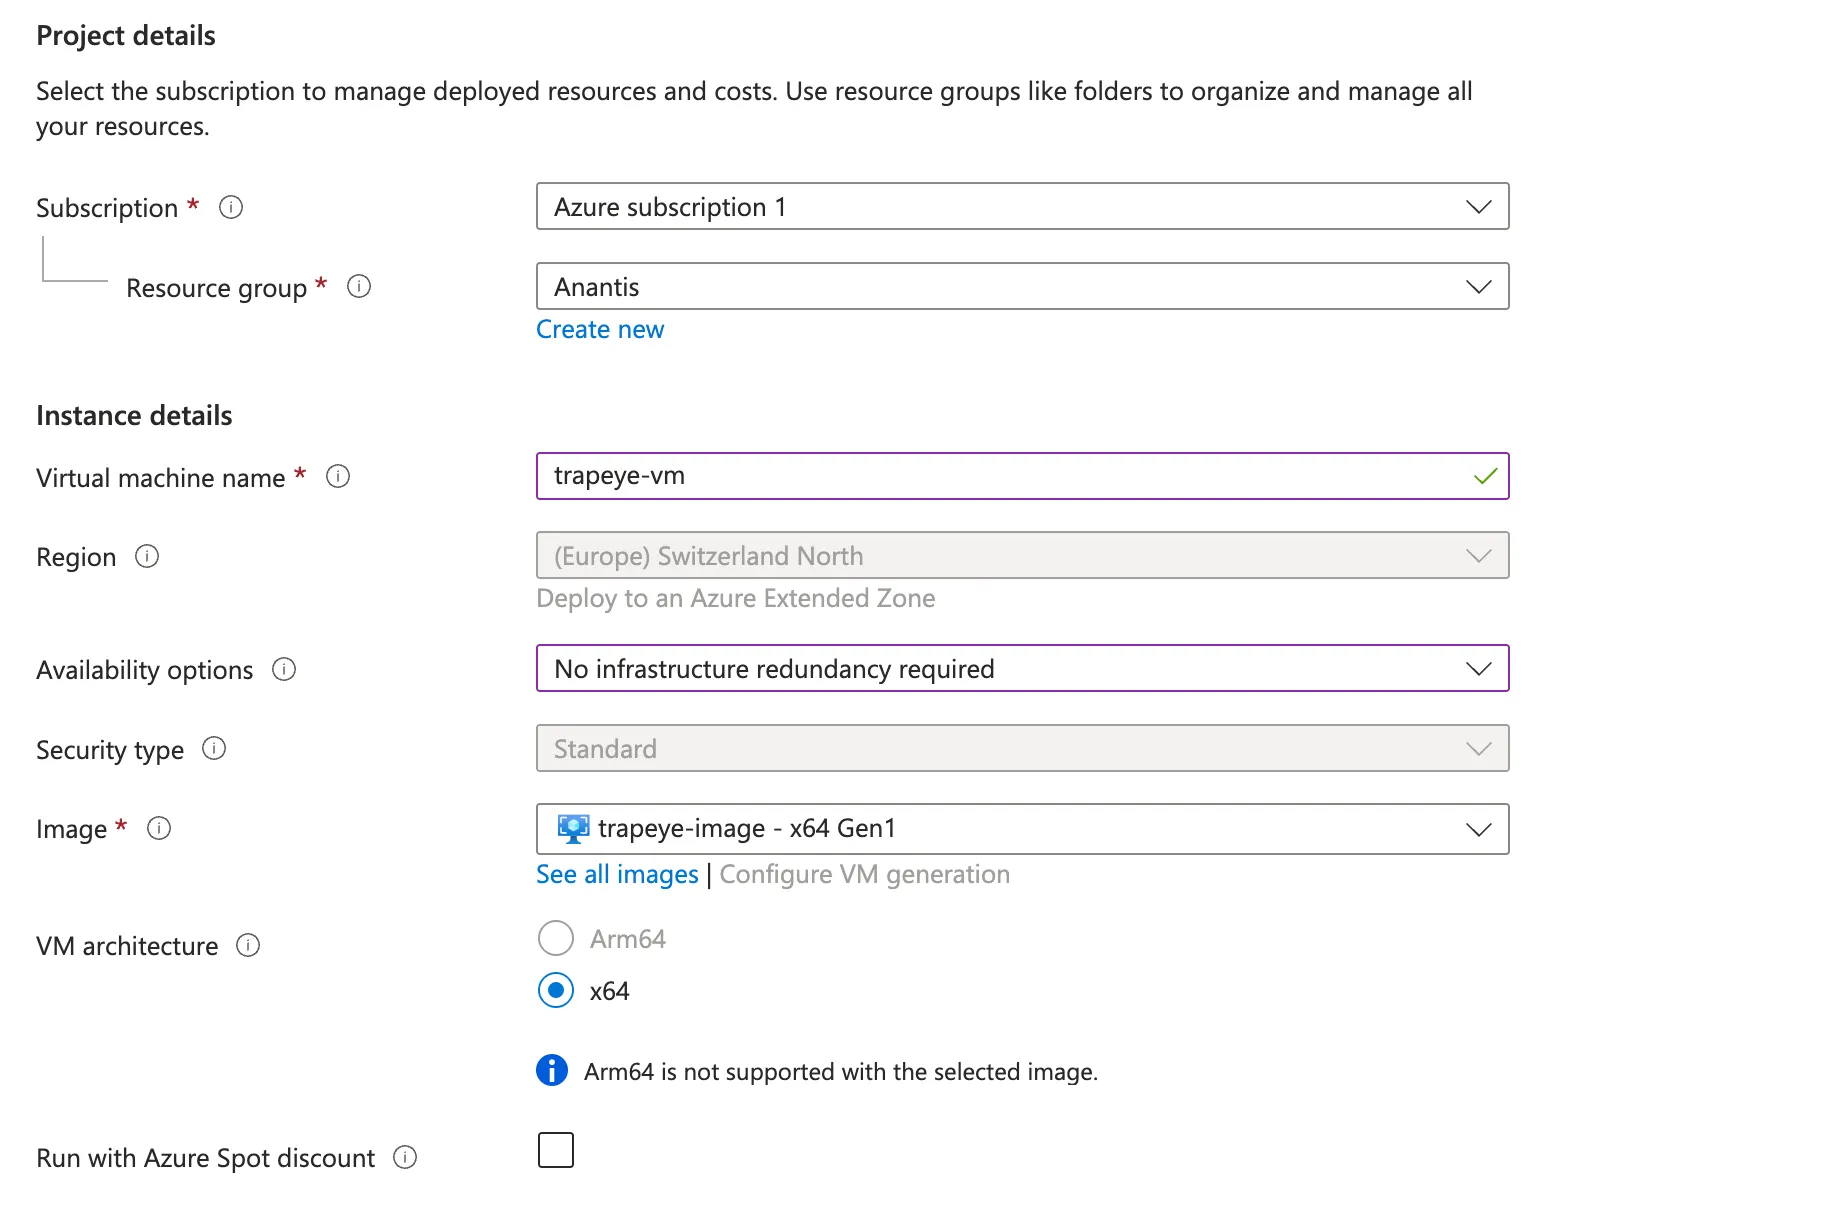
In the
Networkingtab, select the Virtual network identified in the earlier steps. Choose a Subnet and set thePublic IPtoNone.
From the TrapEye Platform, go to Management → Installation and copy the values for
url,entity_uuid, andauth_token.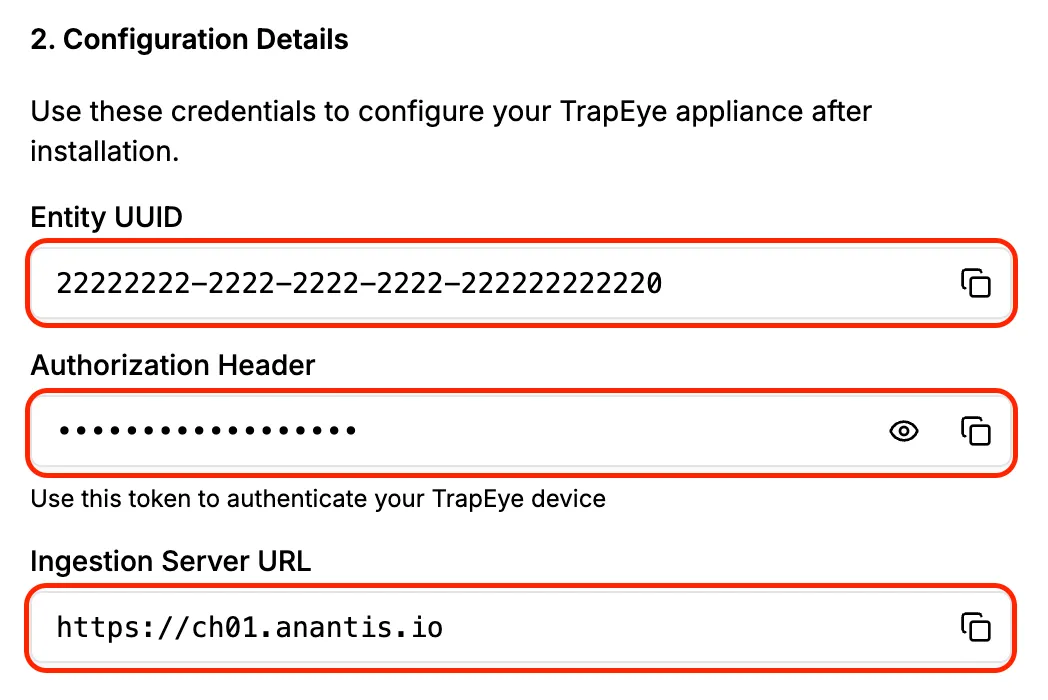
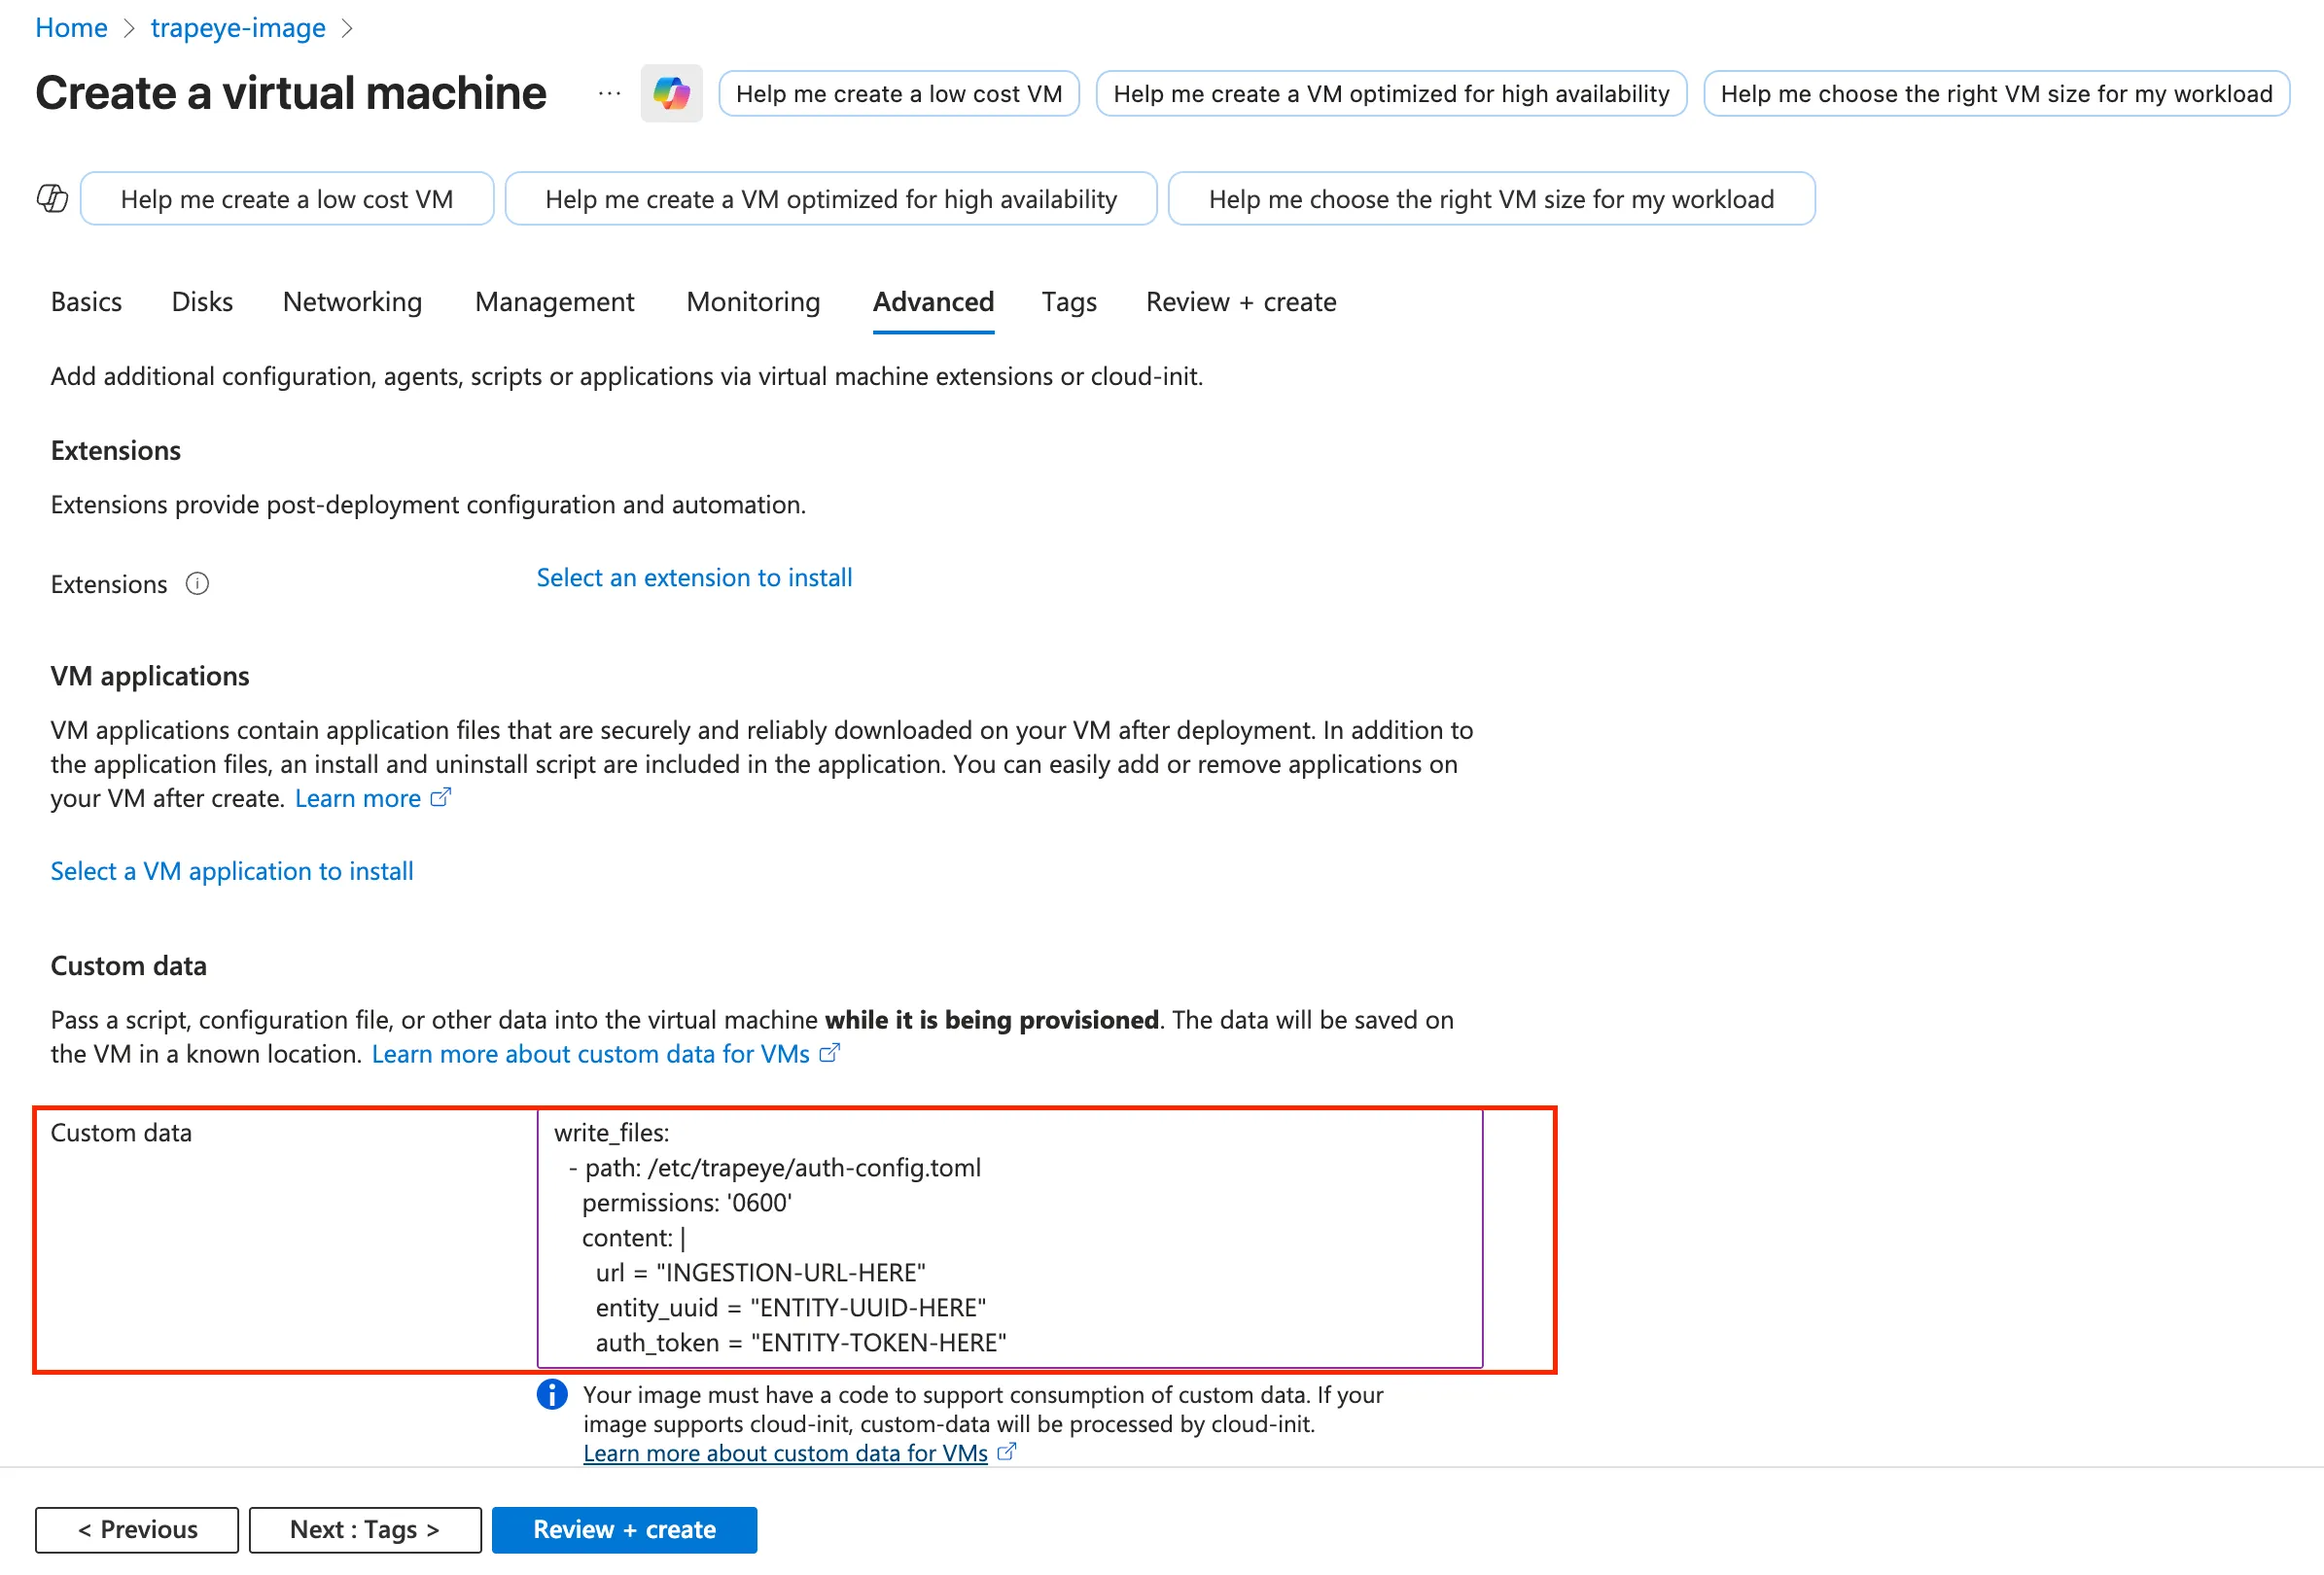
Replace the placeholder values in the template below with your TrapEye configuration parameters., then paste the final result into the Custom Data field in the
Advancedtab.#cloud-configwrite_files:- path: /etc/trapeye/auth-config.tomlpermissions: '0600'content: |url = "INGESTION-URL-HERE"entity_uuid = "ENTITY-UUID-HERE"auth_token = "ENTITY-TOKEN-HERE"Example:
Click Add to build the virtual machine.
Setup complete
Section titled “Setup complete”Your TrapEye virtual machine has been successfully deployed in Azure.
It will now appear in the Devices section of the TrapEye Deception Platform, and you will begin receiving real-time alerts as soon as any activity is detected.