

Deploy on Proxmox
This guide will help you deploy TrapEye on your Proxmox environment smoothly, from preparing your VM template to launching your first instance.
Import the TrapEye Proxmox Image
Section titled “Import the TrapEye Proxmox Image”Log in to the TrapEye Portal, go to Management → Installation and download the latest TrapEye Proxmox image (
.qcow2format).
Open a Terminal on your Laptop and push the downloaded
.qcow2image to your Proxmox server via ssh usingscp:Terminal window scp trapeye-image.qcow2 root@<proxmox-ip>:/var/lib/vz/images/
Create a New Proxmox Template
Section titled “Create a New Proxmox Template”Open the Proxmox Shell via the web interface or SSH.

Verify the presence of the uploaded image:
Terminal window file /var/lib/vz/images/trapeye-image.qcow2Create a new VM with the appropriate value in
memory,coresandbridge.Resource Minimum Value Recommended Value CPU 1 vCPUs 2 vCPUs Memory 1024 MiB (1 GB) 4096 MiB (4 GB) Terminal window qm create 9000 --name trapeye-template --memory <choose memory value in MB> --cores <choose cores number> --net0 virtio,bridge=<your bridge network>Import the image into your VM:
Terminal window qm importdisk 9000 /var/lib/vz/images/trapeye-image.qcow2 local-lvmOpen the Hardware tab of your Template, select the Unused Disk, and double-click to edit.
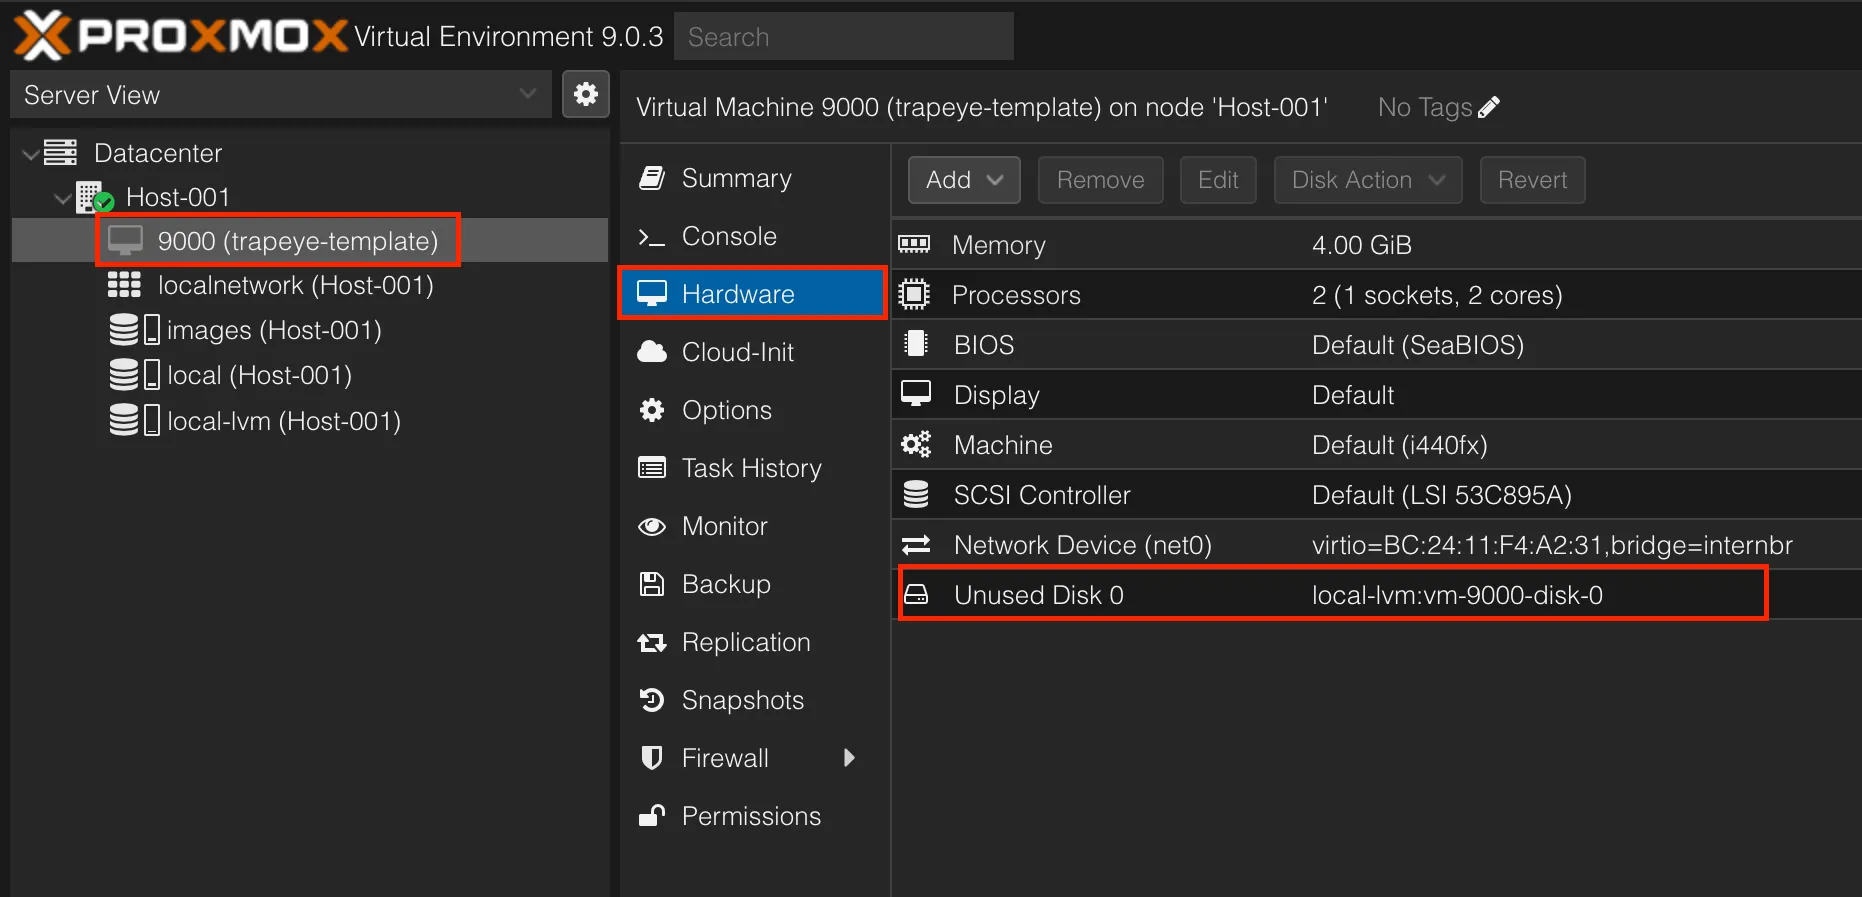
Set Bus/Device to
VirtIO Blockand click Add.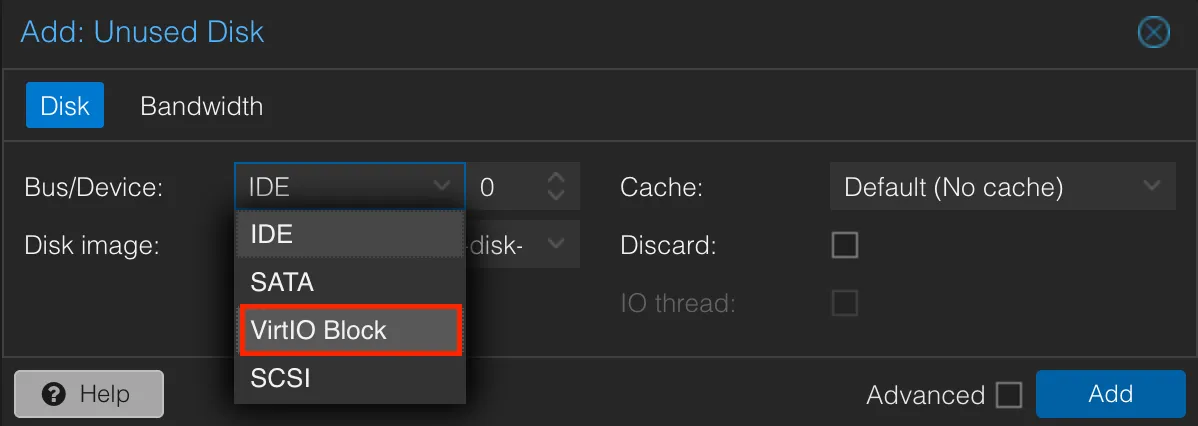
Once added, the new disk should appear attached as a VirtIO device.
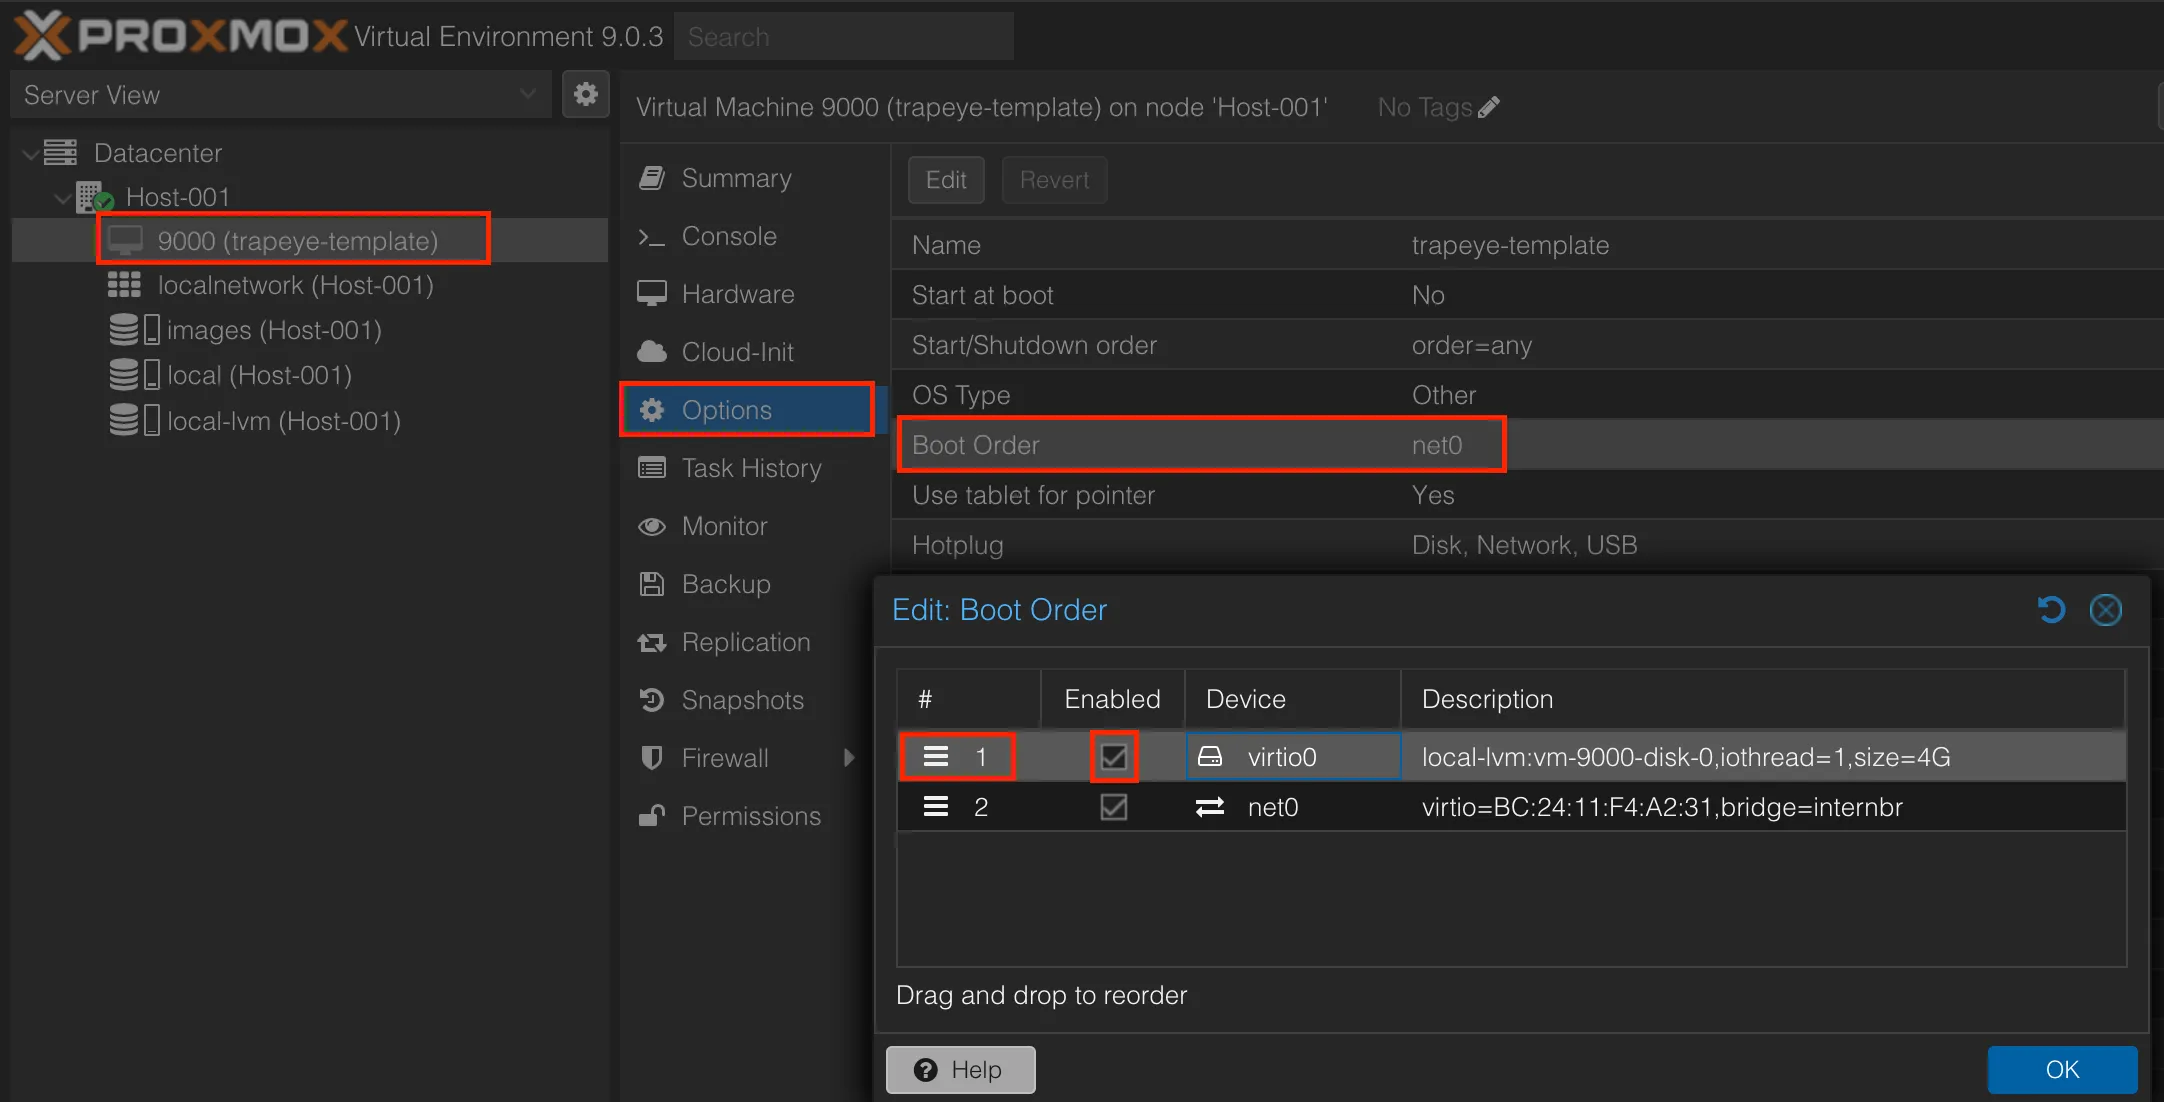
Adjust the Boot Order so that the VM boots from the newly added disk:
- Go to the Options tab of your VM.
- Double-click on Boot Order.
- Enable the
VirtIOdisk and move it to the top of the list. - Click OK to confirm.
Convert your VM into a template
Terminal window qm template 9000
TrapEye Configuration
Section titled “TrapEye Configuration”The easiest way to configure TrapEye for mass deployment and to avoid manual configuration of each VM is to use a Cloud Init config in the Proxmox Template.
Option 1: Cloud Init Configuration
Section titled “Option 1: Cloud Init Configuration”Create the cloud init disk in your Proxmox template.
Terminal window qm set 9000 --ide2 local-lvm:cloudinitChange the password for root user.
Terminal window qm set 9000 --ciuser root --cipassword CHANGEMEFrom the TrapEye Platform, go to Management → Installation and copy the values for
url,entity_uuid, andauth_token.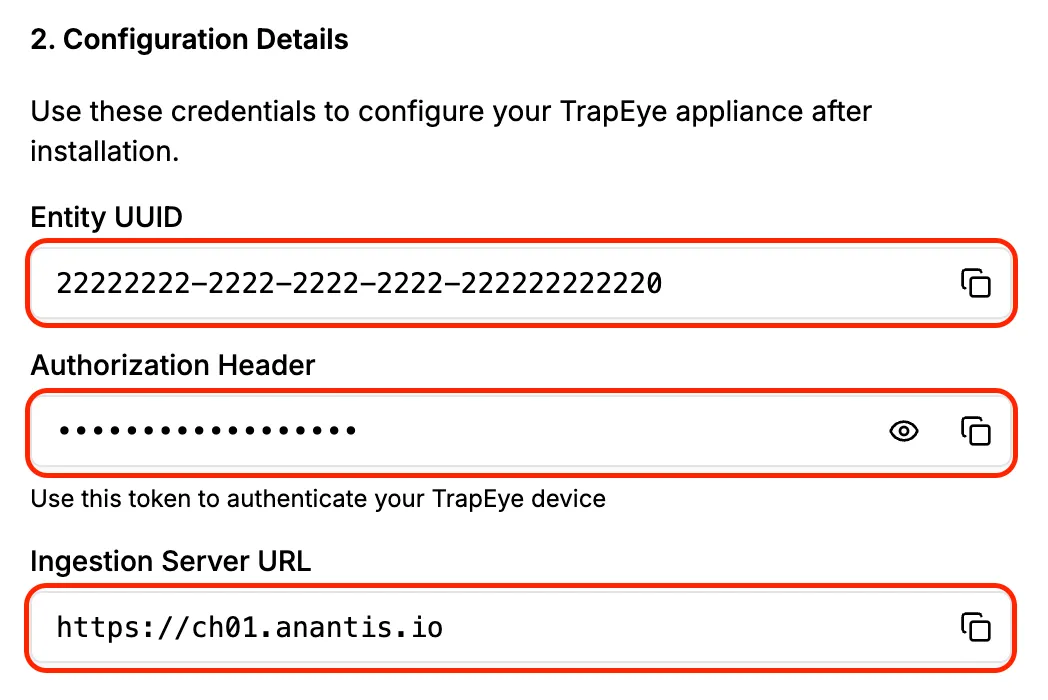
Create snippets folder if it doesn’t exist and create the configuration file with your specific data.
Terminal window mkdir -p /var/lib/vz/snippets/cat > /var/lib/vz/snippets/trapeye-vendor.yaml <<EOF#cloud-configwrite_files:- path: /etc/trapeye/auth-config.tomlpermissions: '0600'content: |url = "INGESTION-URL-HERE"entity_uuid = "ENTITY-URL-HERE"auth_token = "ENTITY-TOKEN-HERE"EOFApply that config file into your cloud-init disk:
Terminal window qm set 9000 --cicustom "vendor=local:snippets/trapeye-vendor.yaml"Clone your template into a Proxmox VM and start it.
Terminal window qm clone 9000 100 --name trapeye-prod-01qm start 100
Option 2: Manual Configuration via HTTPS
Section titled “Option 2: Manual Configuration via HTTPS”By default, if Cloud Init does not push the /etc/trapeye/auth-config.toml file, TrapEye service boot in Manual Config Mode and allow you to connect to it via its IP Address (DHCP by default).
Clone your template into a Proxmox VM and start it.
Terminal window qm clone 9000 100 --name trapeye-prod-01qm start 100Get the IP Address of your VM
From the TrapEye Platform, go to Management → Installation and copy the values for
url,entity_uuid, andauth_token.Connect to the TrapEye Manual Config Web Page by navigating to
https://<your_vm_ip>:8443Ignore the TLS warning as this is a temporary self-signed certificate and fill the form with your 3 custom value copied earlier:
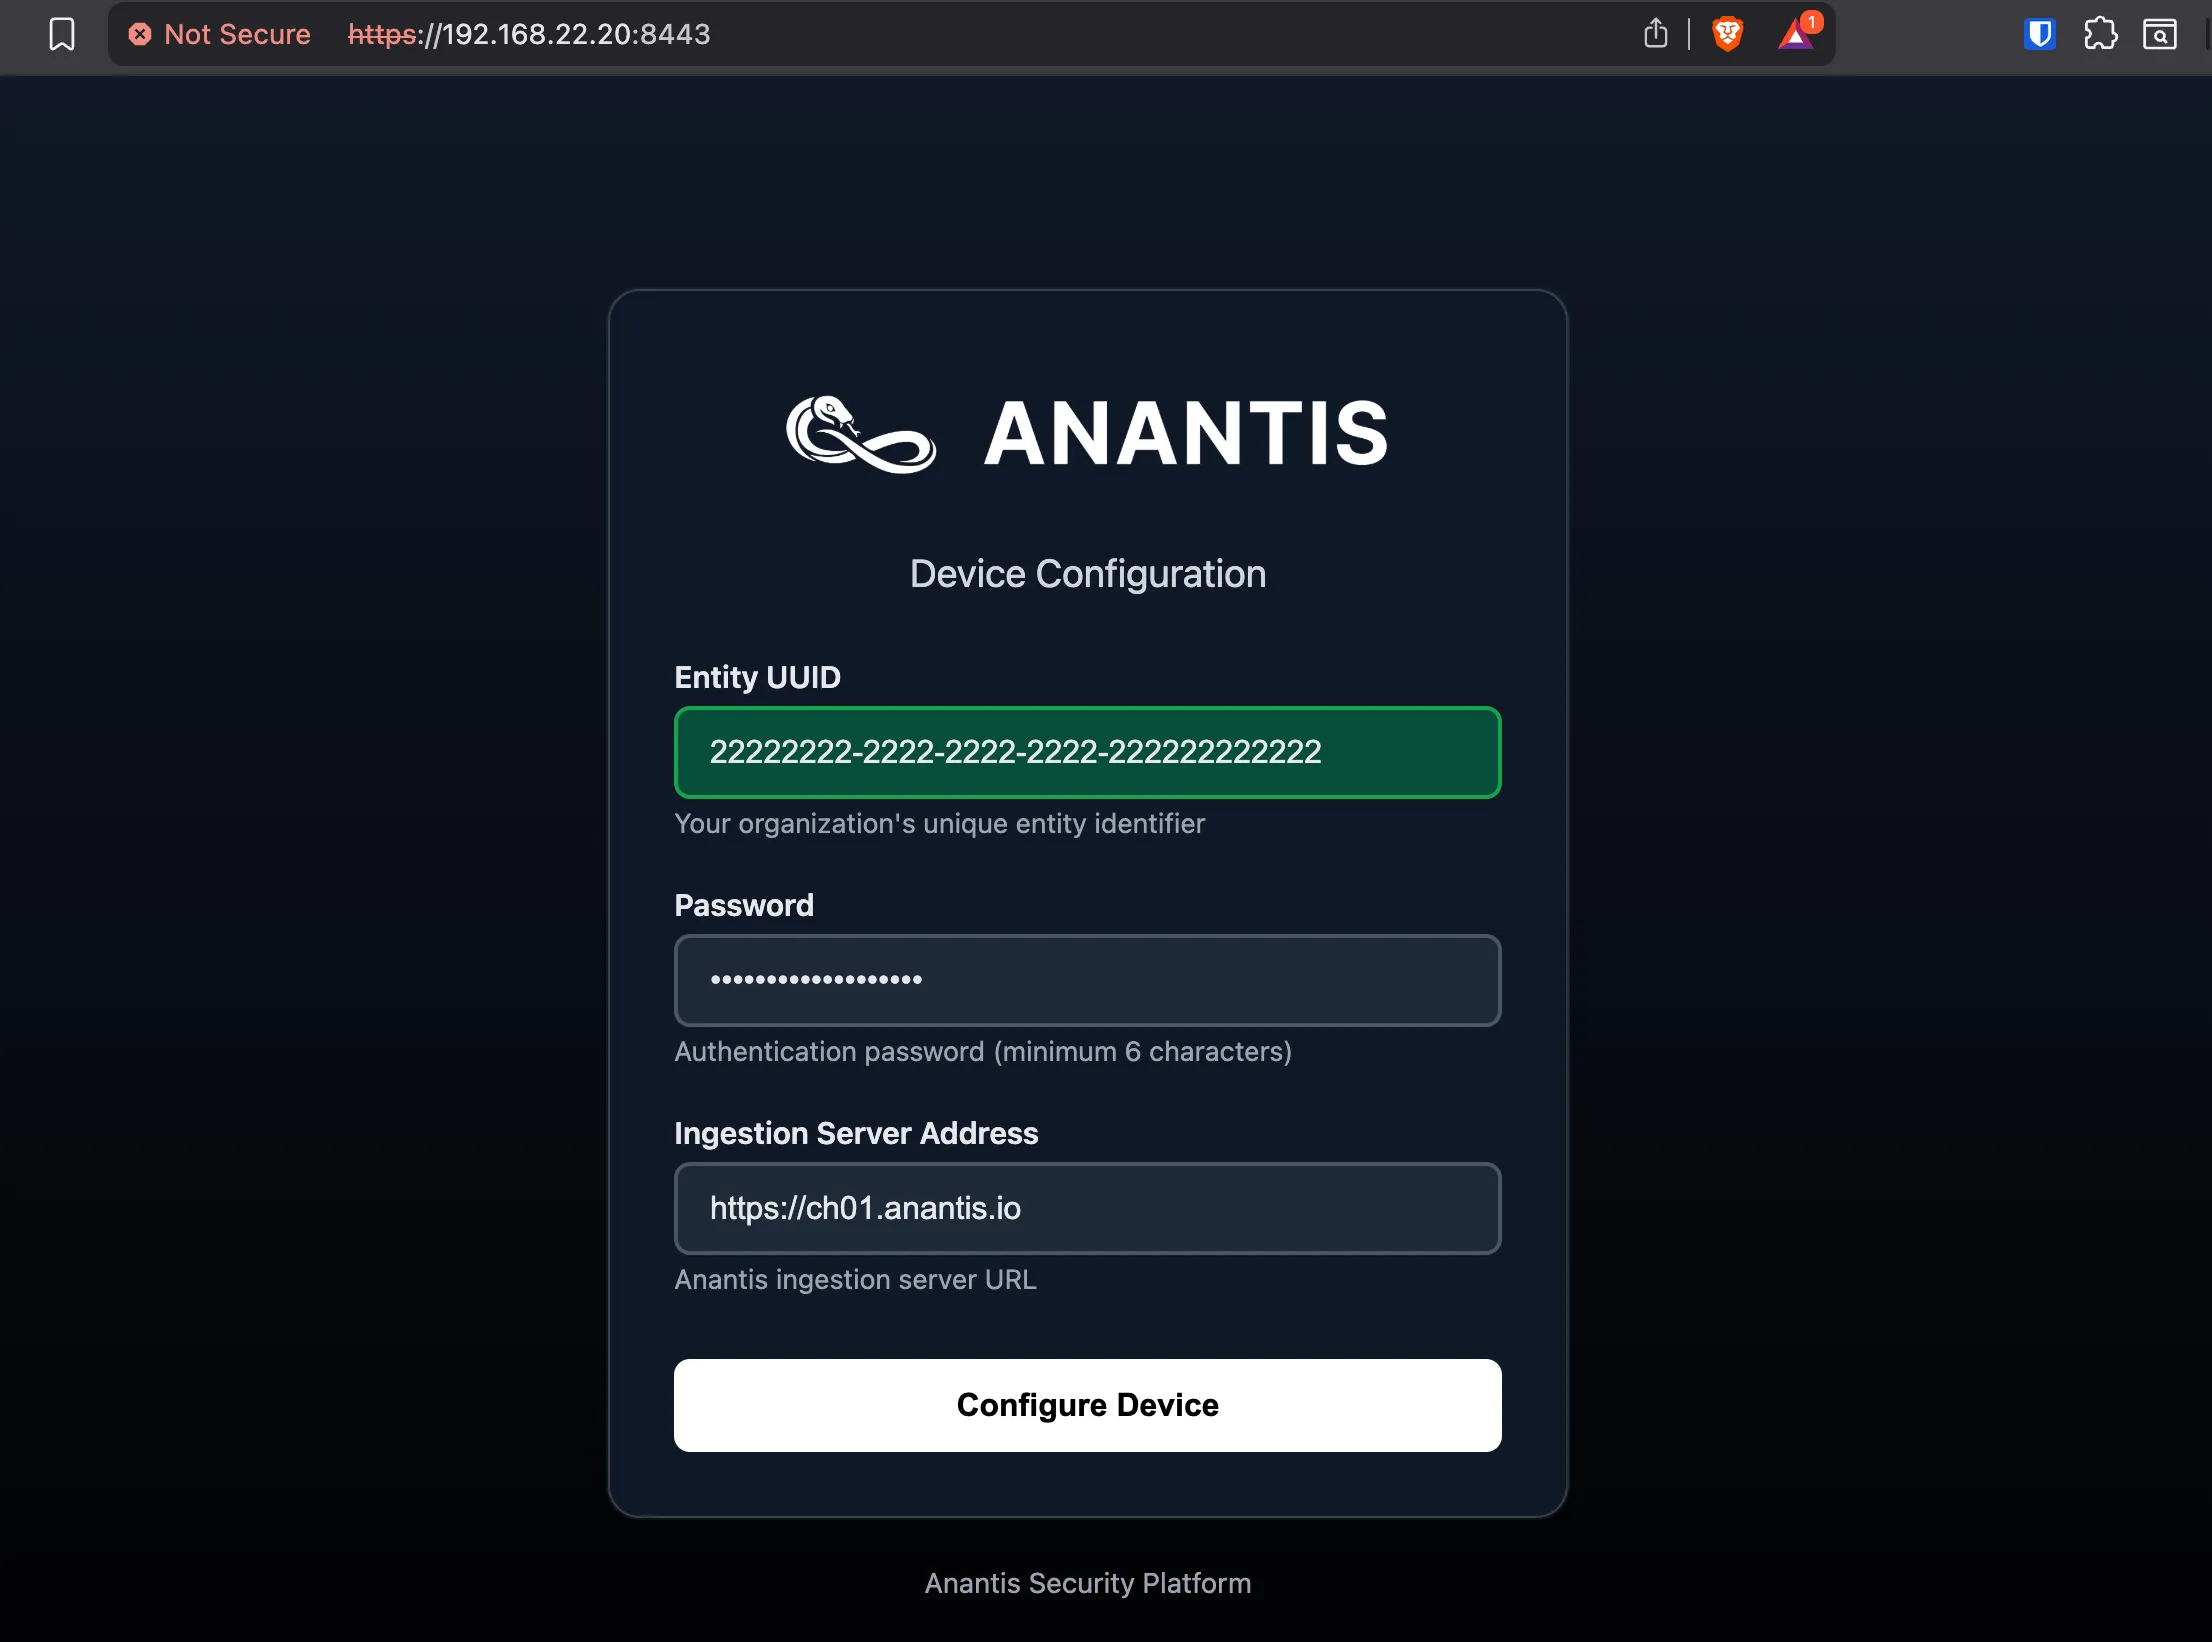
Setup complete
Section titled “Setup complete”Your TrapEye virtual machine has been successfully deployed on Proxmox.
It will now appear in the Devices section of the TrapEye Deception Platform, and you will begin receiving real-time alerts as soon as any activity is detected.