

Deploy on vSphere/ESXi
This guide will help you deploy TrapEye on your ESXi environment smoothly, from preparing your VM template to launching your first instance.
Import the TrapEye VMware Image
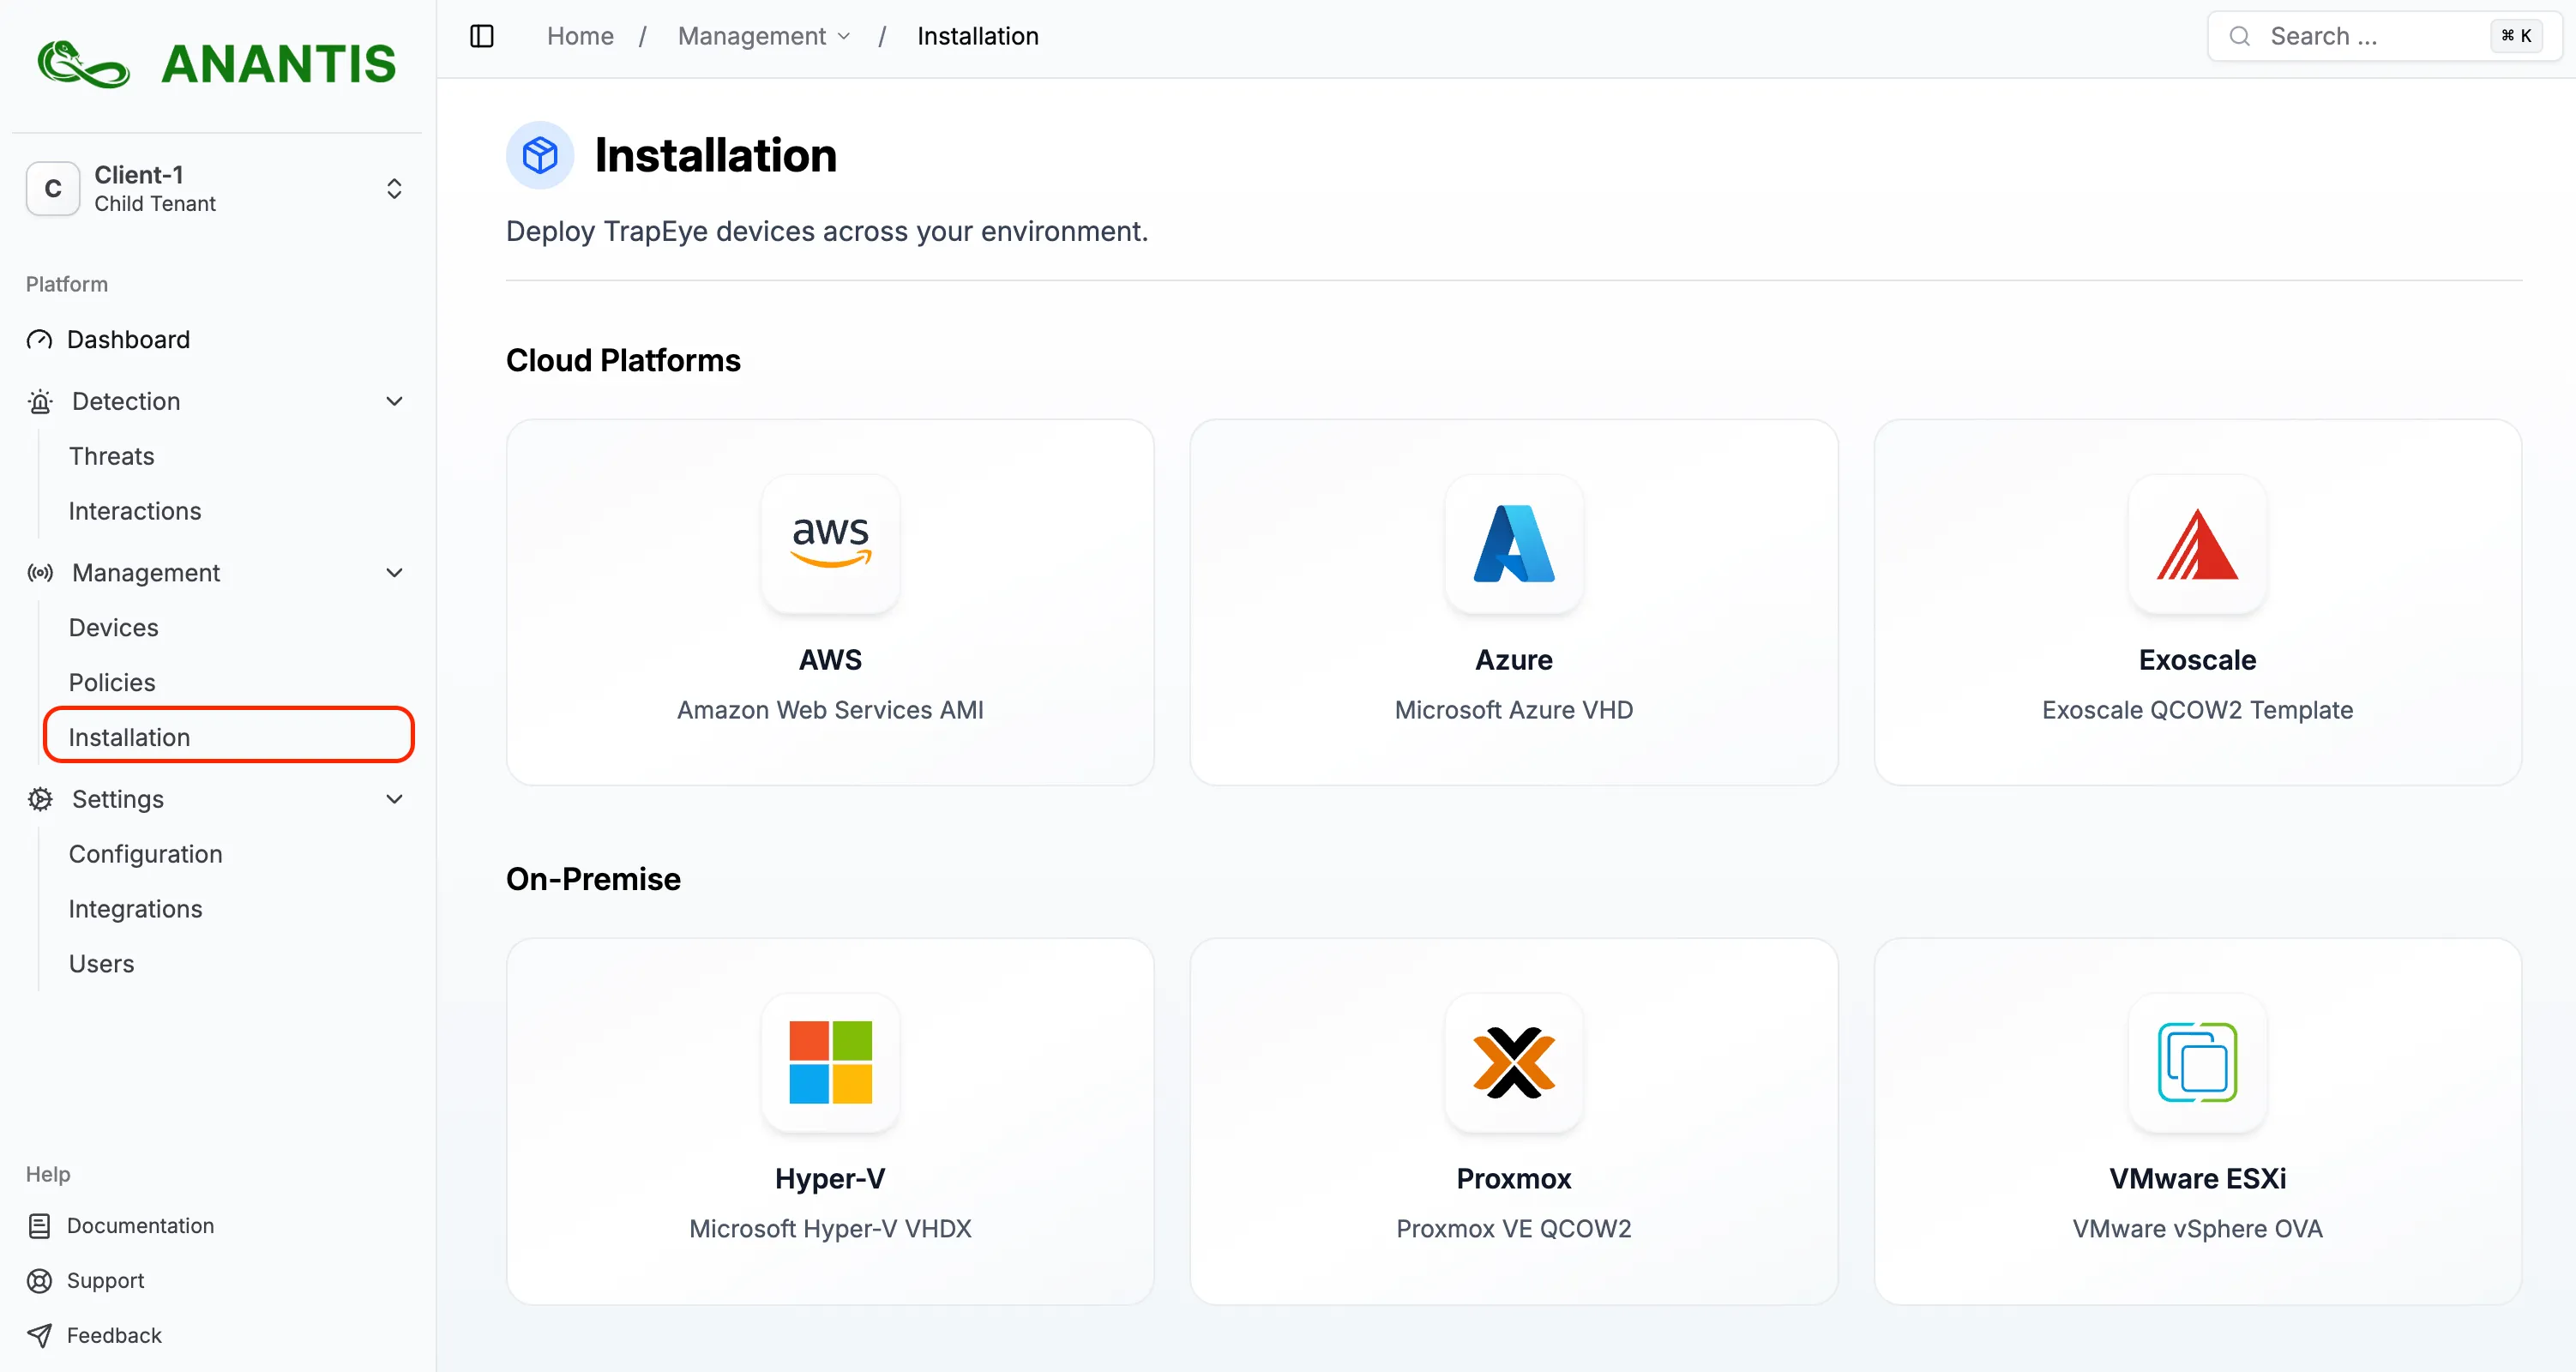
Section titled “Import the TrapEye VMware Image”Log in to the TrapEye Portal, go to Management → Installation and download the latest TrapEye VMware image (.ova format).
Create a New Virtual Machine
Section titled “Create a New Virtual Machine”This guide illustrates the process on ESXi. The equivalent steps can be performed in vSphere as well, but note that the UI and paths may differ depending on your vSphere version.
Connect to your ESXi Web Client.
In the
Virtual Machinesmenu, click onCreate / Register VM.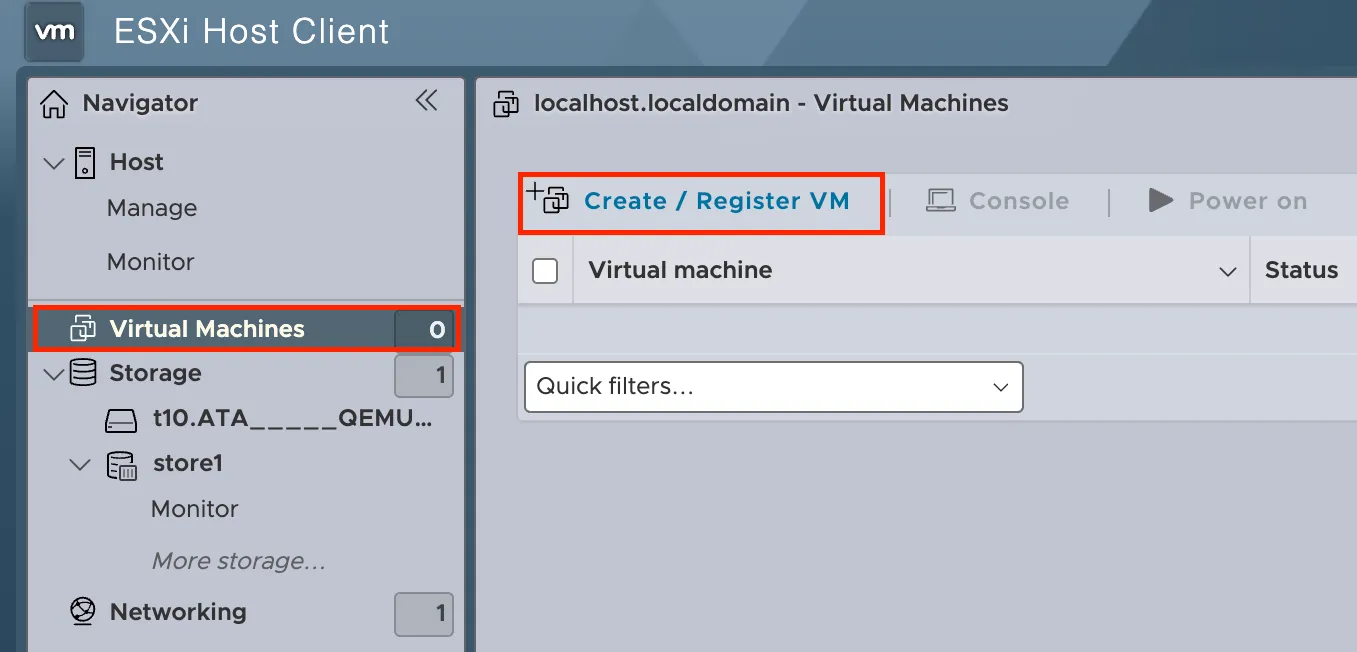
A new popup will appear, inside choose
Deploy a virtual machine from an OVF or OVA file, and click onNext. Choose a name for your VM and upload the OVA file download earlier.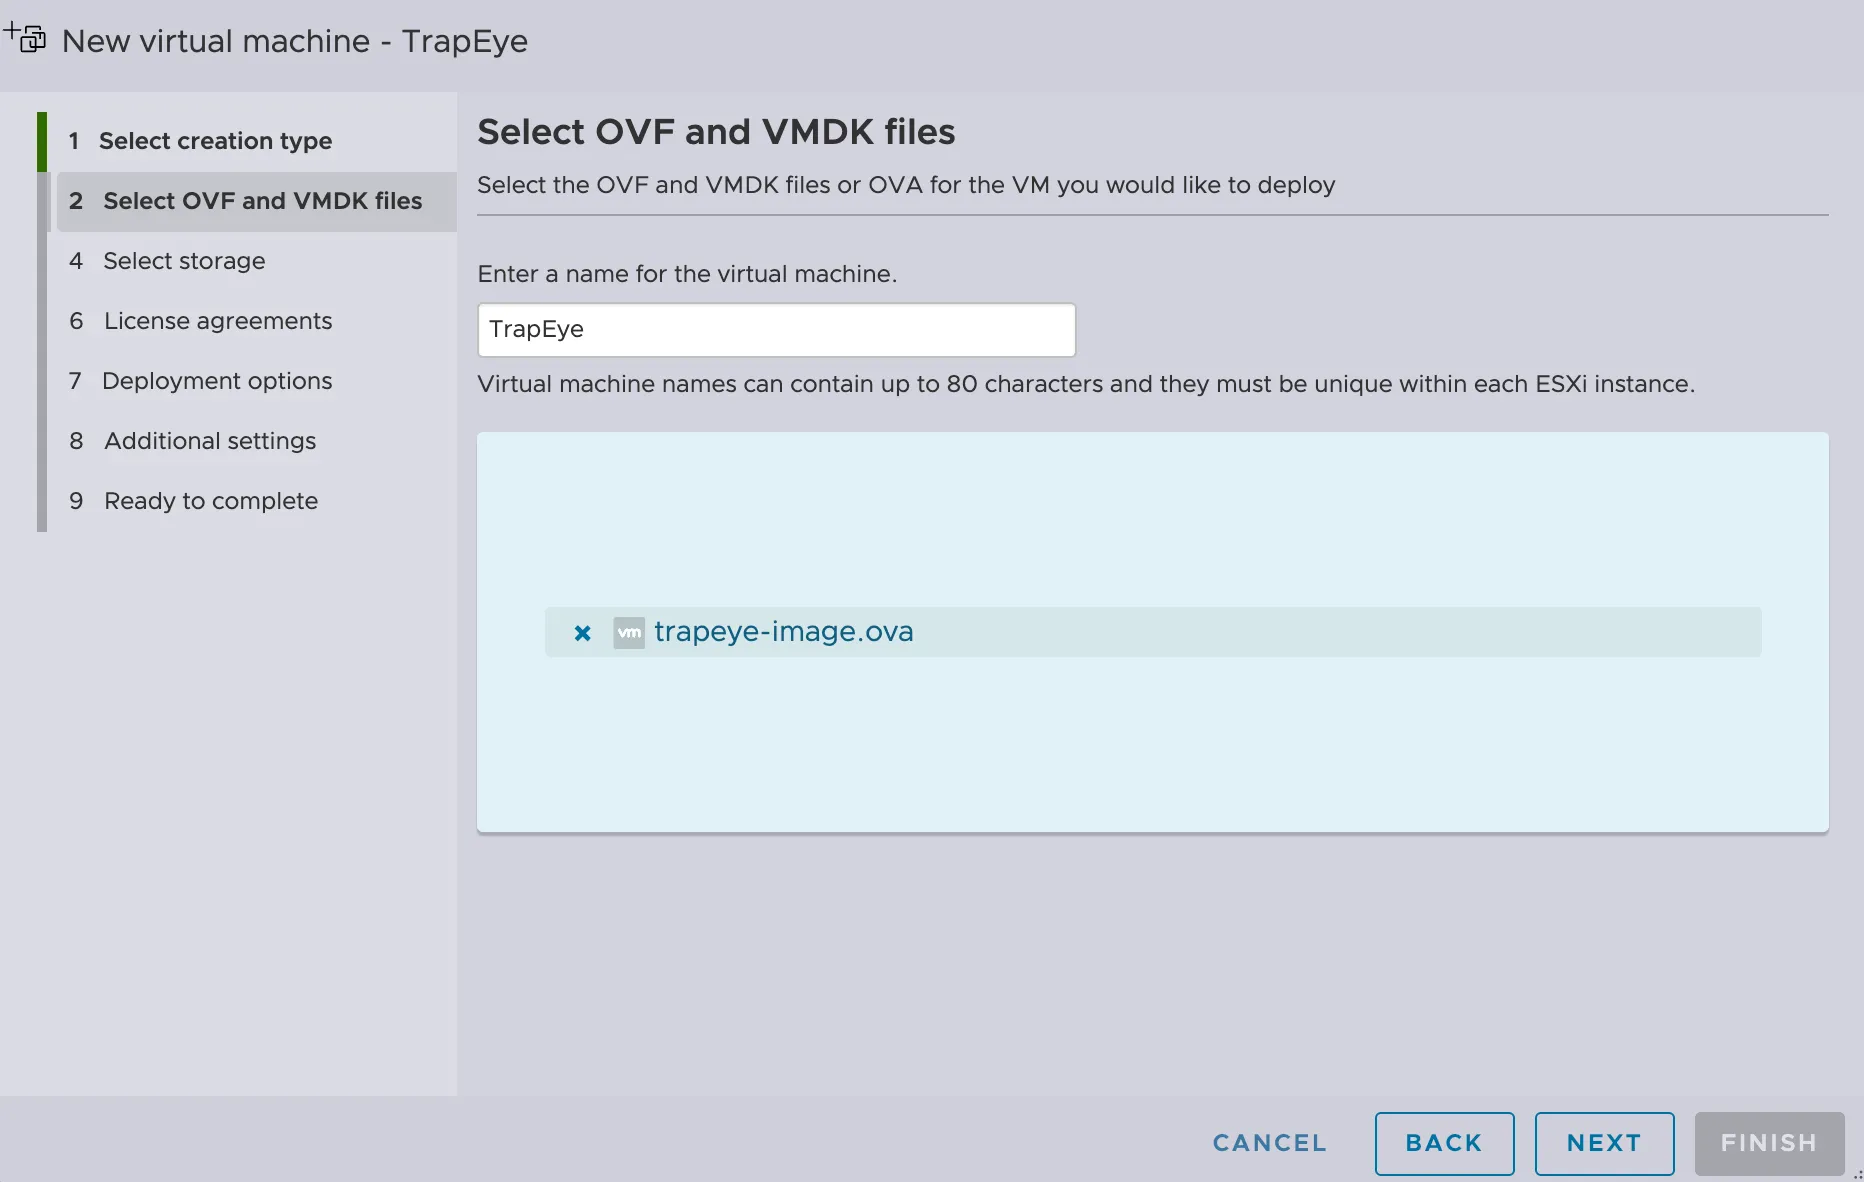
Choose a DataStore where you want to store the virtual machine.
Disable
Power on automaticallyto ensure the configuration steps can be applied correctly before the VM boots.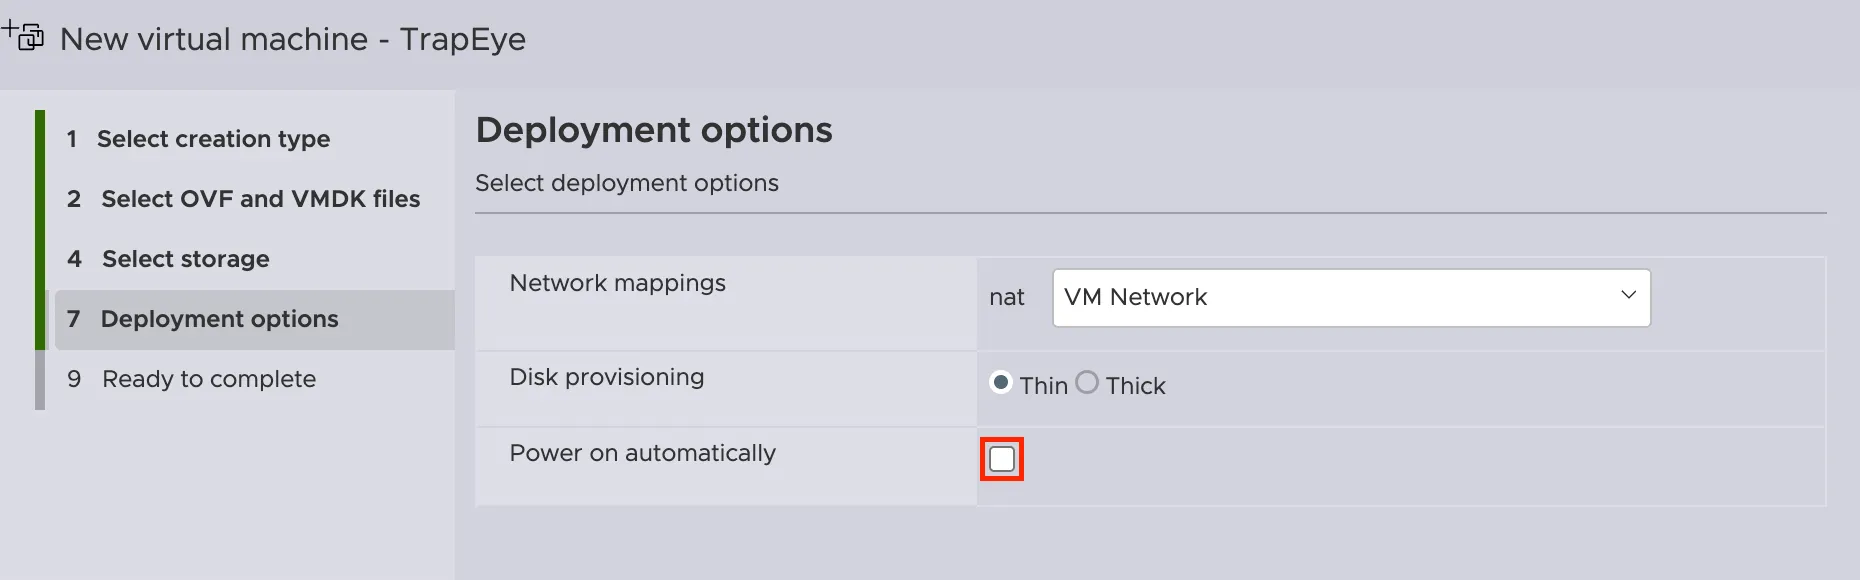
If asked, fill the CPU and Memory fields with recommended values.
Resource Minimum Value Recommended Value CPU 1 vCPUs 2 vCPUs Memory 1024 MiB (1 GB) 4096 MiB (4 GB) And fill guest OS value with the following value:
Name Value Compatibility ESXi 6.5 Virtual Machine Guest OS family Linux Guest OS version Latest 64 bits Debian version available in menu <= 13 Click finish to build the virtual machine.
TrapEye Configuration
Section titled “TrapEye Configuration”The easiest way to configure TrapEye for mass deployment and to avoid manual configuration of each VM is to use a Cloud Init config in the virtual machine.
Option 1: Cloud Init Configuration
Section titled “Option 1: Cloud Init Configuration”From the TrapEye Platform, go to Management → Installation and copy the values for
url,entity_uuid, andauth_token.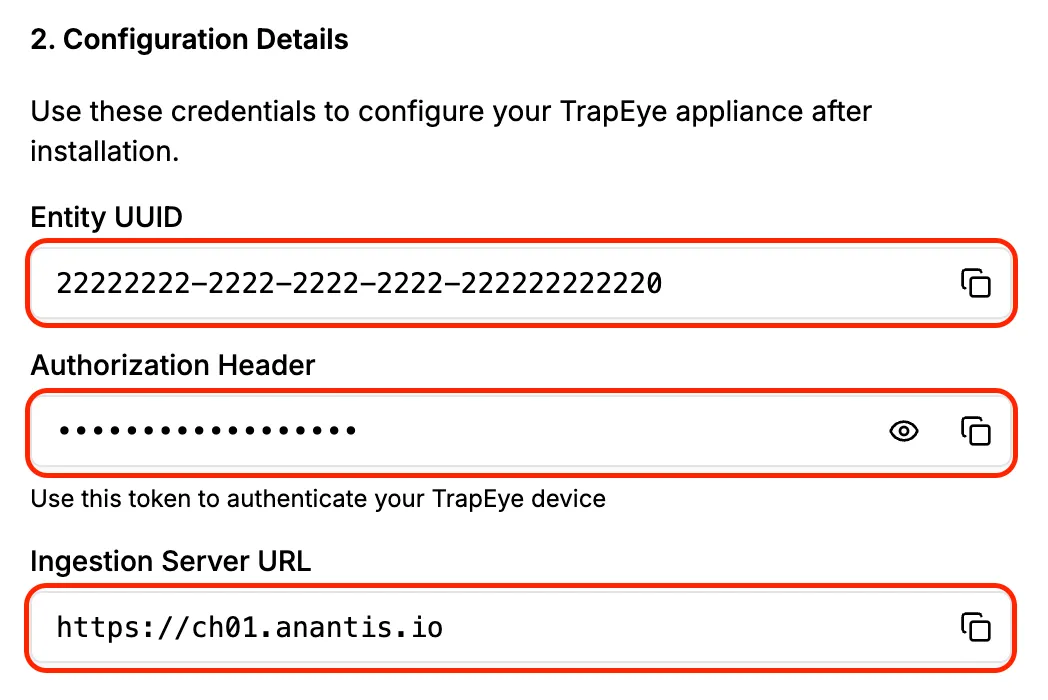
Create a
user-data.ymlfile with your specific data.cat > user-data.yml <<EOF#cloud-configwrite_files:- path: /etc/trapeye/auth-config.tomlpermissions: '0600'content: |url = "INGESTION-URL-HERE"entity_uuid = "ENTITY-UUID-HERE"auth_token = "ENTITY-TOKEN-HERE"EOFOn a Linux machine, install the
cloud-image-utilspackage, which provides the cloud-localds tool.Terminal window # On Ubuntu/Debiansudo apt updatesudo apt install cloud-image-utilsUse to generate the Cloud-Init seed ISO (
seed.iso) from youruser-data.ymlconfiguration.Terminal window cloud-localds seed.iso ./user-data.ymlConnect to your ESXi Web Client. In
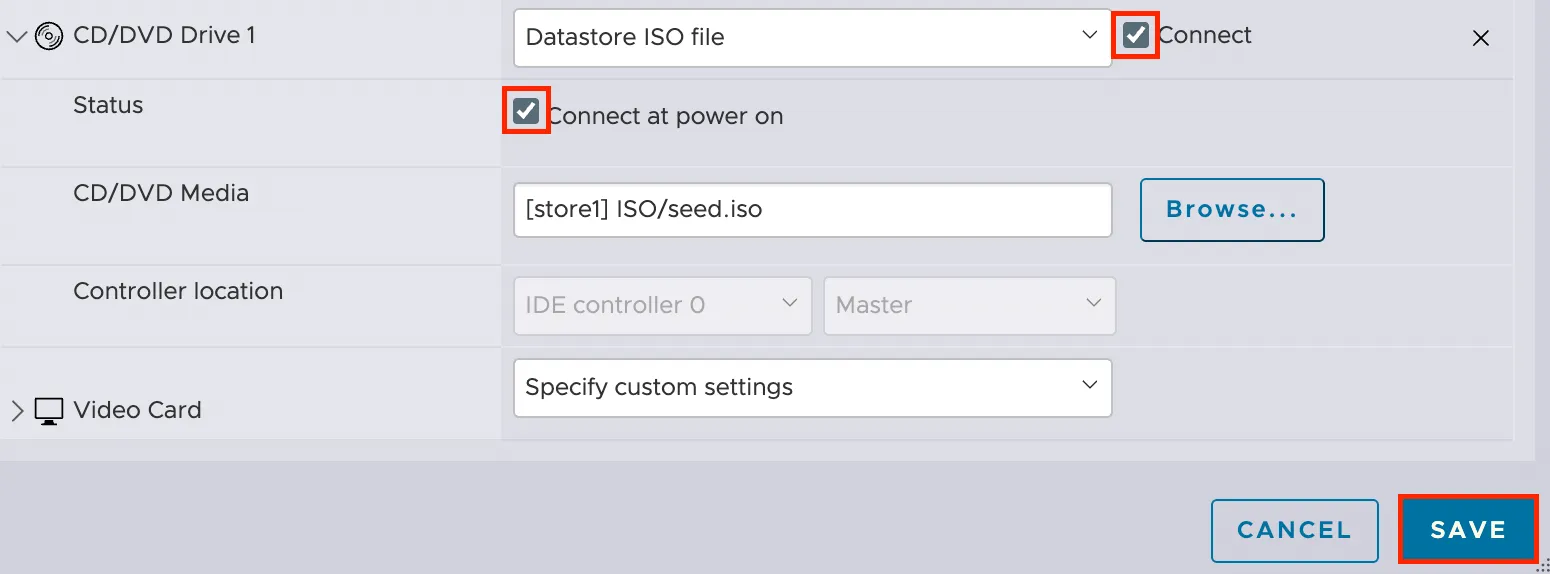
Virtual Machinesmenu, edit settings of your current virtual machine before its first boot.Add a CD/DVD drive if not any, then select
Datastore ISO file. In the new popup, upload yourseed.isofile and select it.
In advanced settings of CD/DVD drive, enable the 2 following options :
- Connect
- Connect at power on
Then click on Save.
Option 2: Manual Configuration via HTTPS
Section titled “Option 2: Manual Configuration via HTTPS”By default, if Cloud Init does not push the /etc/trapeye/auth-config.toml file, TrapEye service boot in Manual Config Mode and allow you to connect to it via its IP Address (DHCP by default).
Start the virtual machine and find its IP Address
From the TrapEye Platform, go to Management → Installation and copy the values for
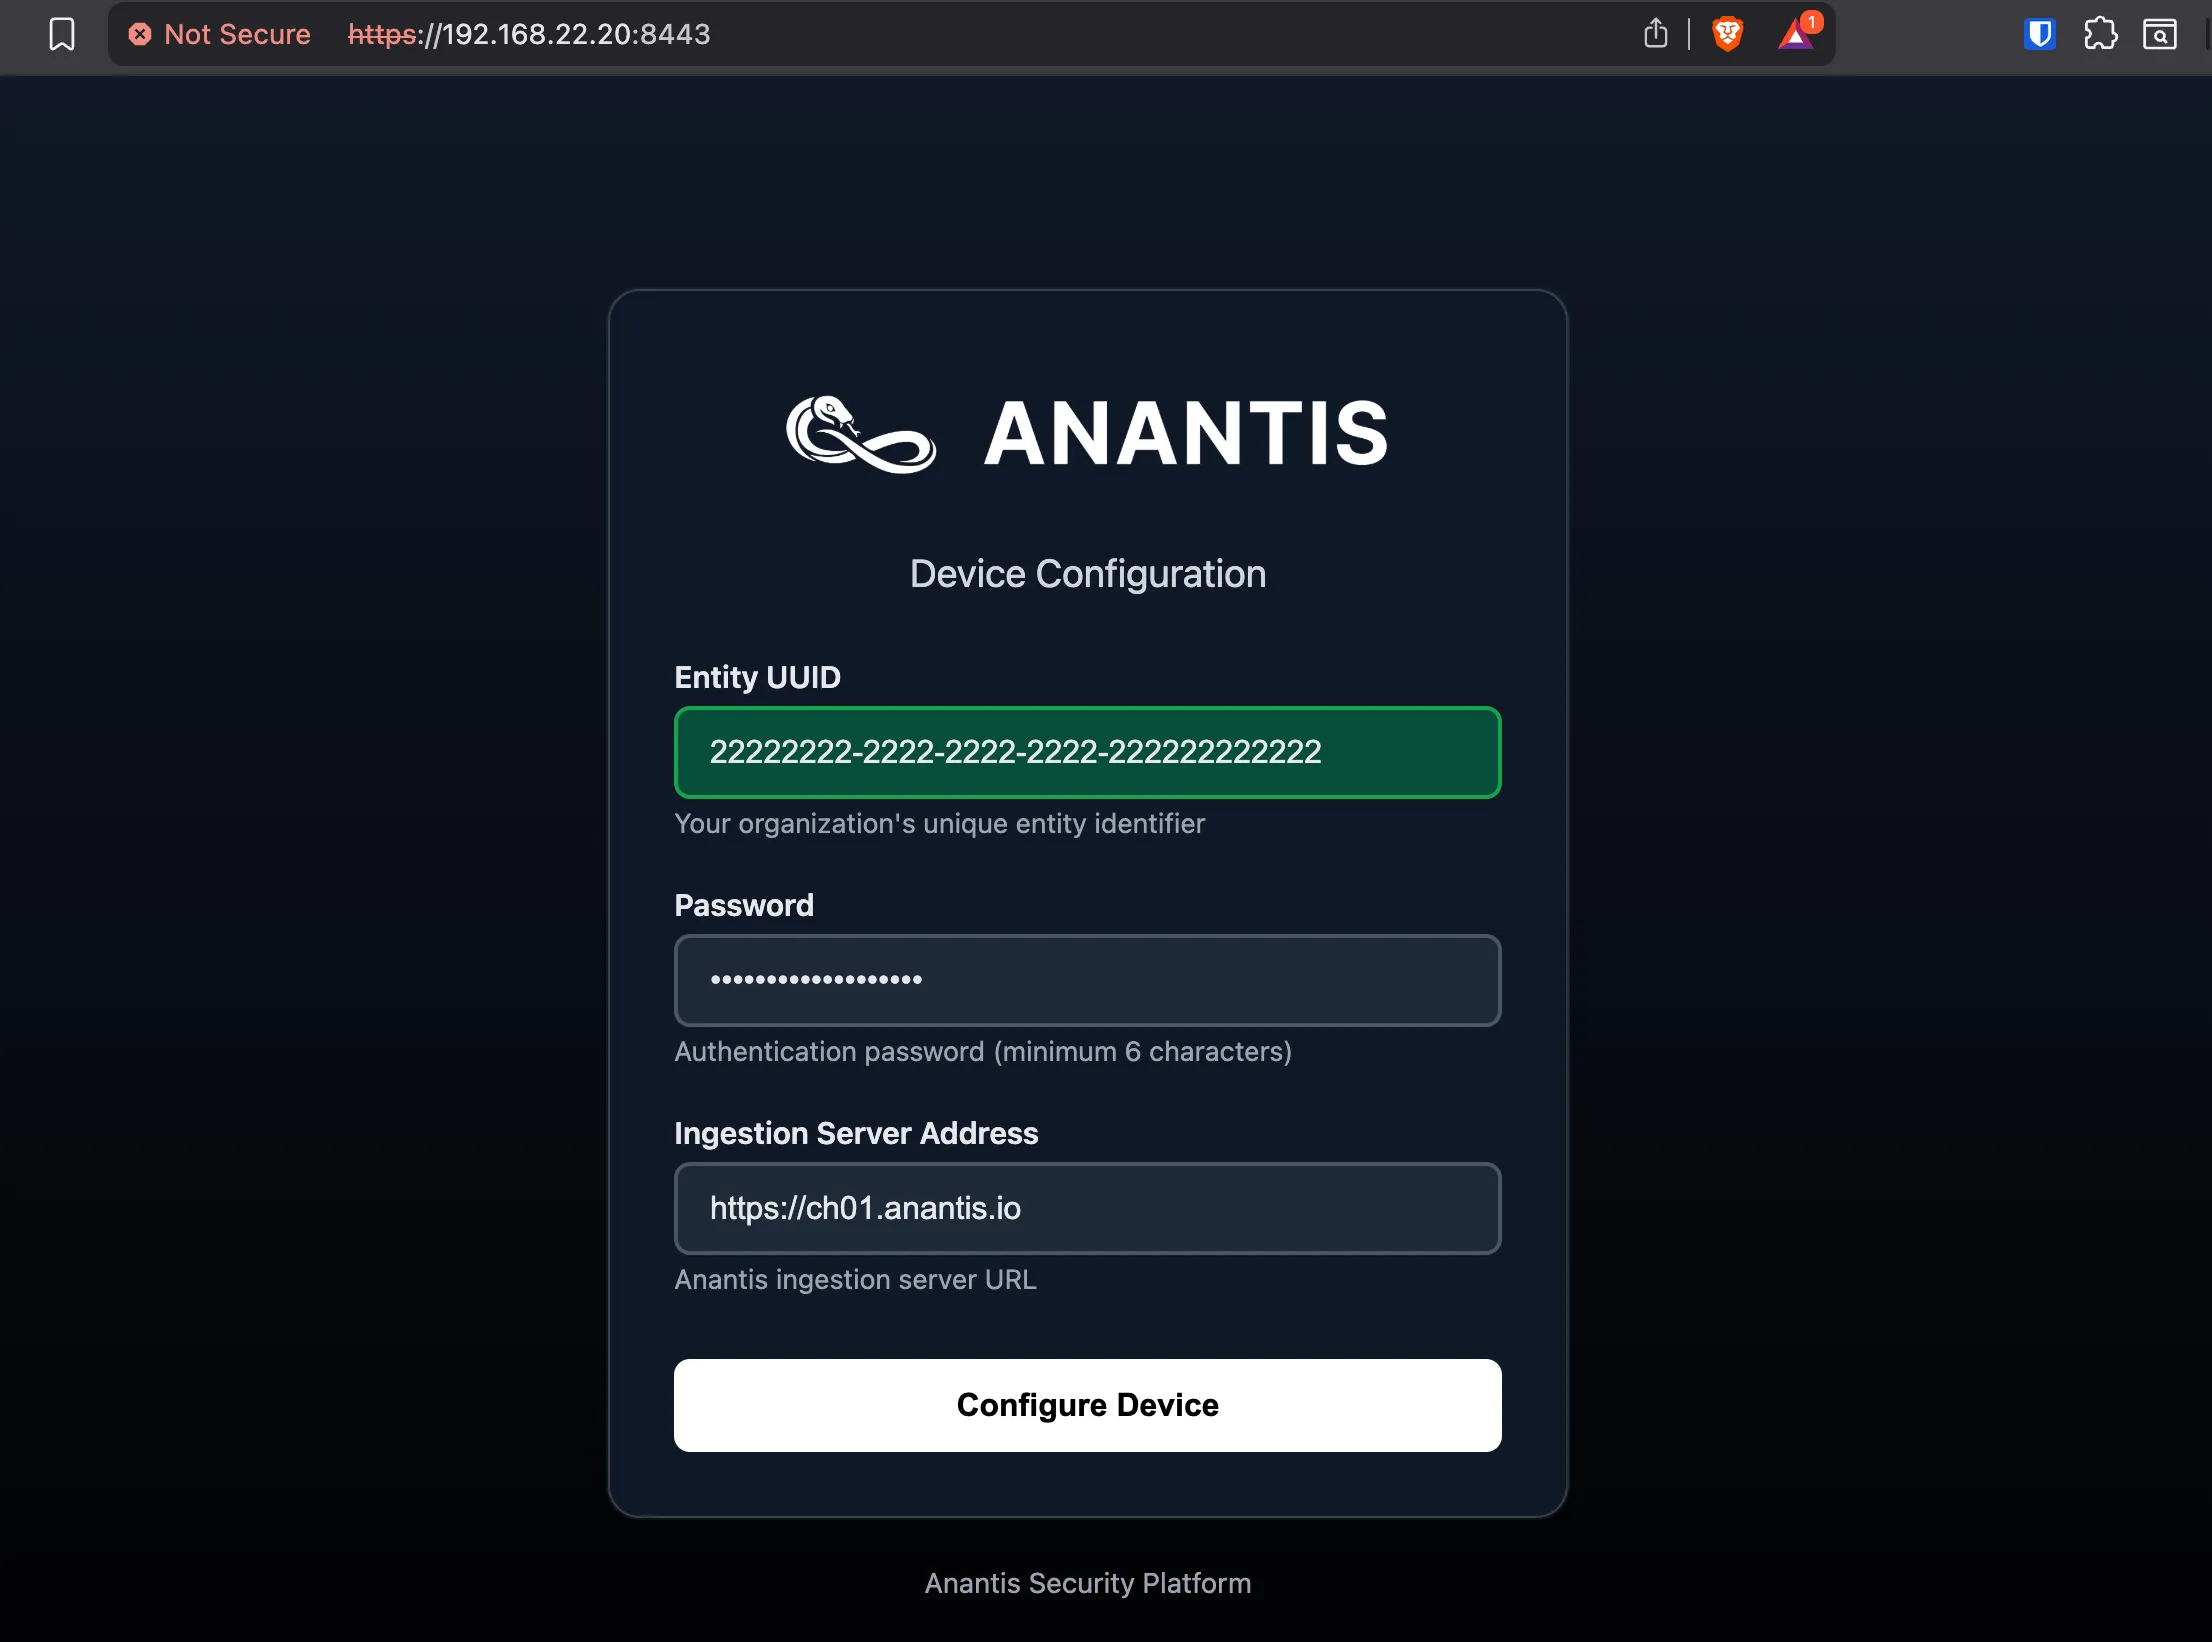
url,entity_uuid, andauth_token.Connect to the TrapEye Manual Config Web Page by navigating to
https://<your_vm_ip>:8443Ignore the TLS warning as this is a temporary self-signed certificate and fill the form with your 3 custom value copied earlier:
Setup complete
Section titled “Setup complete”Your TrapEye virtual machine has been successfully deployed on vSphere/ESXi.
It will now appear in the Devices section of the TrapEye Deception Platform, and you will begin receiving real-time alerts as soon as any activity is detected.