

Splunk Integration
Integrate TrapEye with Splunk using the HTTP Event Collector (HEC) to forward threats and interactions in real-time.
Splunk Configuration
Section titled “Splunk Configuration”Go to Settings → Data Inputs inside Splunk.
Click Add new in HTTP Event Collector card.
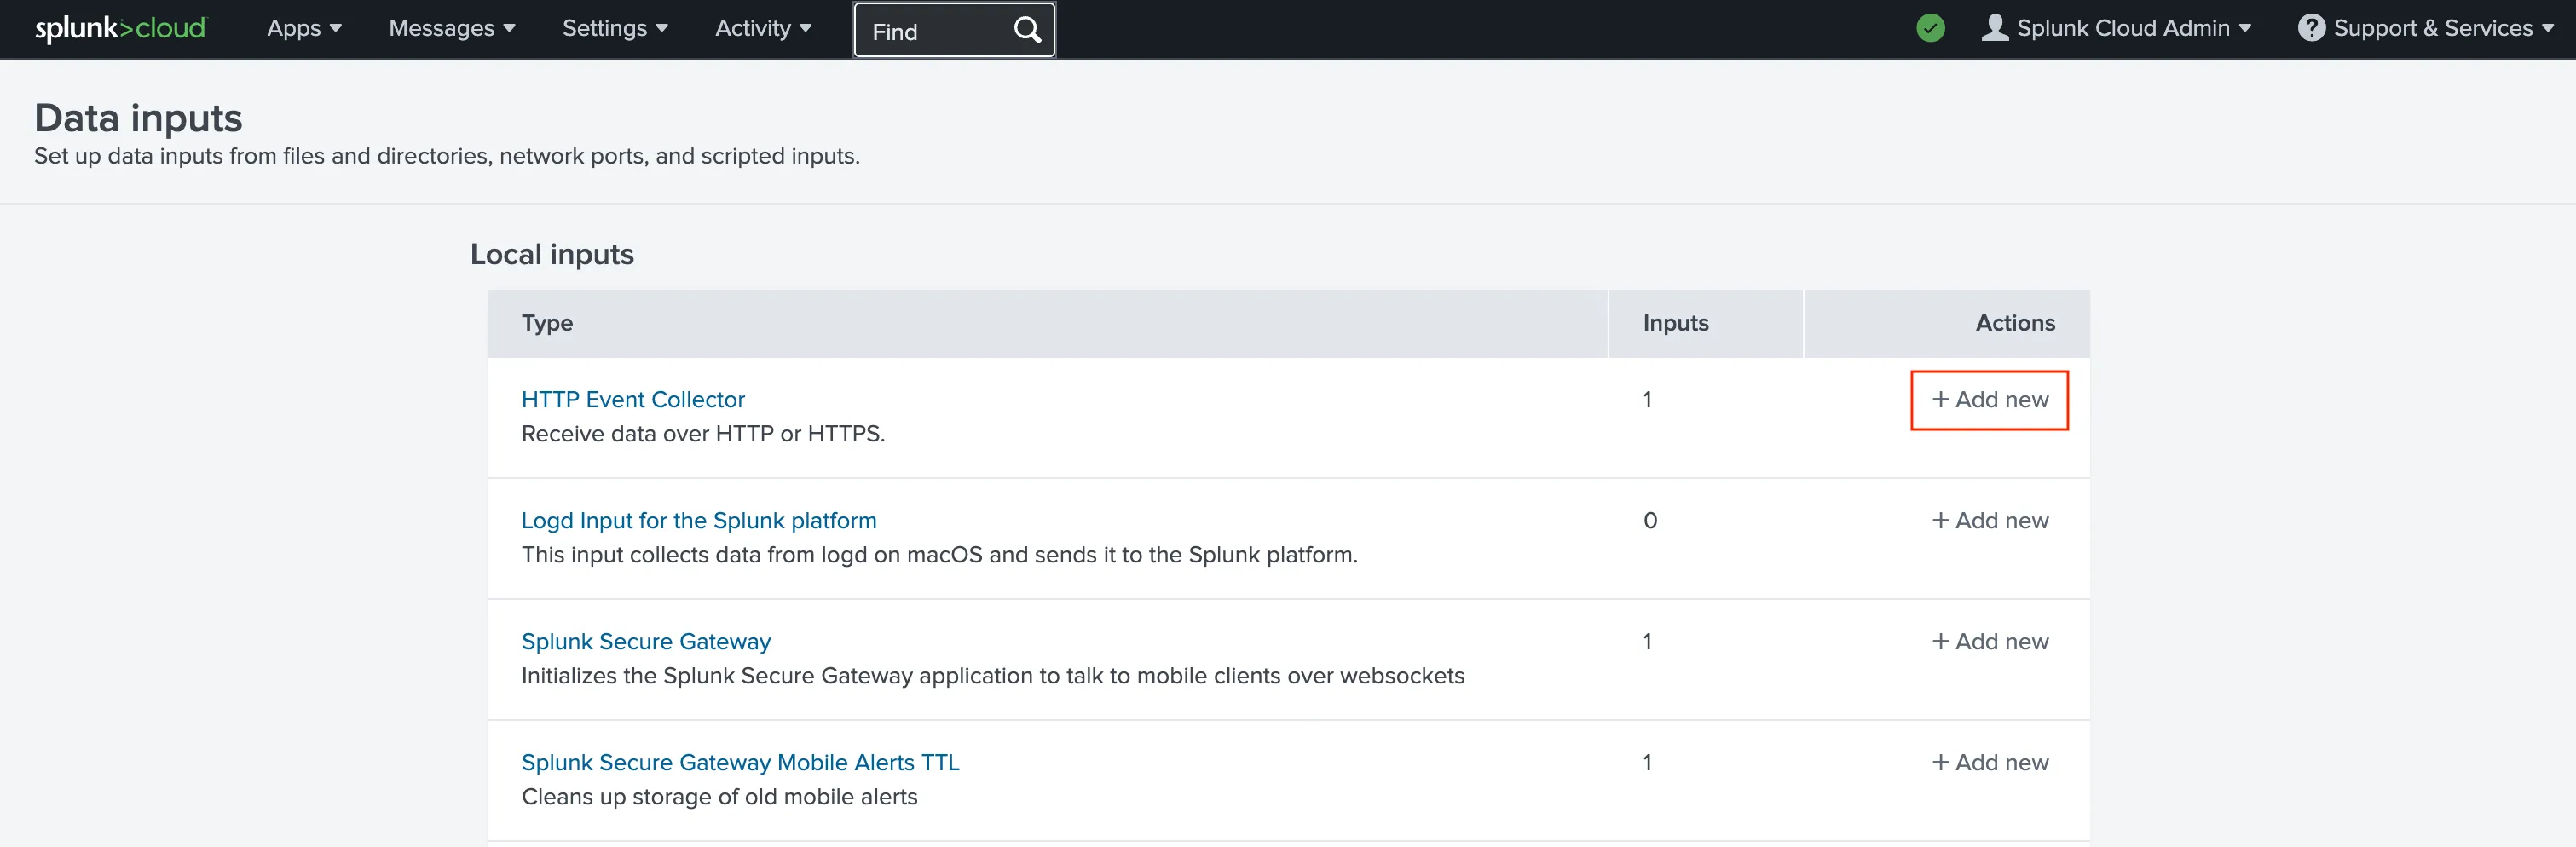
Choose a Name for the token and click Next.
In Source type, select:
_jsonThen click Review.
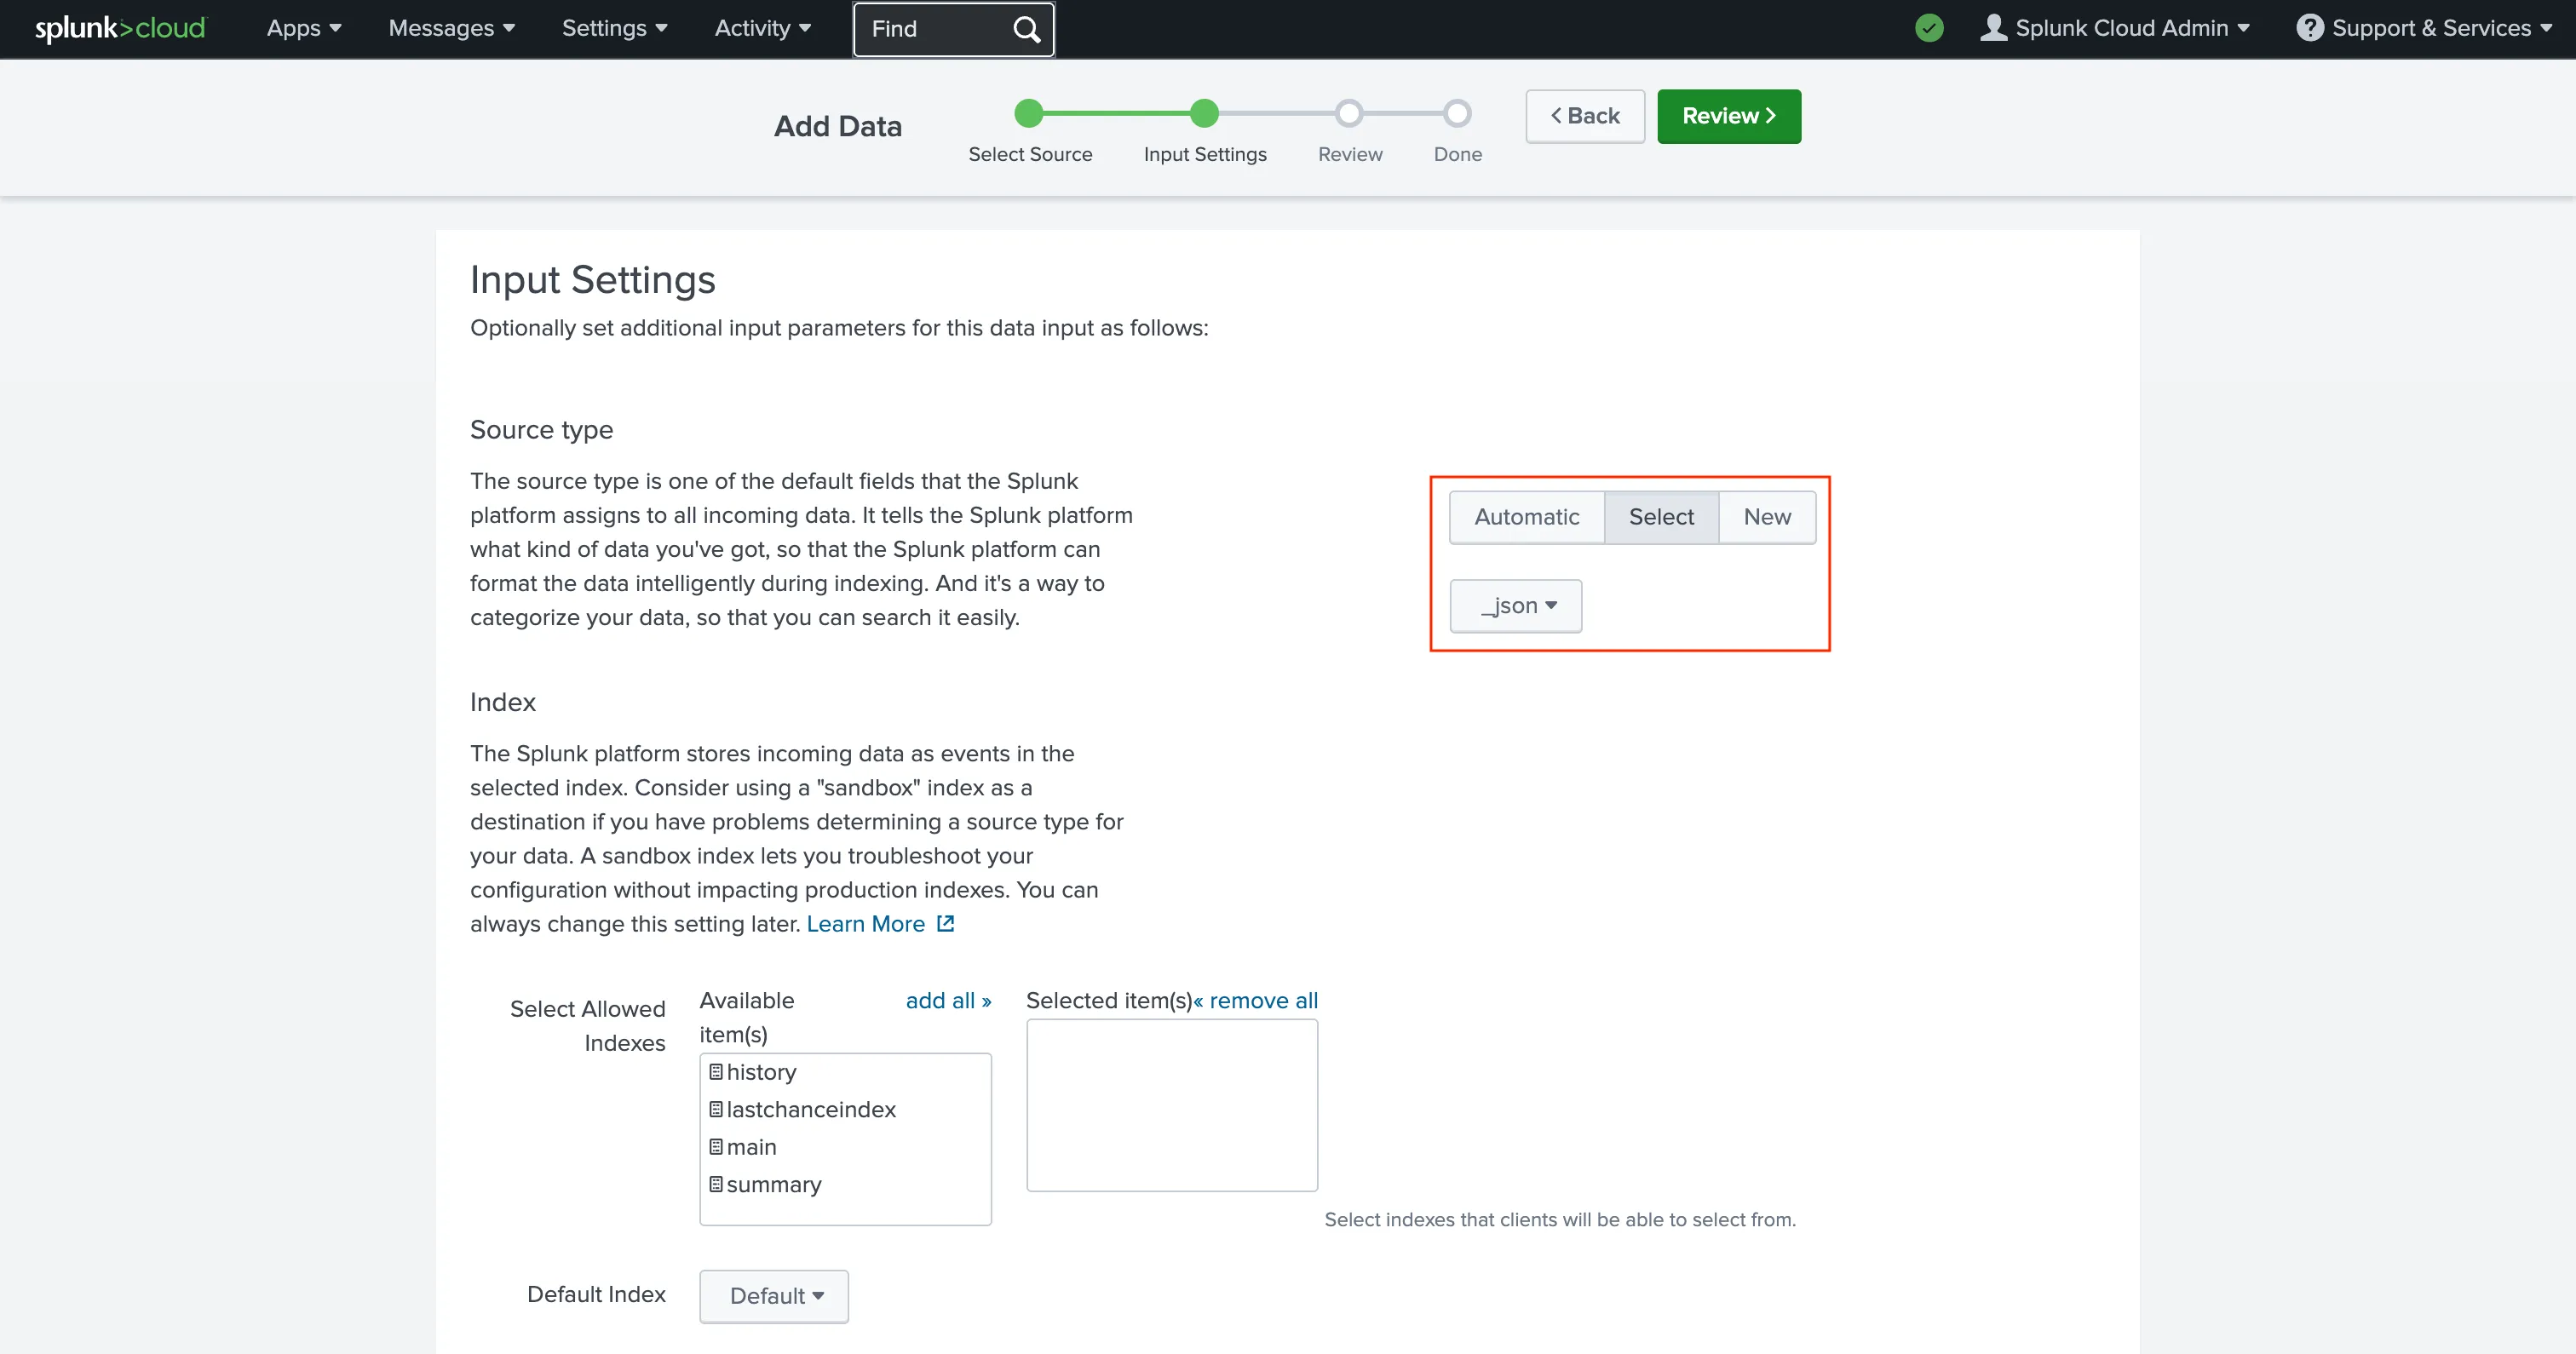
Review the configuration and click Submit.
Copy the generated Token value — you will need it for TrapEye.
TrapEye Configuration
Section titled “TrapEye Configuration”Your Splunk HEC endpoint follows this format:
https://<host>.splunkcloud.com:8088/services/collectorExample
If your tenant URL is:
https://prd-p-tsr58.splunkcloud.com/Then your HEC endpoint is:
https://prd-p-tsr58.splunkcloud.com:8088/services/collectorLog in to the TrapEye Platform.
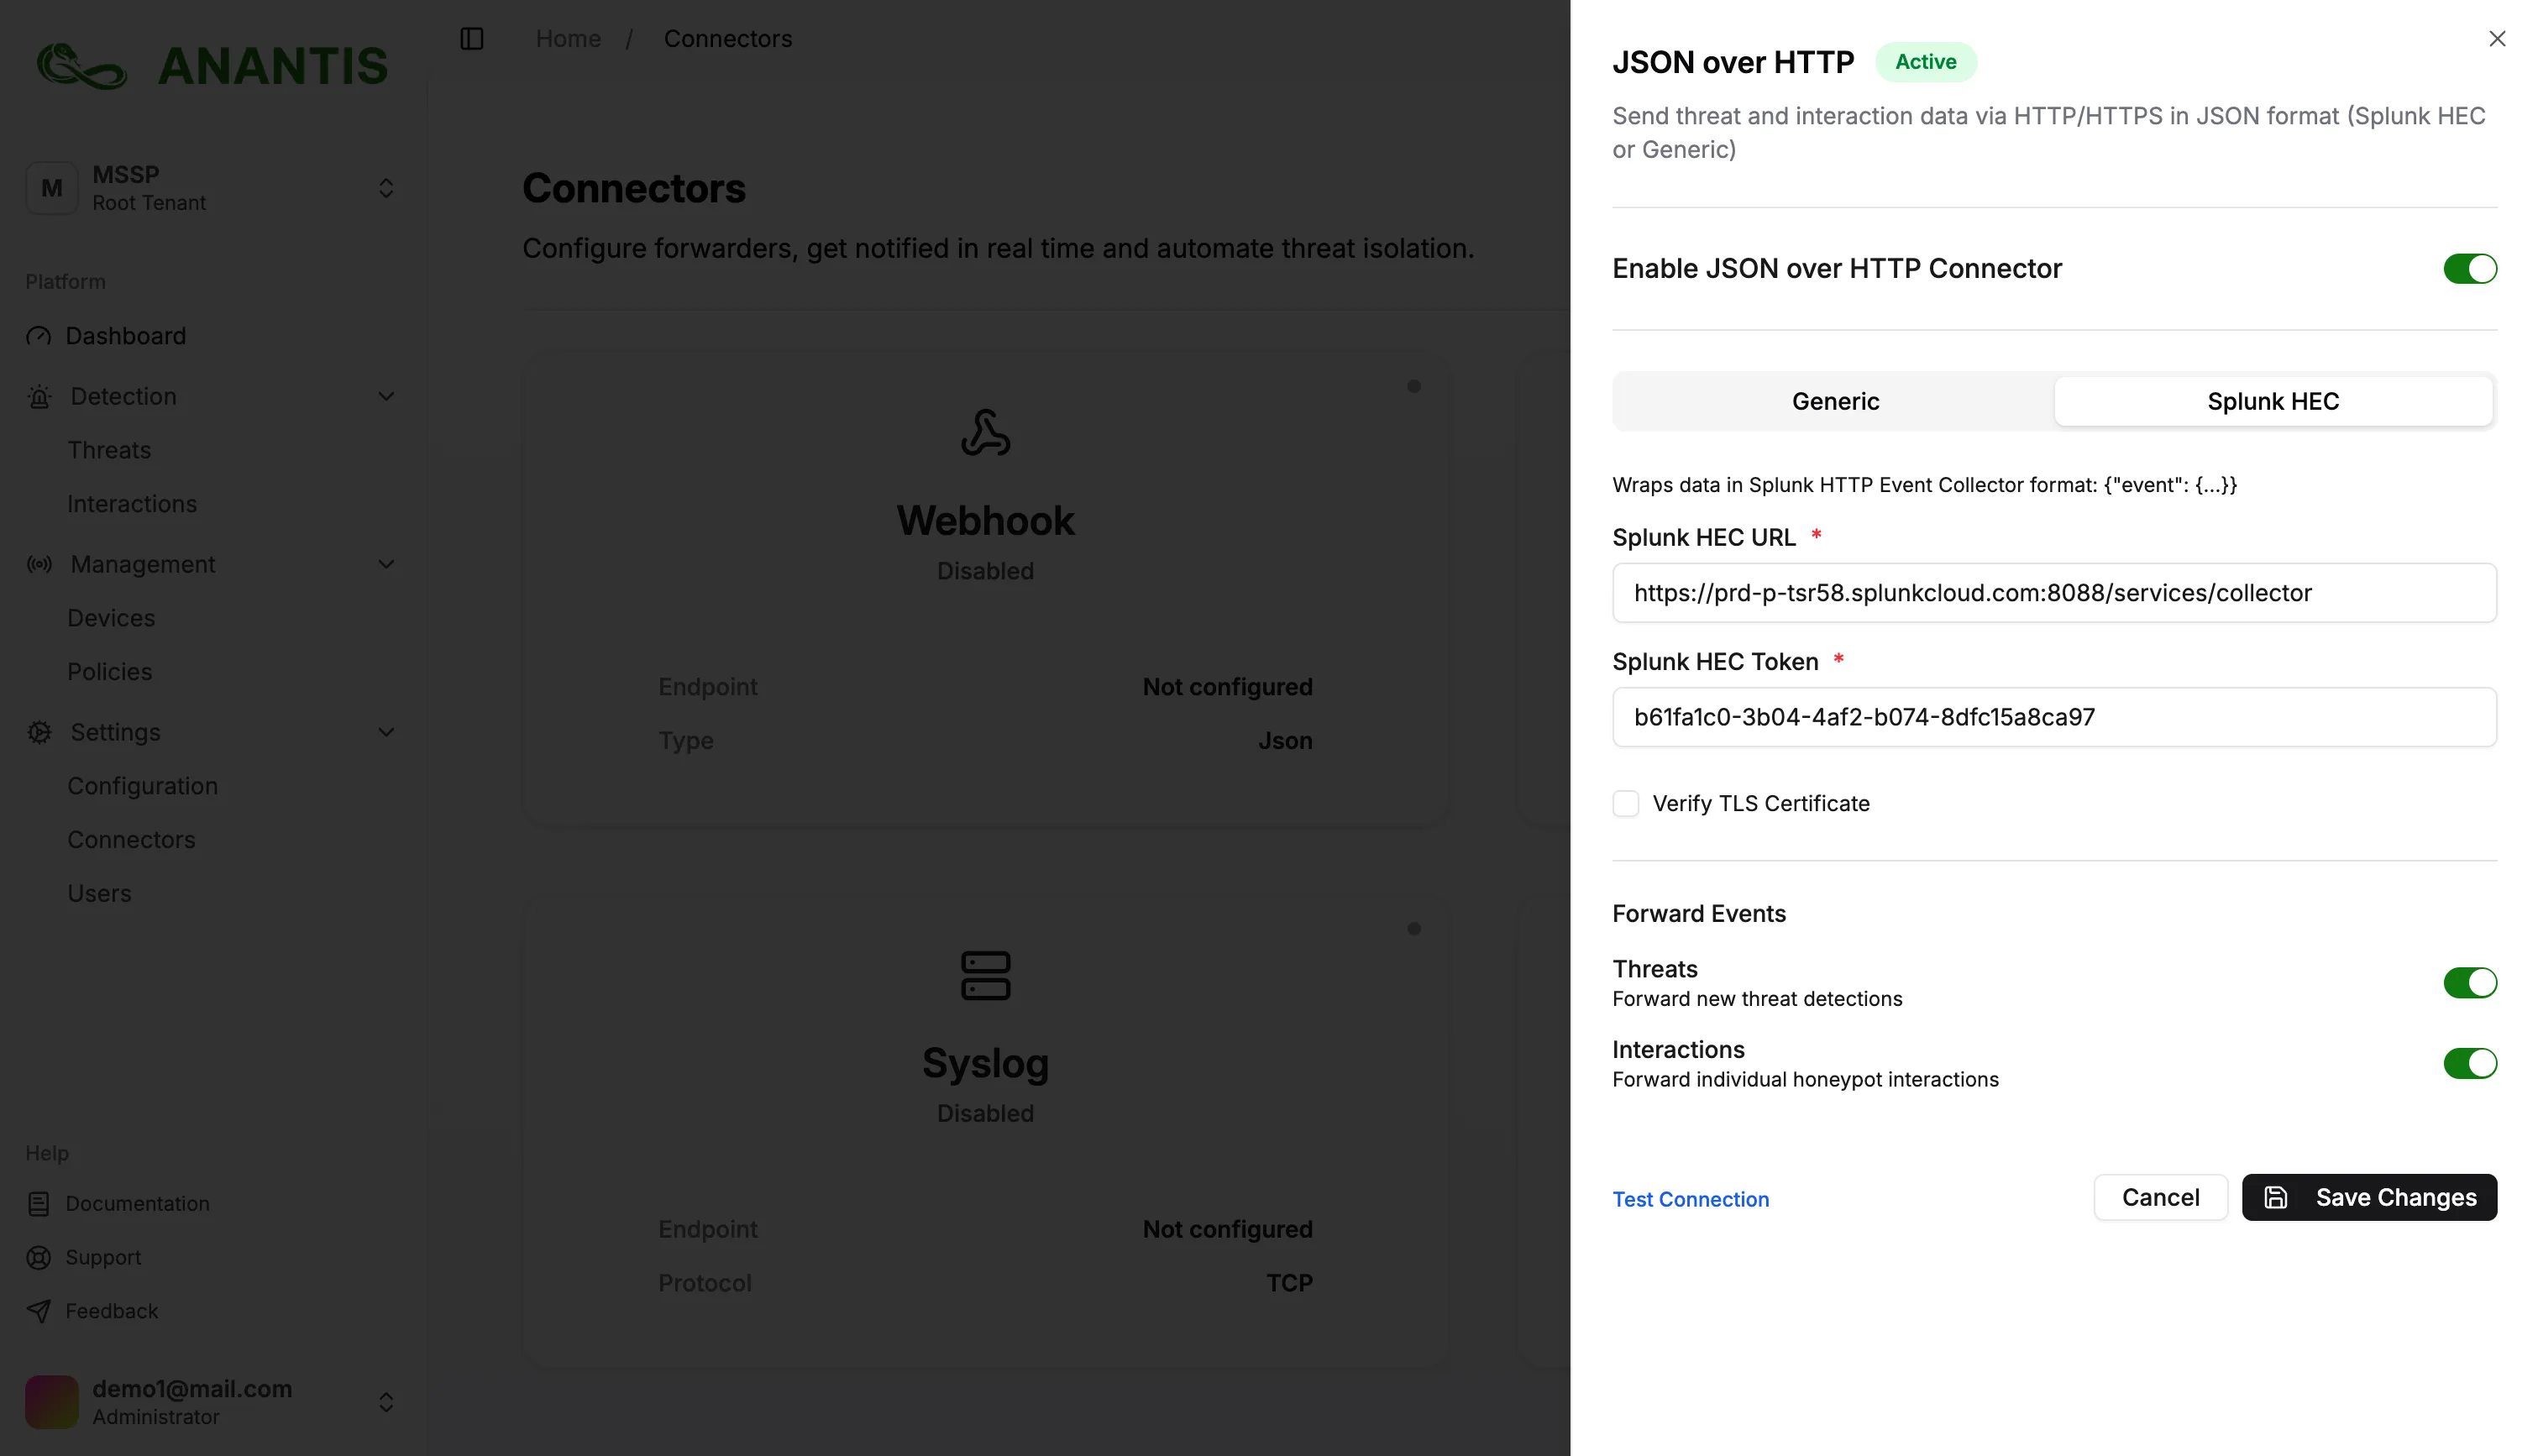
Navigate to the Connectors section.
Choose JSON over HTTP.
Fill in Endpoint URL (your HEC collector URL) and Token (copied from Splunk)
If your Splunk instance uses a self-signed certificate, uncheck:
Verify TLS CertificateClick Save Changes.
Verify Log Flow
Section titled “Verify Log Flow”Once your connector is enabled, click Test Connection.
If everything is correct, TrapEye will display:“Test event sent successfully.”
In Splunk, verify that events are received using:
index=* event="new_threat"You should now see TrapEye events arriving.

If you enabled the Forward Interactions option in TrapEye, you will also see an interaction event with this search:
index=* event="new_interaction"
Integration Complete
Section titled “Integration Complete”TrapEye is now successfully connected to Splunk via HTTP Event Collector.
You should begin receiving real-time threat and interaction events in your Splunk environment.