

Configure SSO with Microsoft Entra ID
Set up Single Sign-On (SSO) in TrapEye by creating an application in Microsoft Entra ID and linking it to TrapEye through the OpenID Connect (OIDC) protocol.
Create an Application in Entra ID
Section titled “Create an Application in Entra ID”Initial Setup
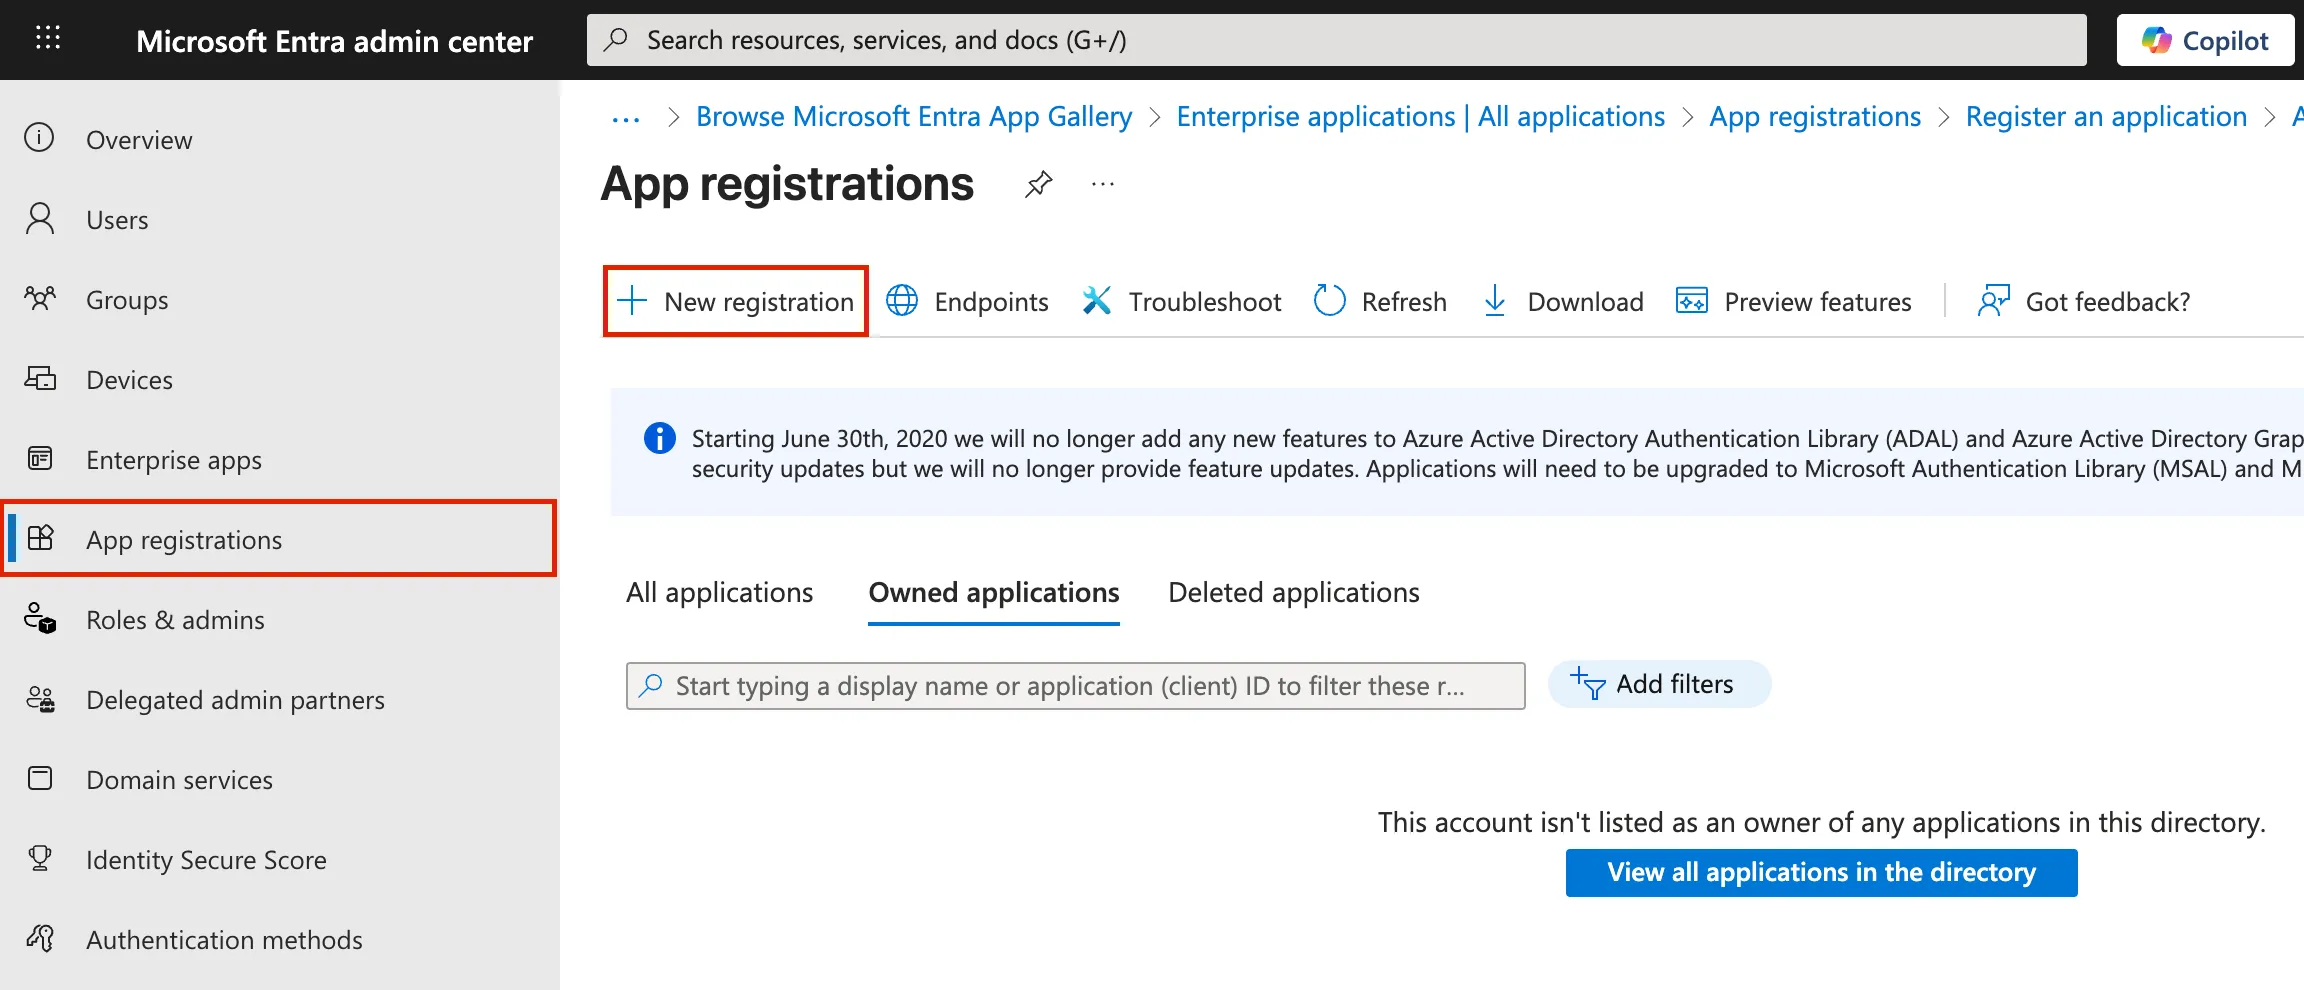
Section titled “Initial Setup”In the Microsoft Entra portal, navigate to App registrations → New registration.
Enter a name for your application (e.g.
TrapEye SSO).Under Supported account types, select:
Accounts in this organizational directory only
Under Redirect URI, choose Web and enter the following value:
https://trapeye.anantis.io/api/auth/oidc/callbackThis URL is the callback endpoint Azure uses to redirect users after a successful authentication.
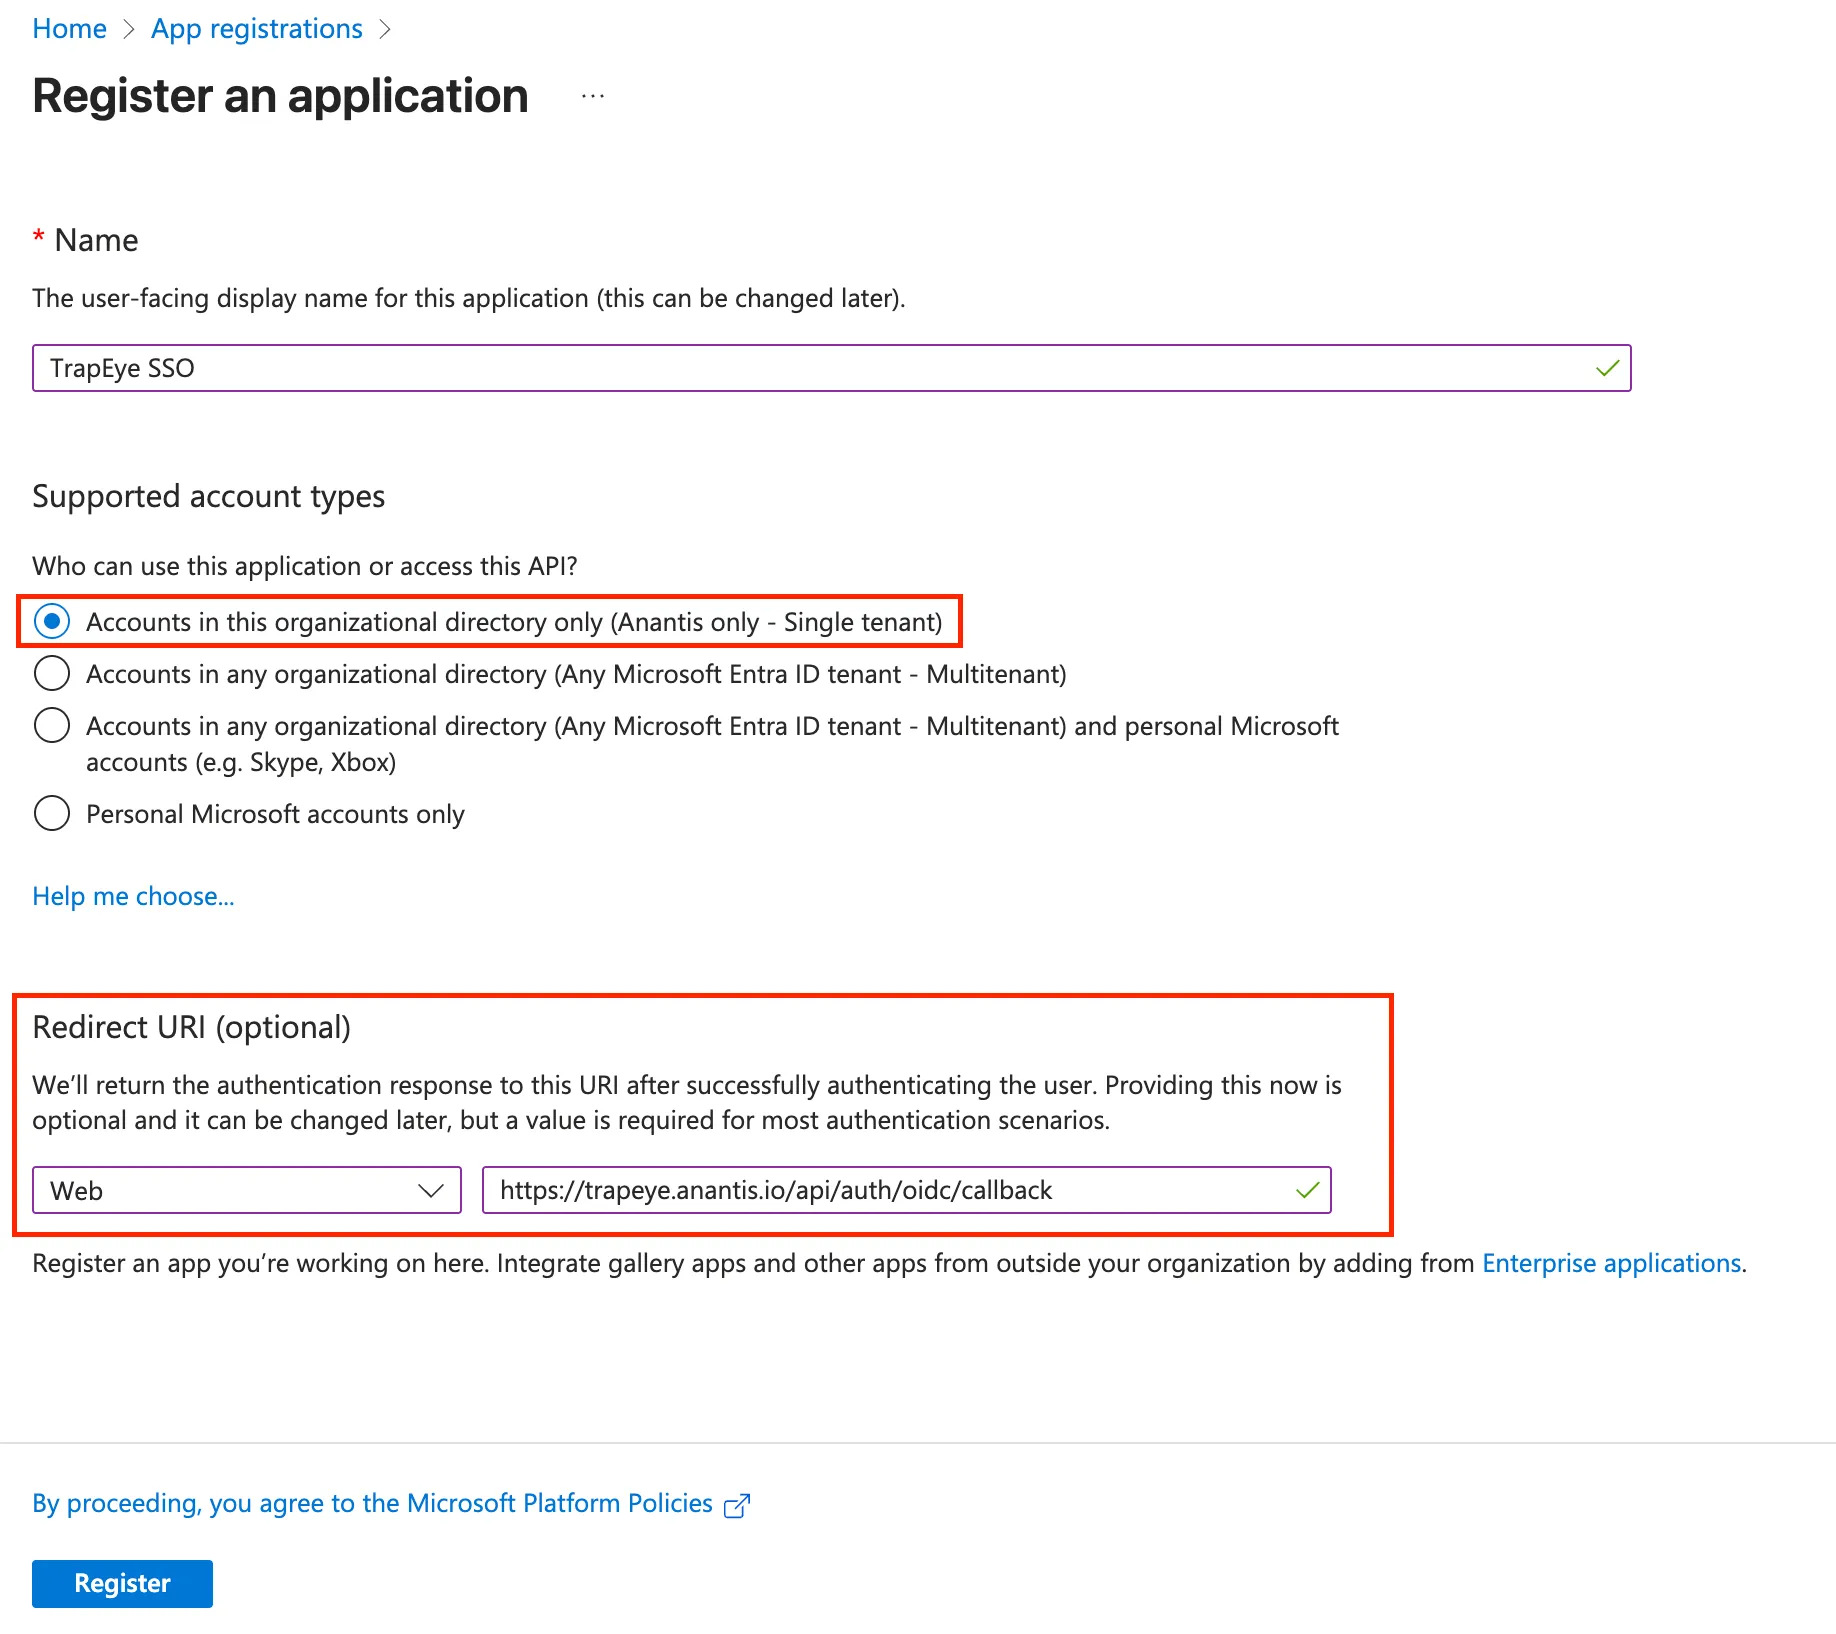
Click Register to create the application.
Configure API Permissions
Section titled “Configure API Permissions”From your newly created application, go to the API permissions menu.
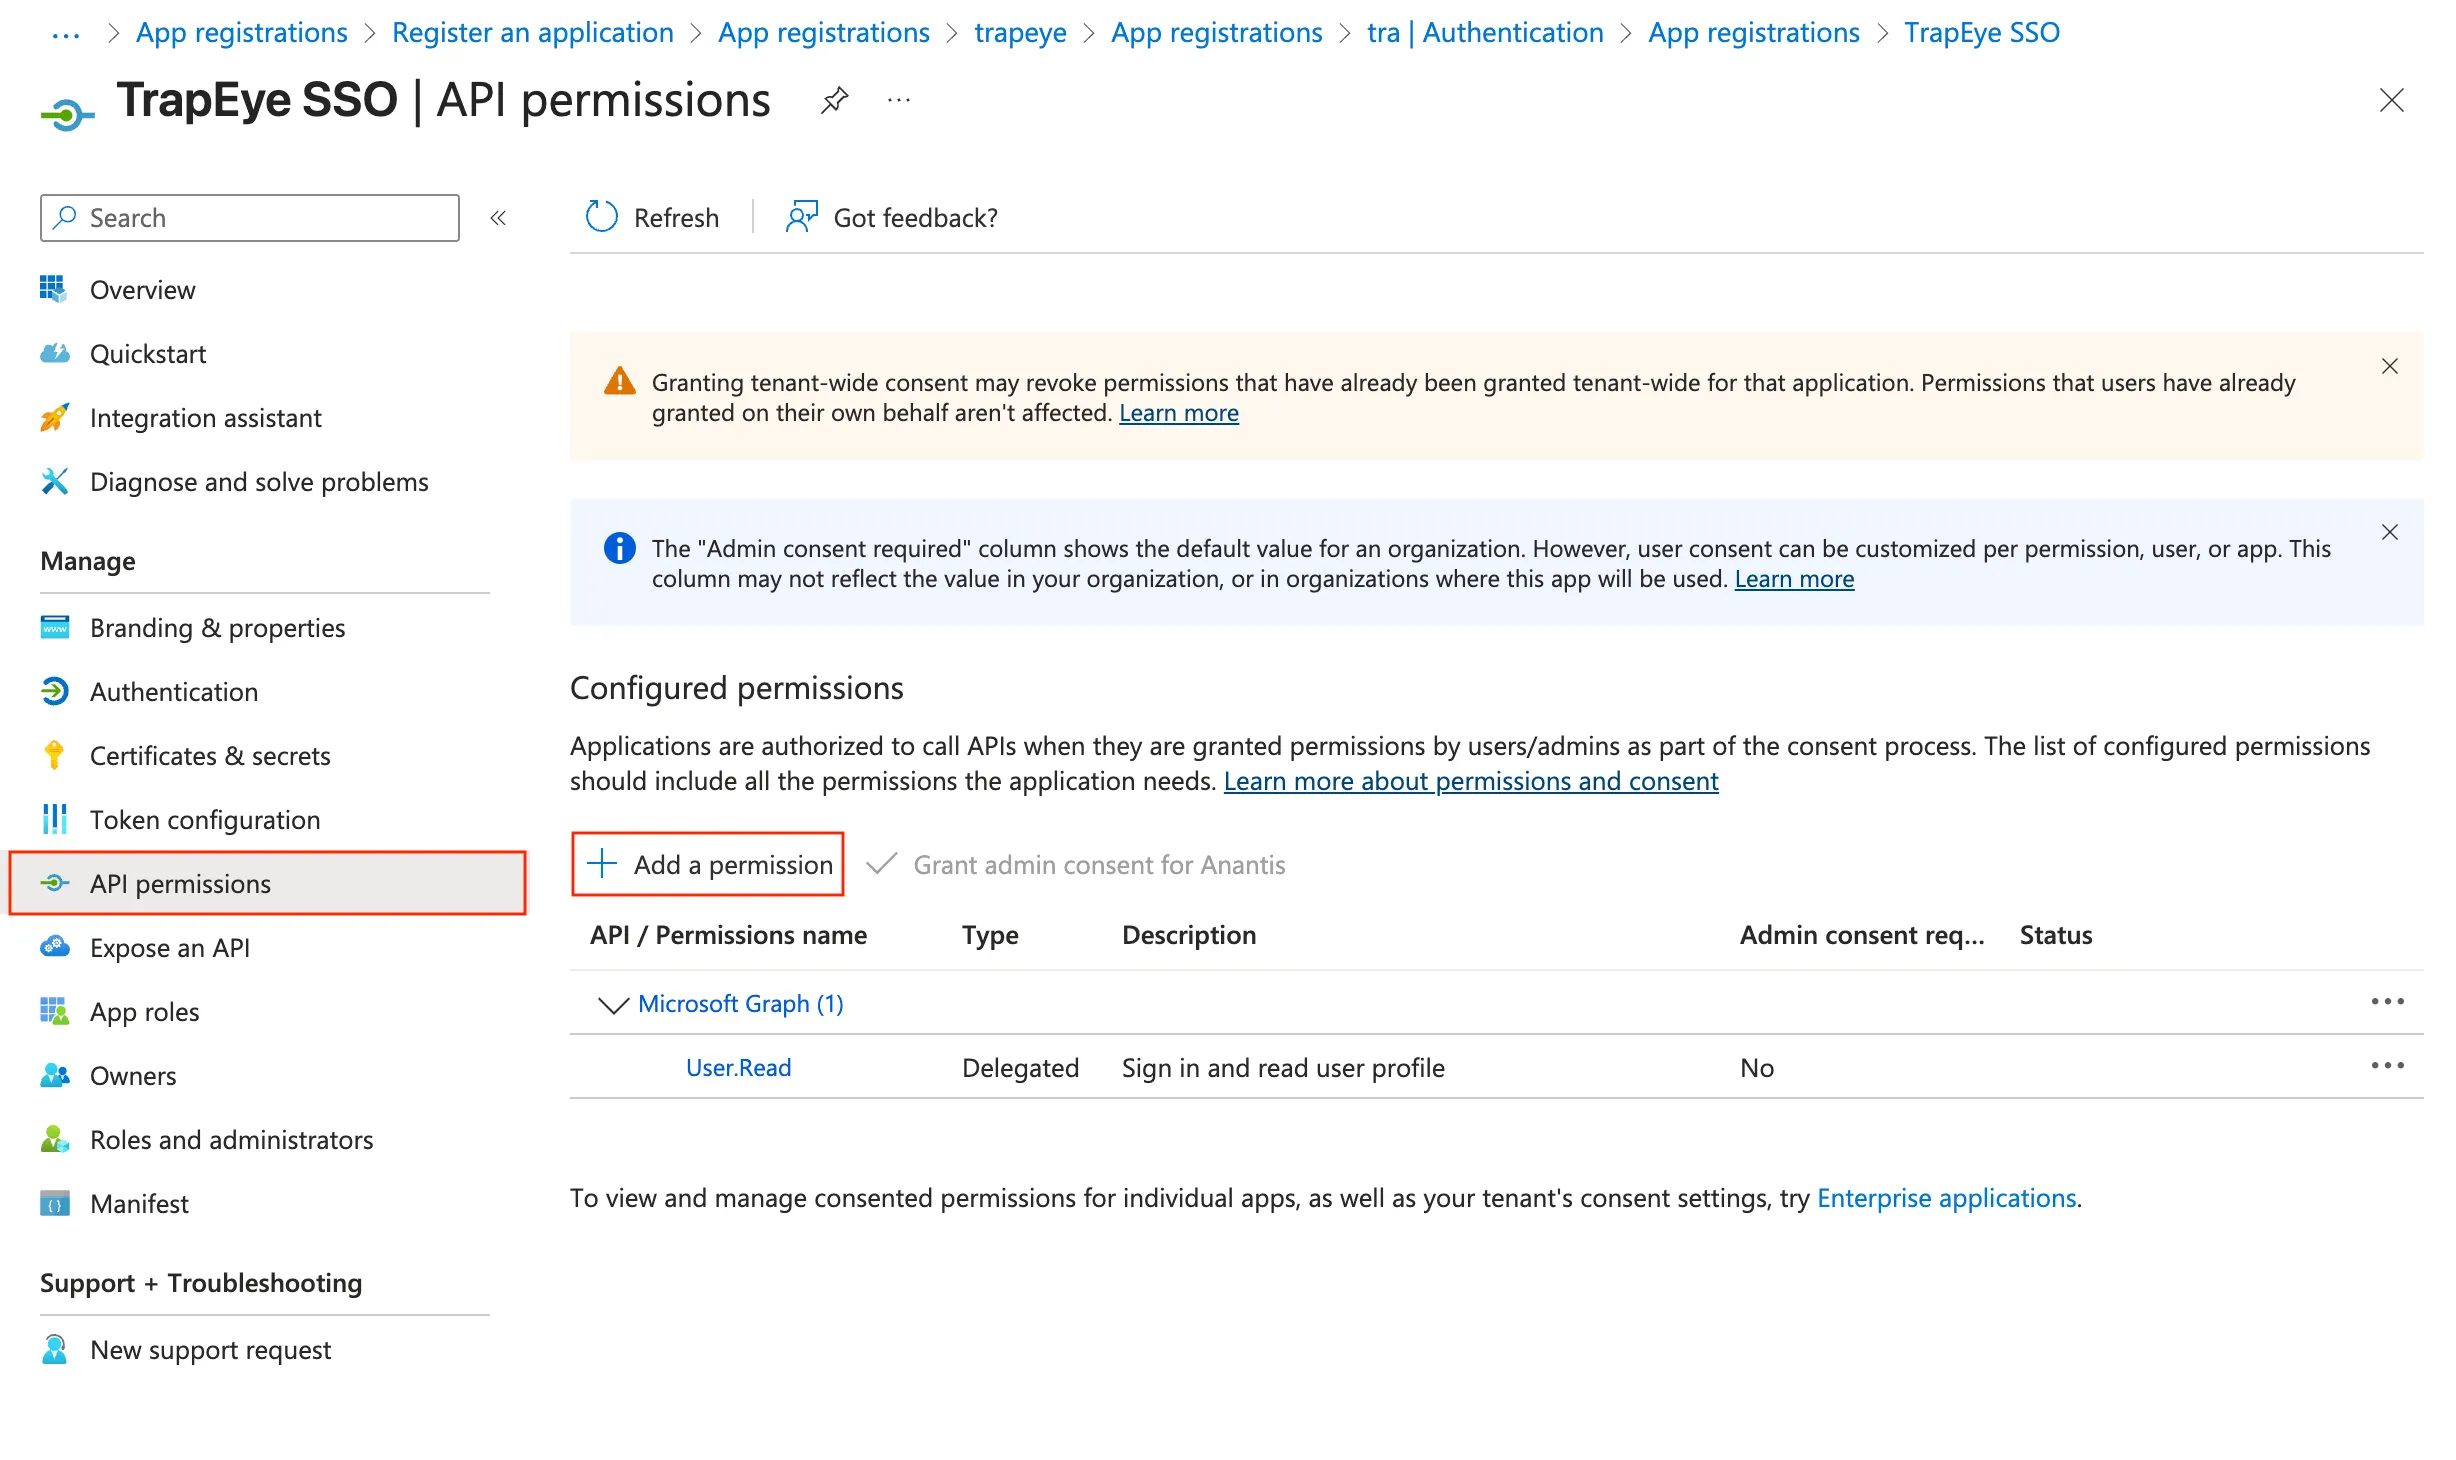
Click Add a permission → Microsoft Graph → Delegated permissions.
In the OpenID permissions section, select the following permissions:
openidprofileemail
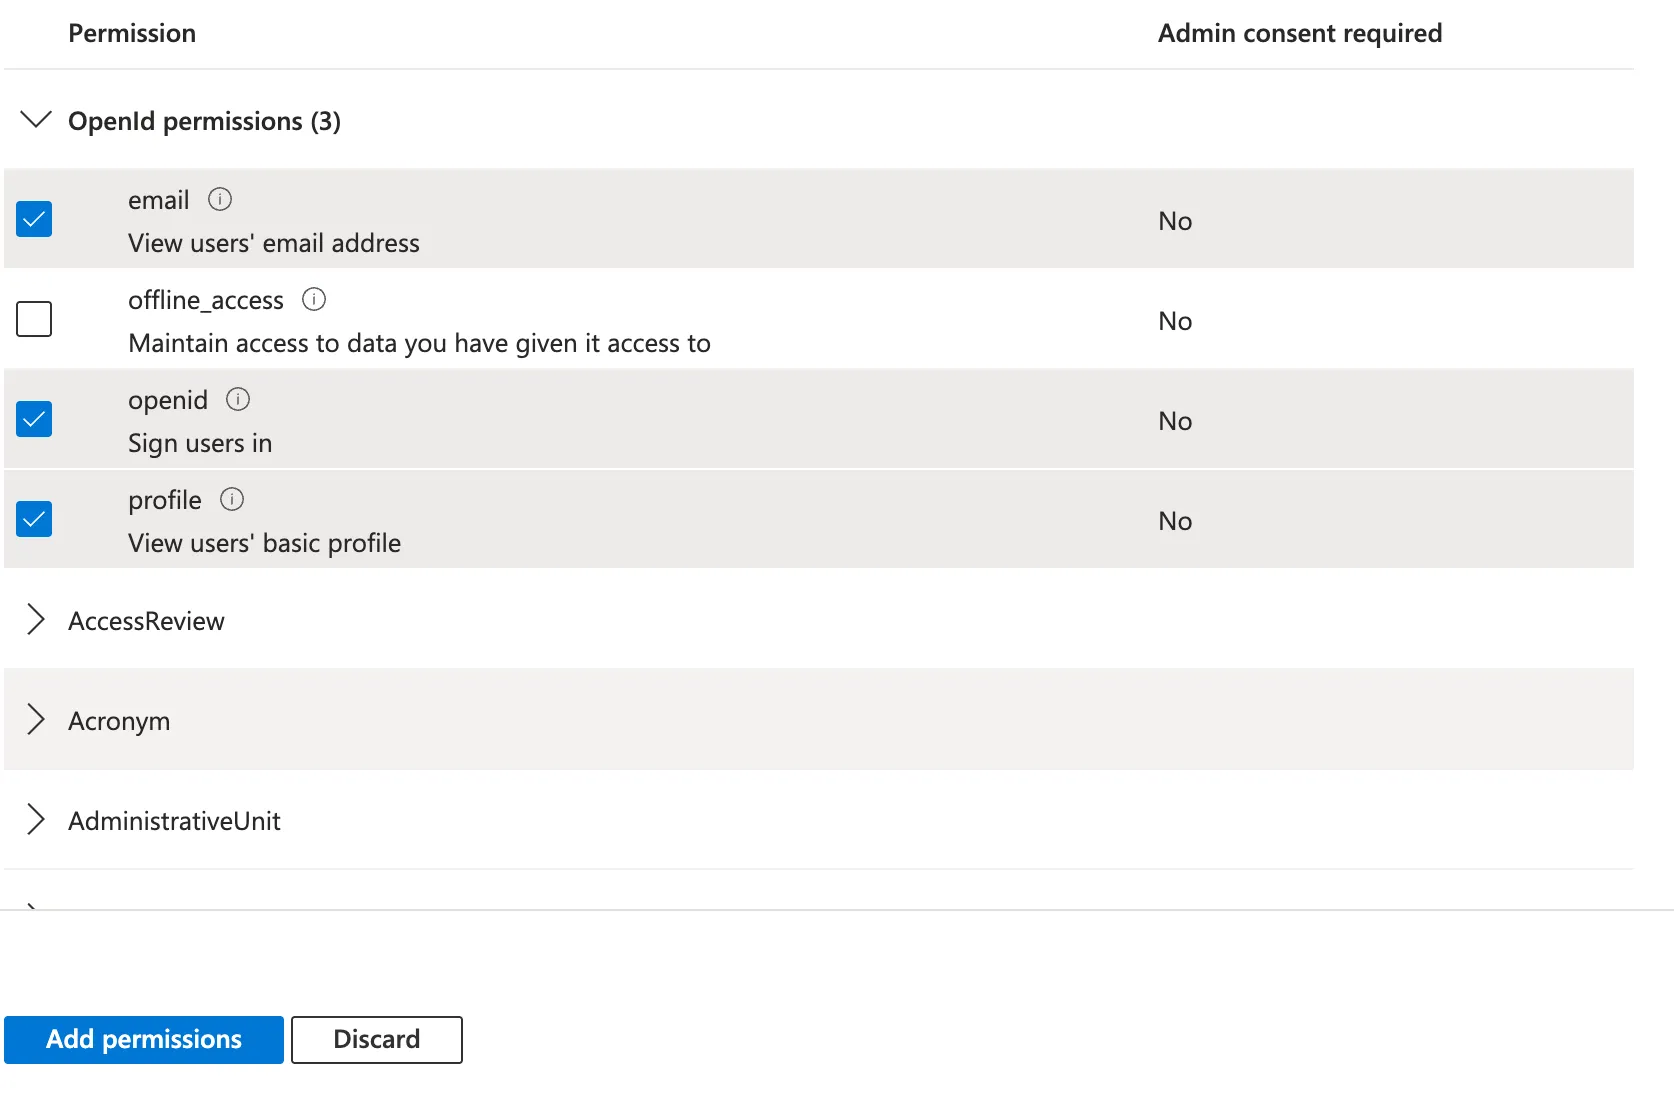
Click Add permissions to confirm.
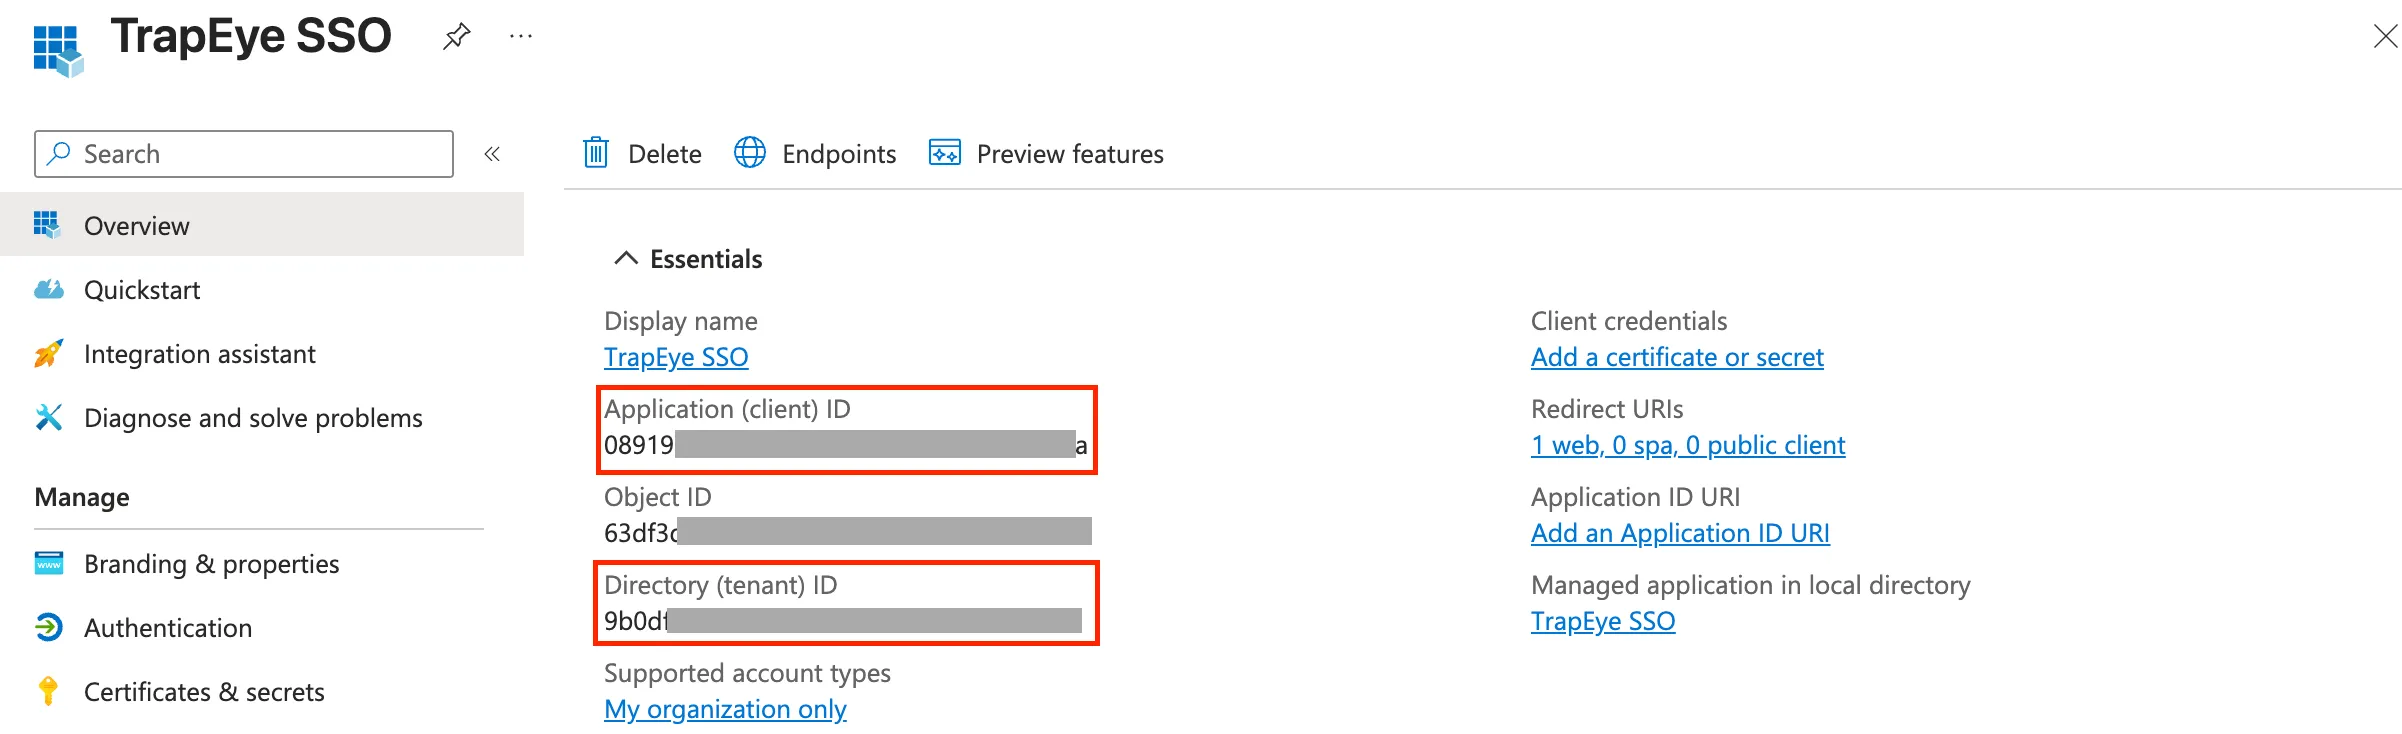
Retrieve Tenant Identifiers
Section titled “Retrieve Tenant Identifiers”Navigate to the Overview section of your application.
Copy the following identifiers, they will be required during TrapEye configuration:
- Application (client) ID
- Directory (tenant) ID
Generate a Client Secret
Section titled “Generate a Client Secret”Go to Certificates & secrets → New client secret.
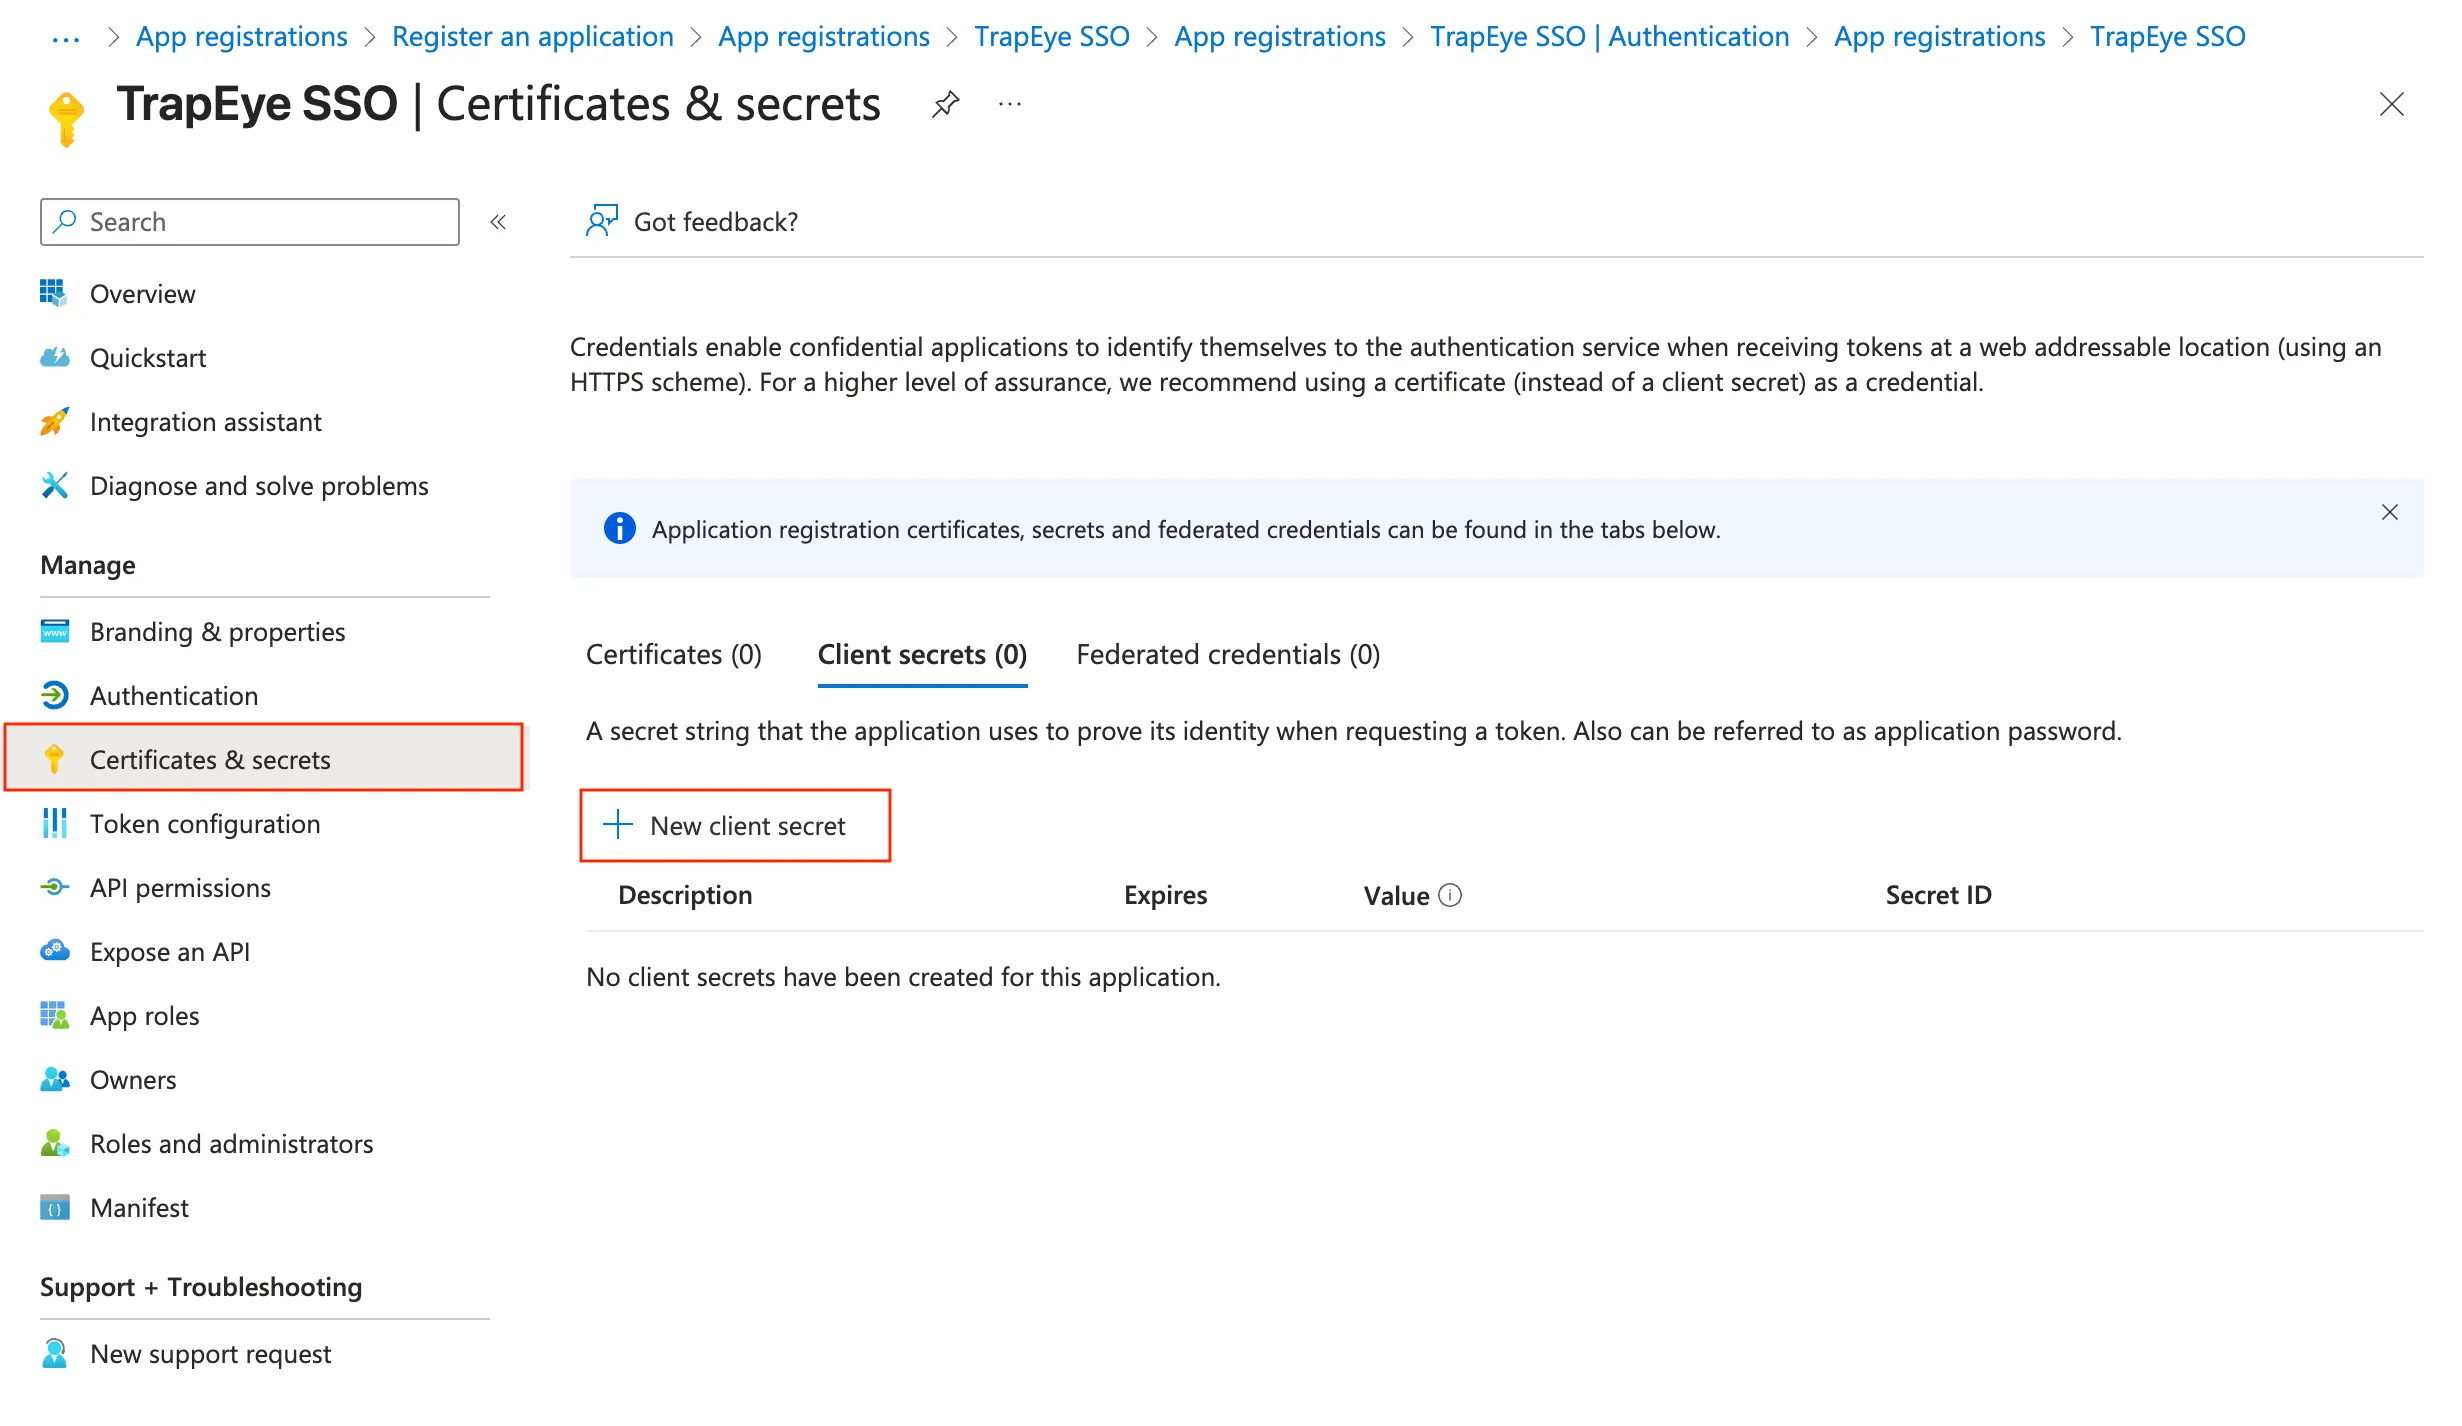
Enter a description (e.g.
TrapEye SSO Secret) and set an expiration (recommended: 24 months).Click Add.
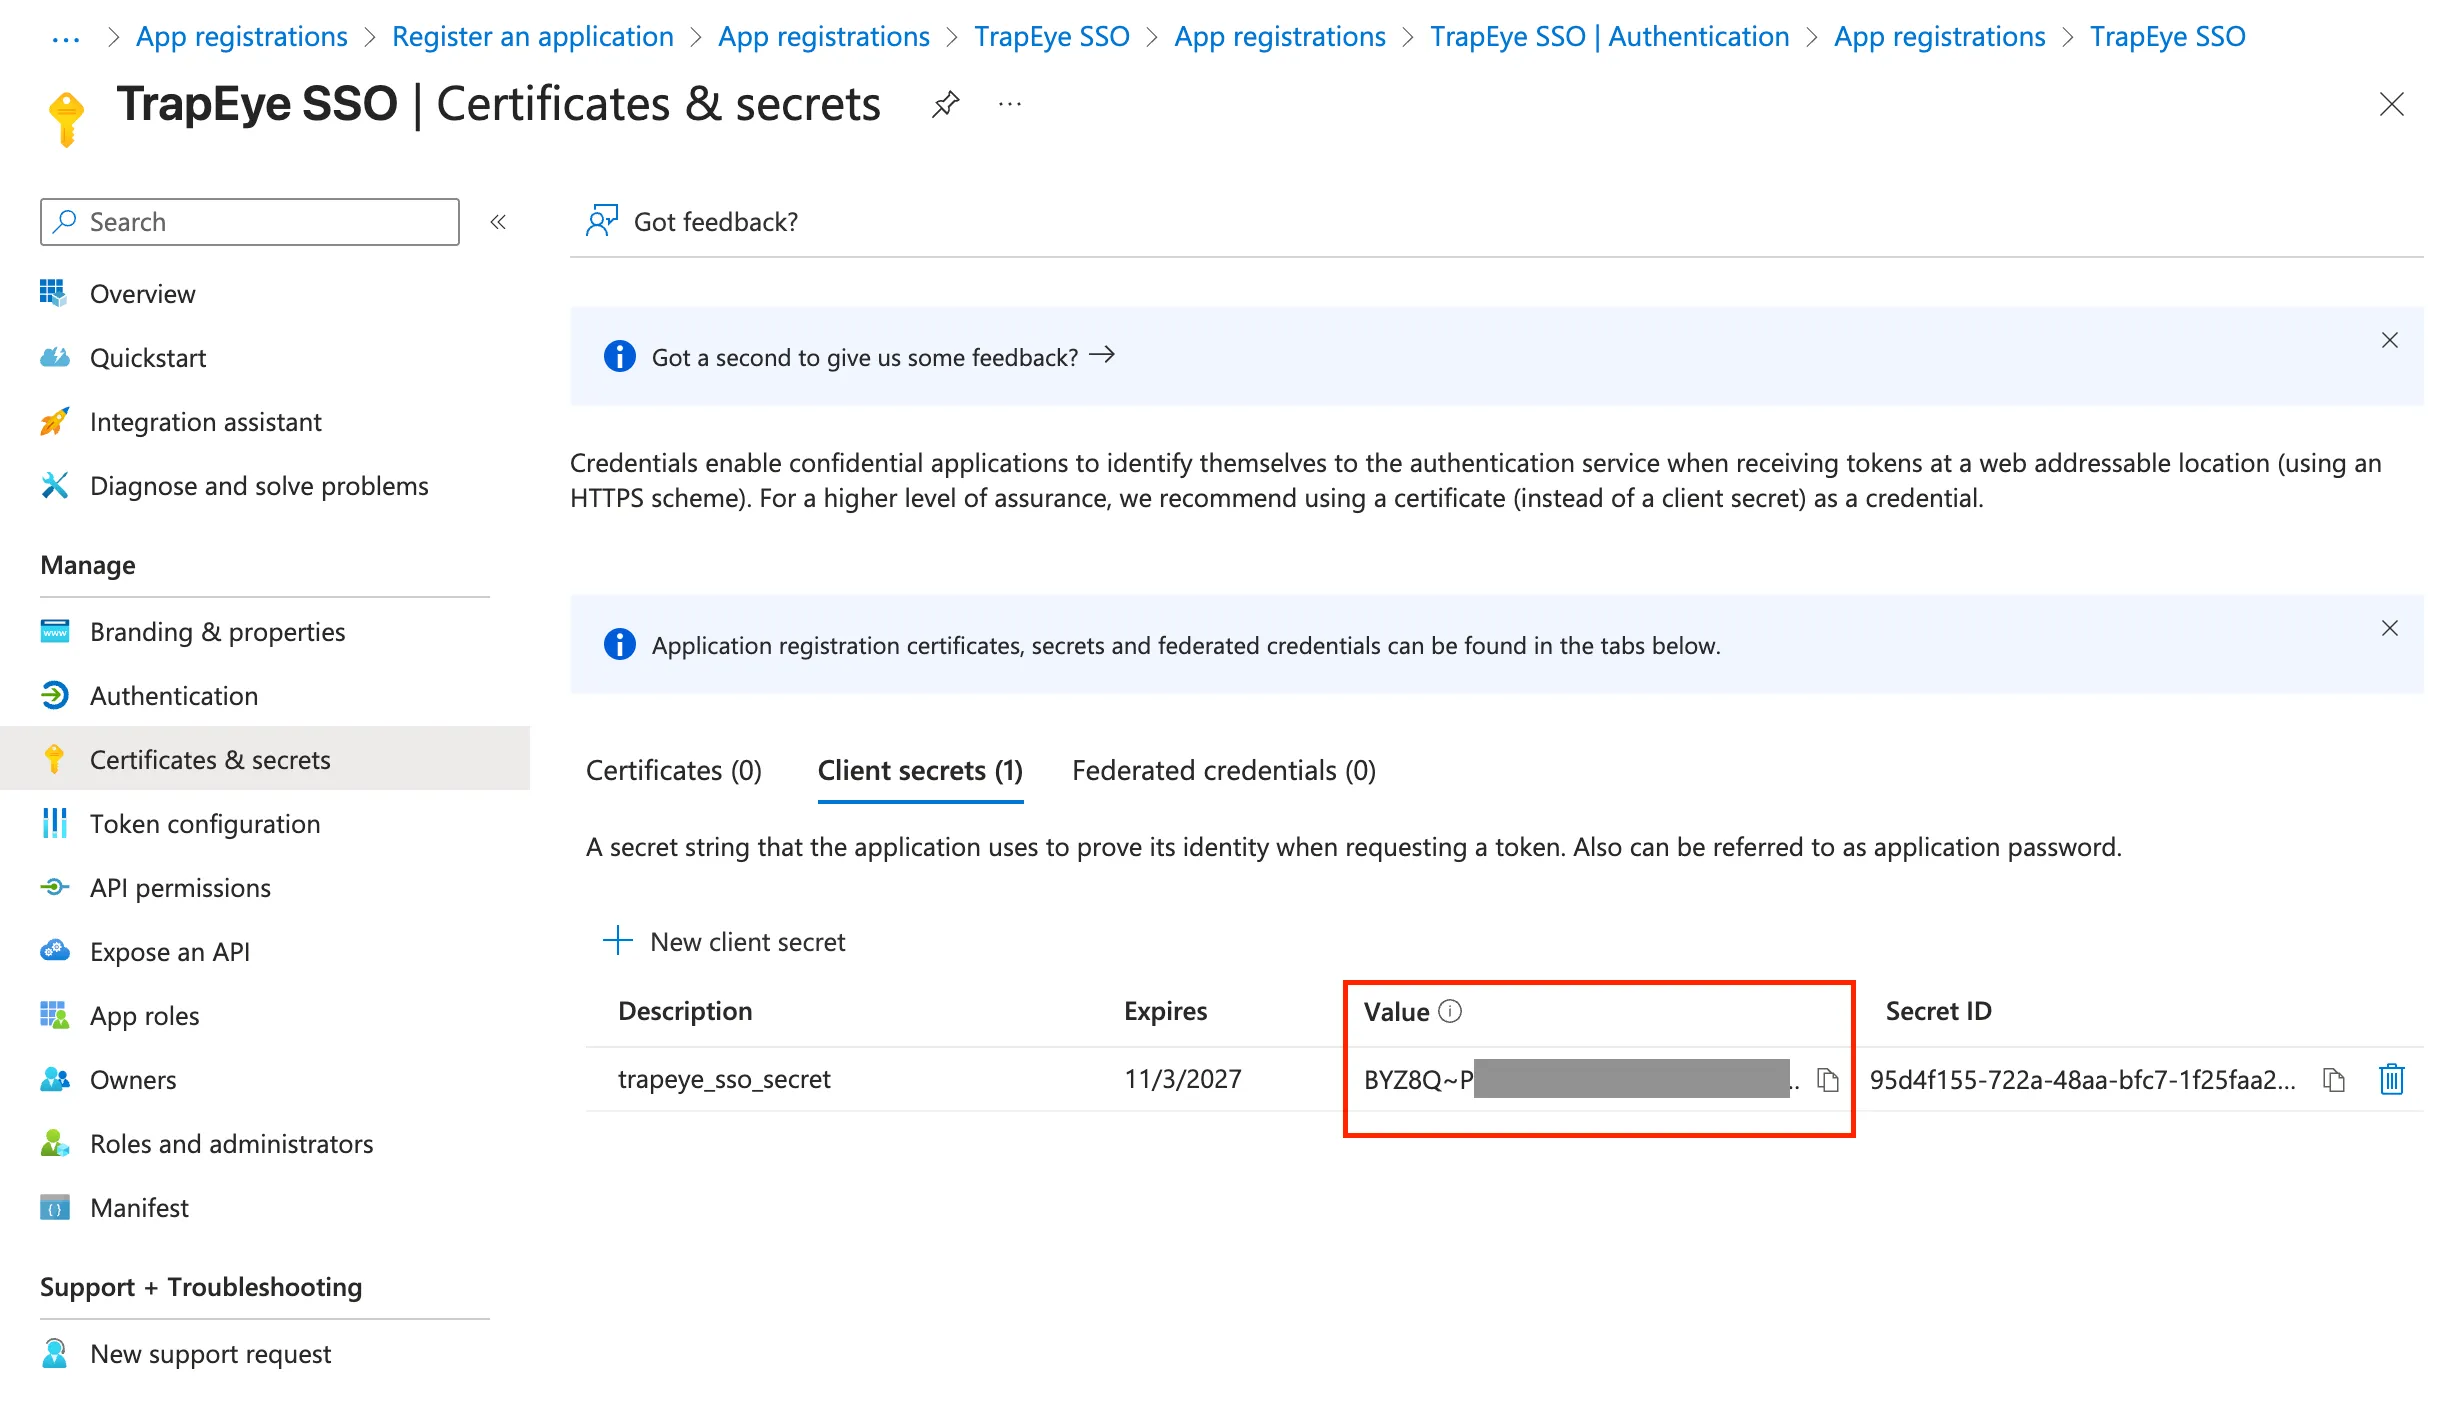
Copy the generated Value (this is your client secret).
Configure SSO in TrapEye
Section titled “Configure SSO in TrapEye”Once your Azure app is ready, log in to the TrapEye Portal
Navigate to Settings → Configuration and select the SSO Configuration menu.
Fill in the following fields:
Field Value Issuer URL https://login.microsoftonline.com/<Directory (Tenant) ID>/v2.0Client ID Application (client) ID Client Secret The secret value you generated SSO Domain. The domain that determines which OIDC issuer should be used during login. Click Save, then Test Connection to validate your setup.
By default, all users in your Entra ID tenant can log in to TrapEye without any restriction.
Optional: Restrict access to specific group
Section titled “Optional: Restrict access to specific group”To restrict access to specific groups only, it is possible to configure the Allowed Groups fields.
Navigate to Token Configuration → Add groups claim
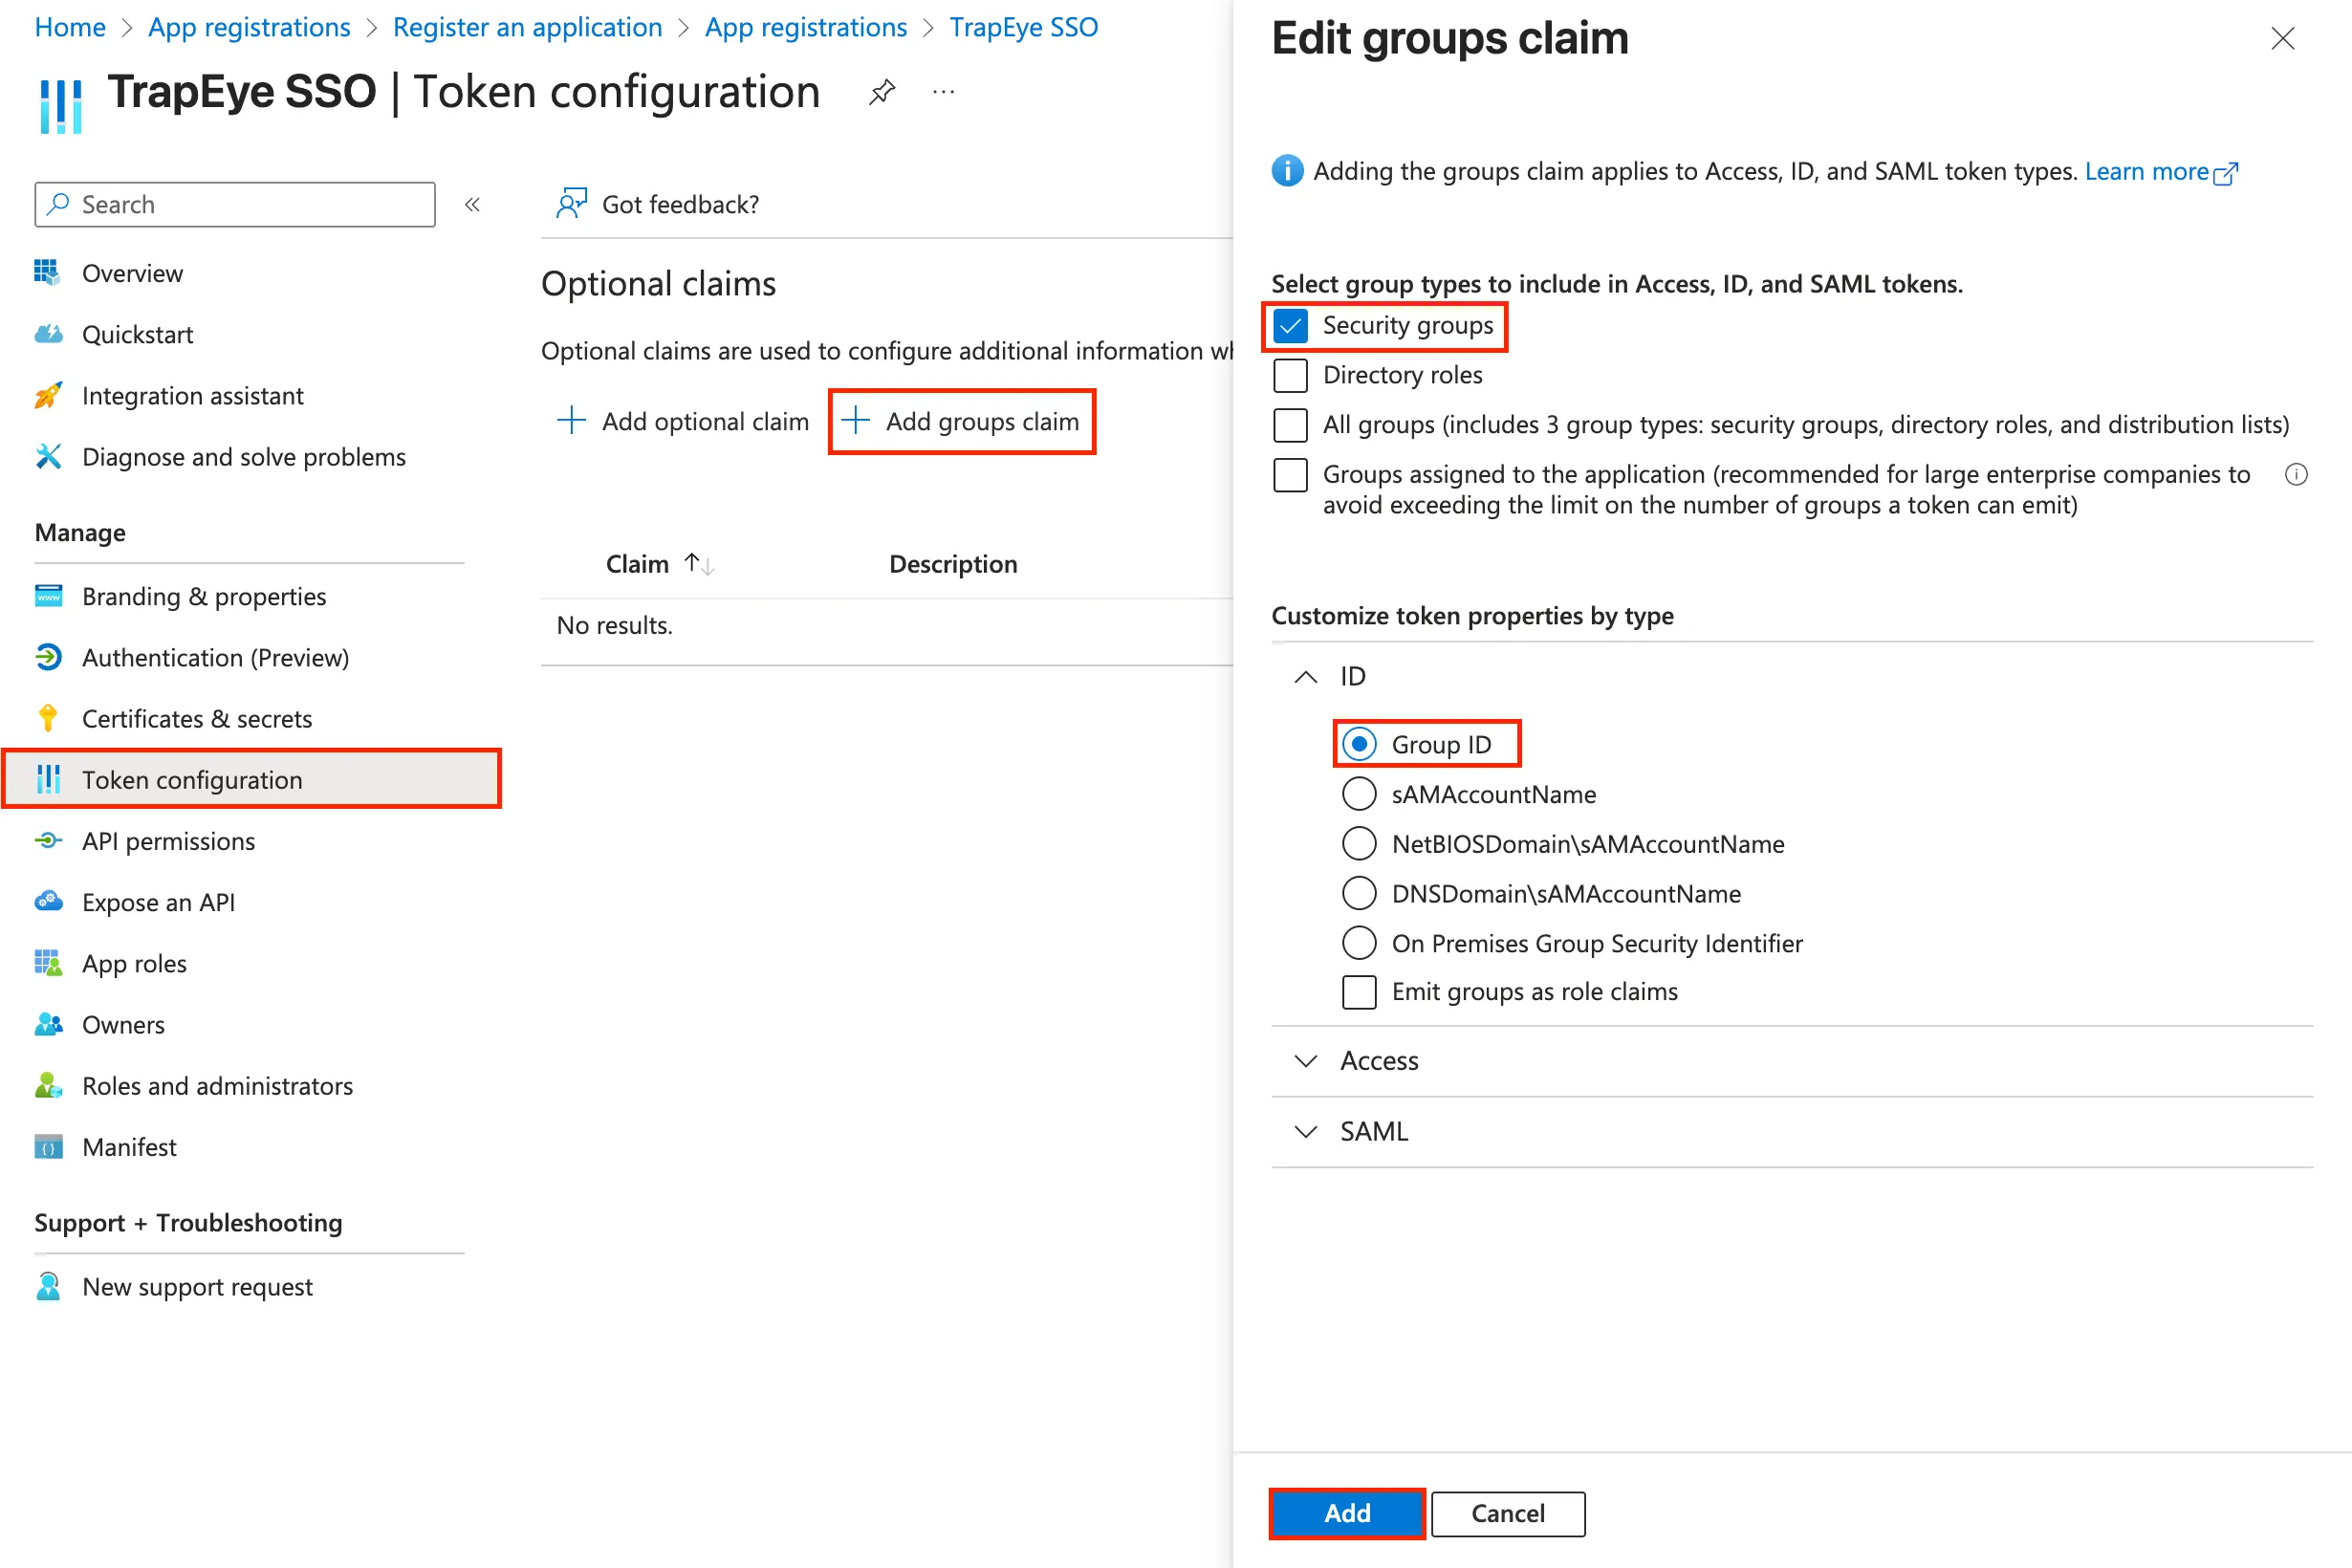
- Select Security Groups to include group information in the OpenID ID token.
- In Customize token properties by type → ID, verify that
Group IDis selected. - Click Add to save.
Go to Groups → All groups:
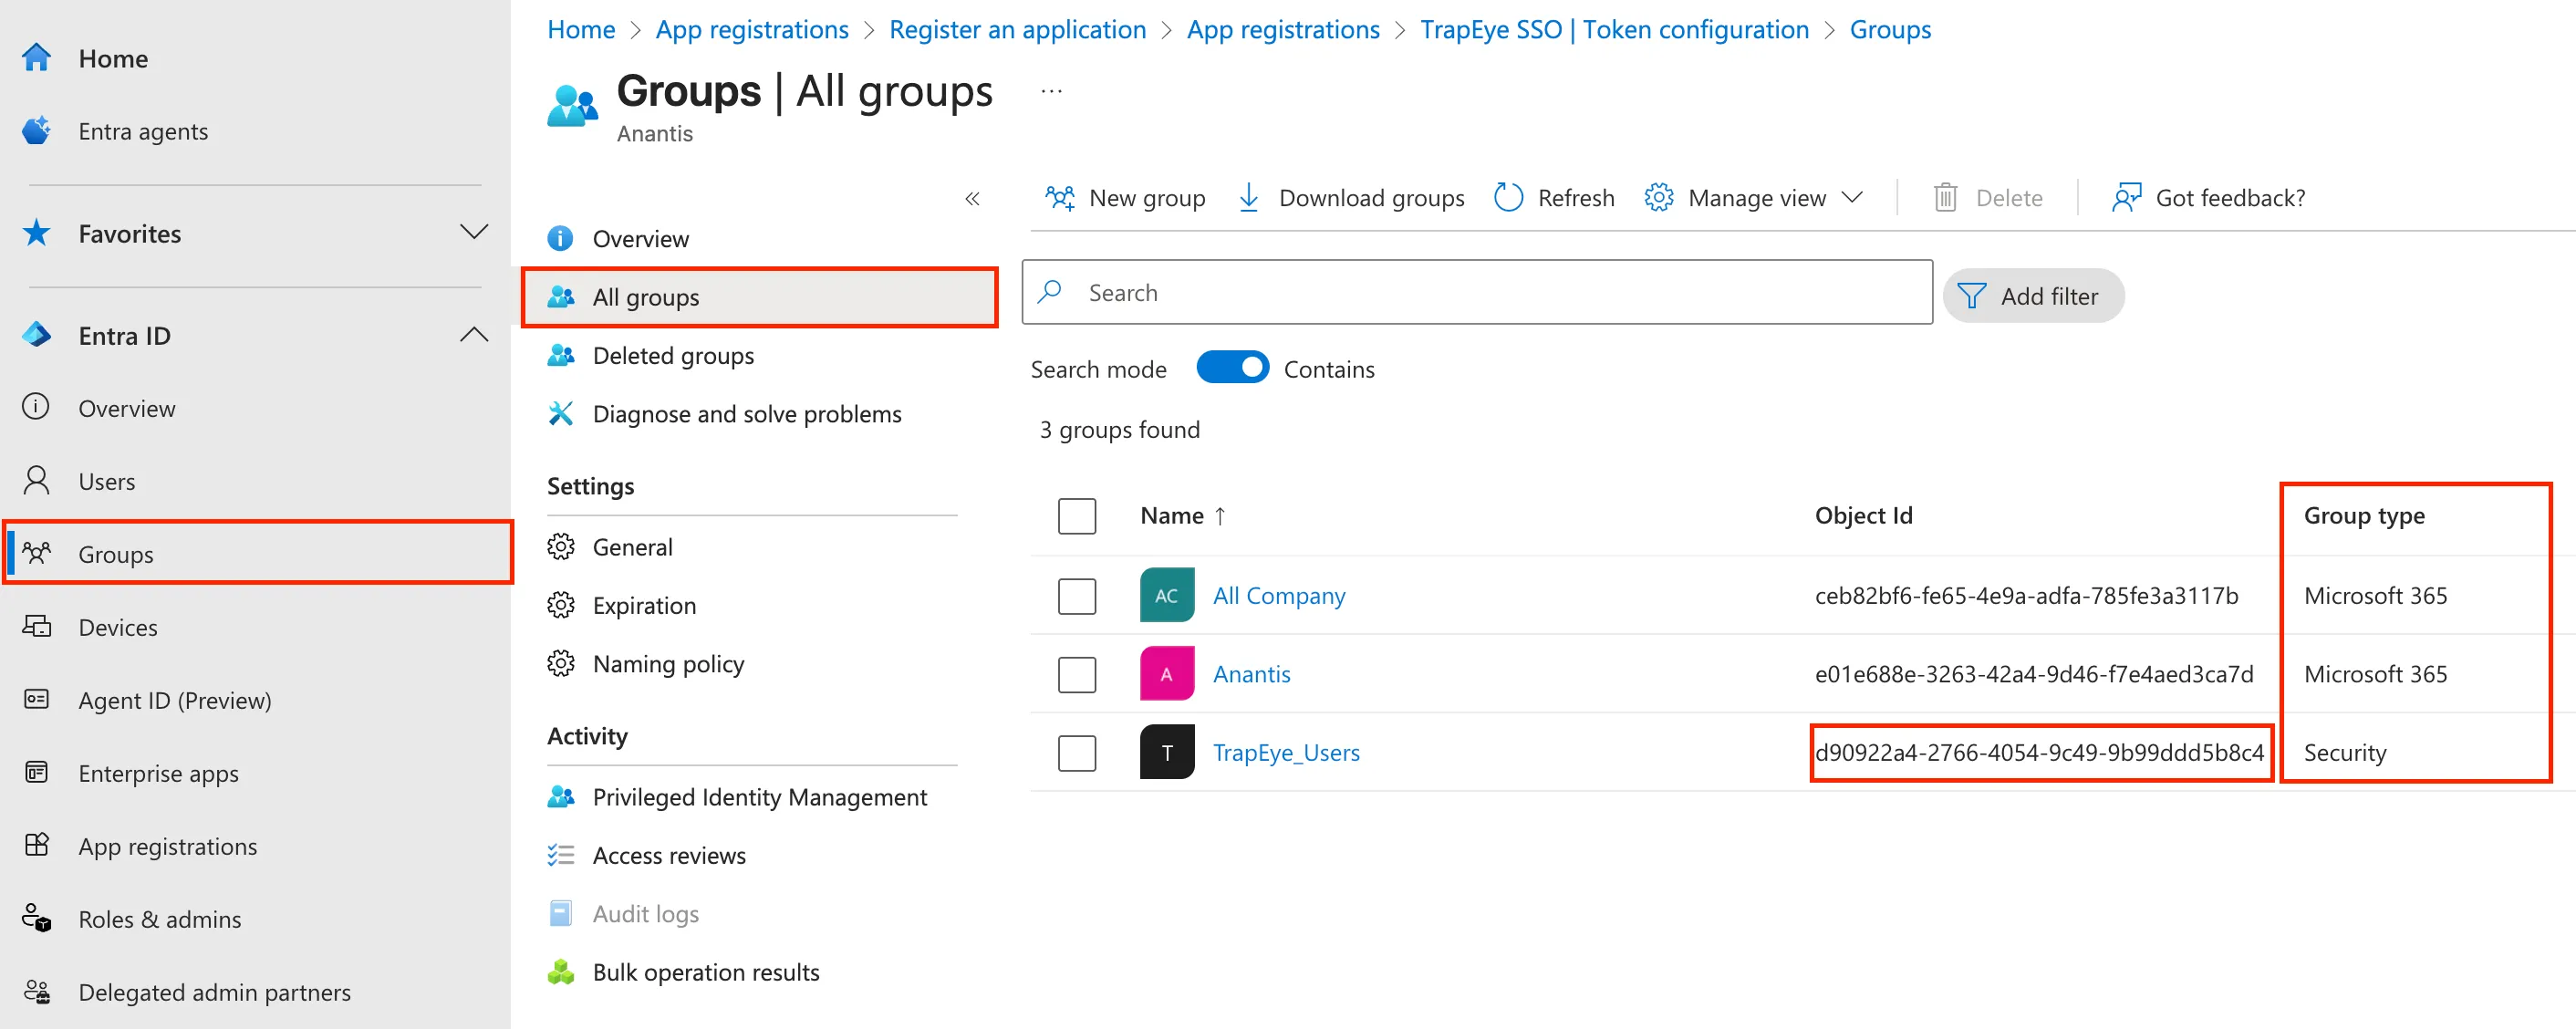
- Select the group(s) whose members should be allowed to authenticate in TrapEye.
- Ensure that the Group type is
Security. - Copy the Object ID of the desired group(s).
Go back to the TrapEye Portal in Settings → Configuration → SSO.
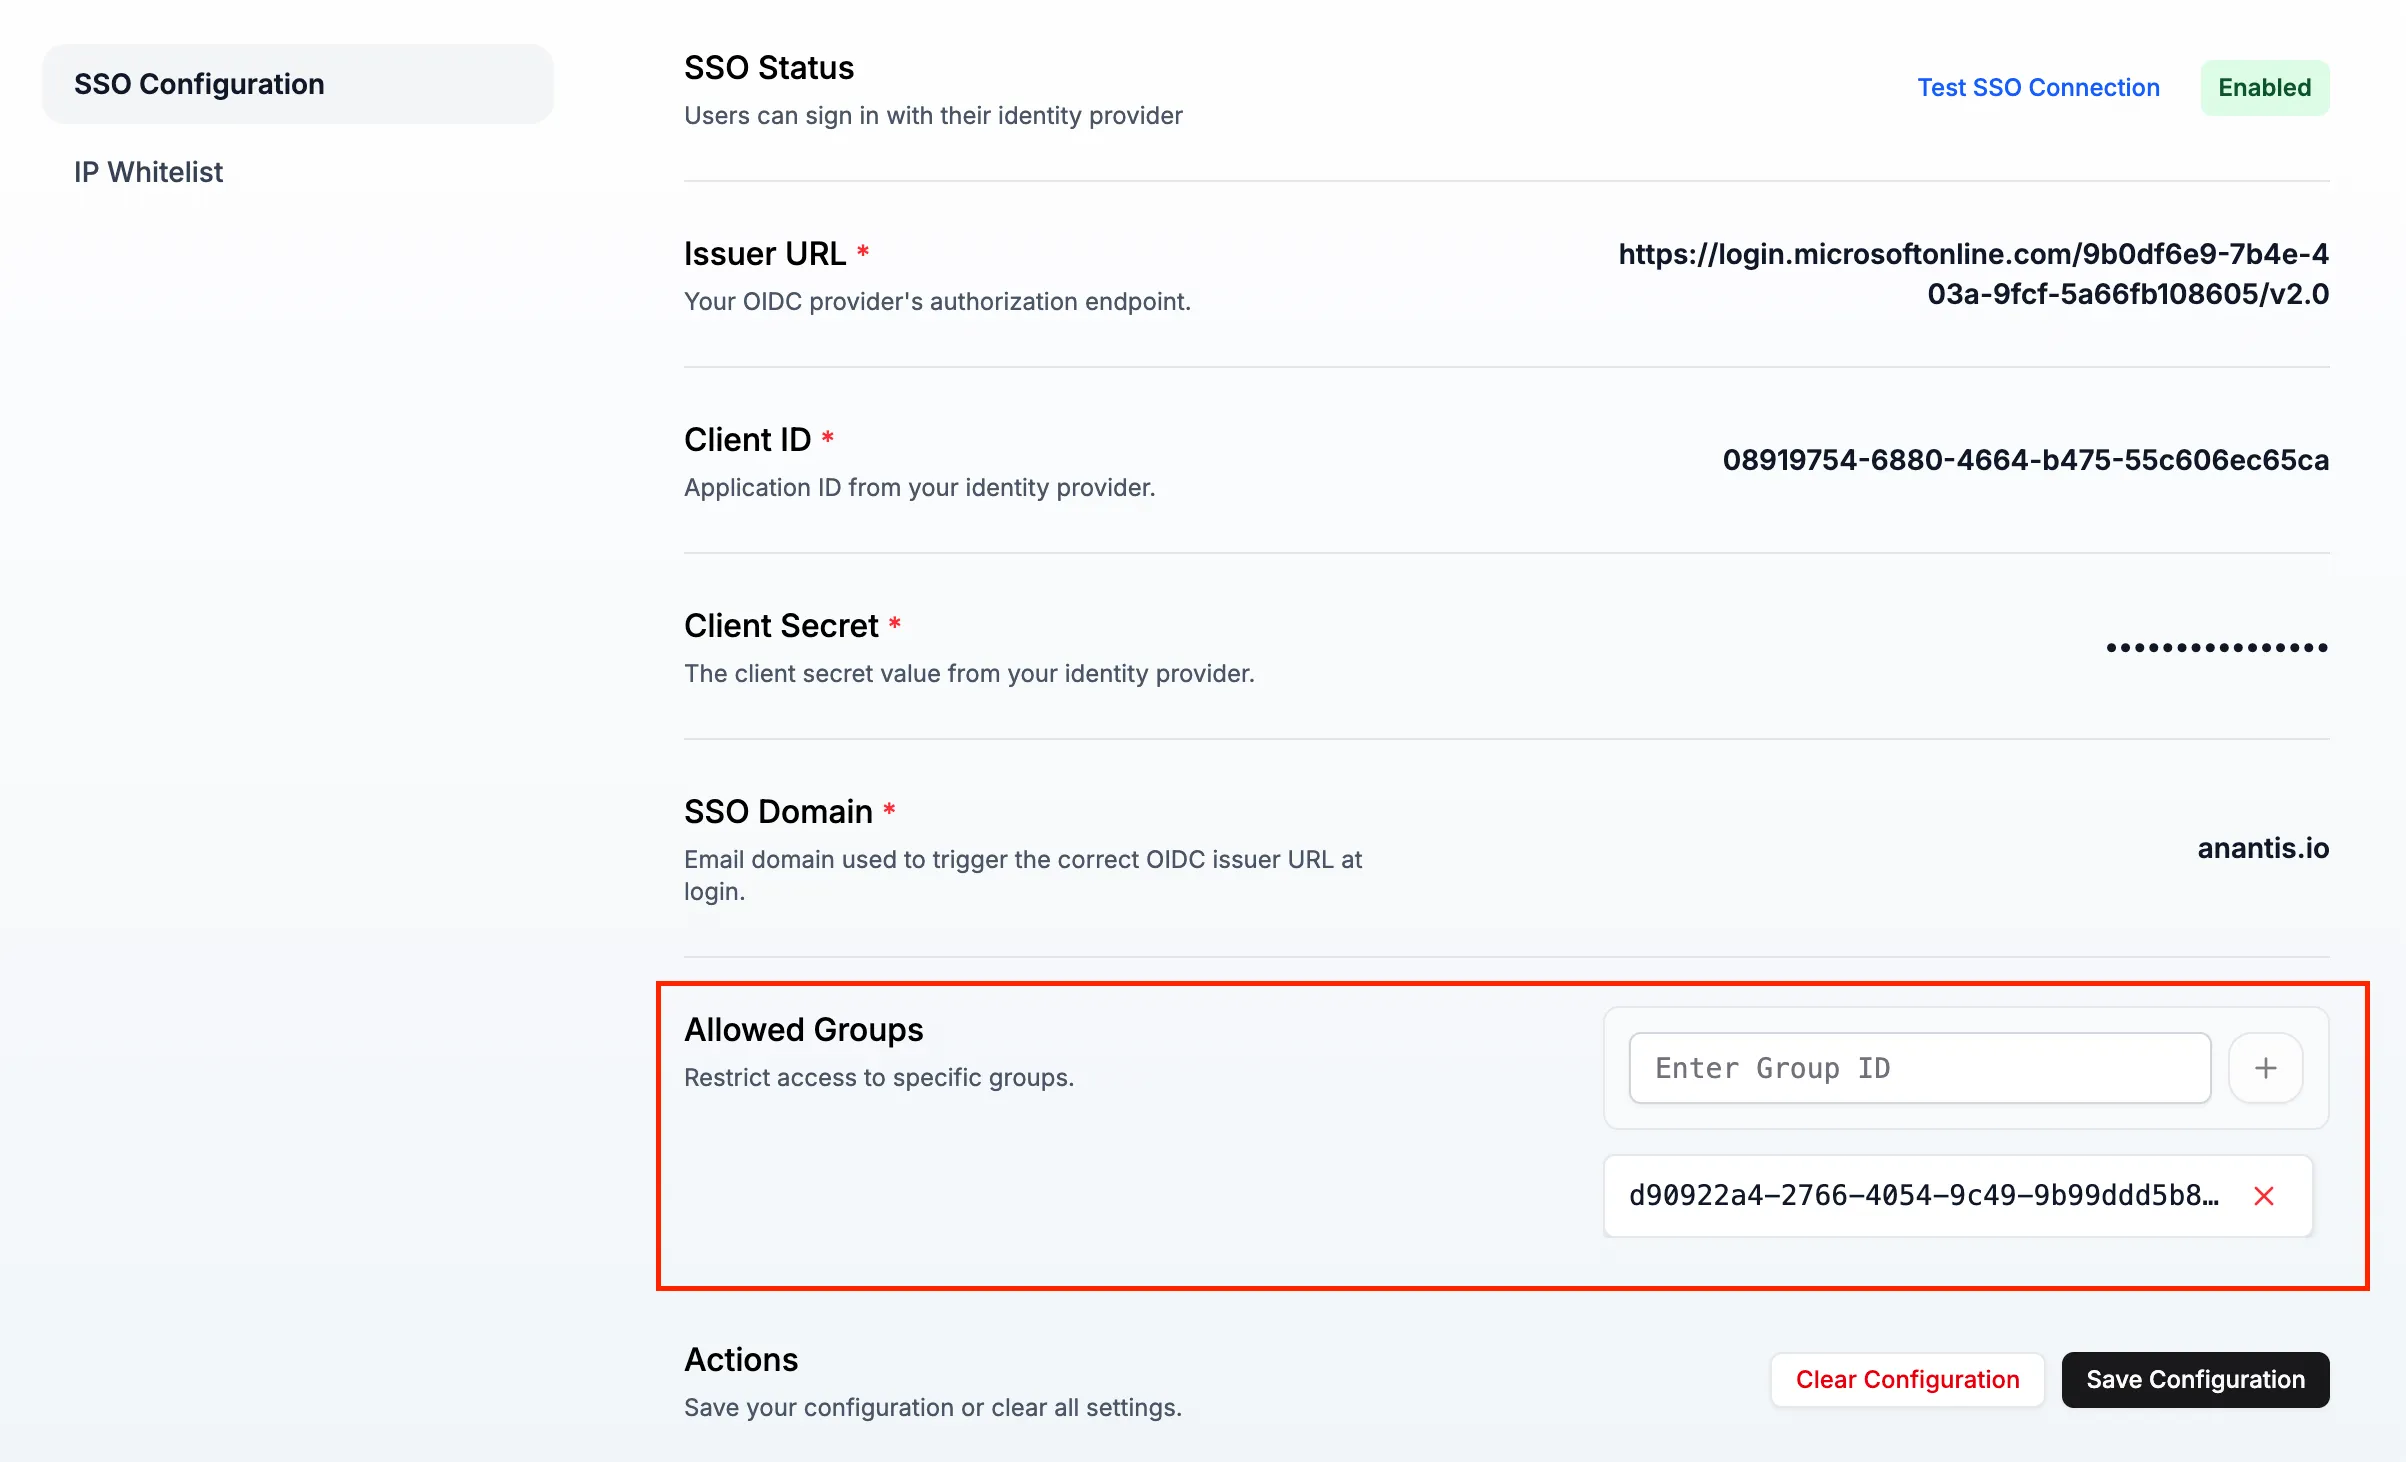
- Paste the Object ID of the desired group(s).
- Save Configuration.
Setup Complete
Section titled “Setup Complete”TrapEye is now integrated with Microsoft Entra ID for secure, seamless Single Sign-On.